

We Love Our Quilting Community
At High Country Quilts we care deeply about community. With our experiences in retail, we know that a store is not only a place to shop but also a place for the community to gather and share. During this busy...


If you're wondering what the easiest quilt to make is, I'll tell you from experience: it's a simple patchwork quilt made from precut fabric squares. You'll often see these squares sold in bundles called 'charm packs,' and they are a new quilter's best friend. This project skips the tricky cutting and lets you focus on the most important skill: sewing a straight seam. It’s the perfect way to build confidence and create something beautiful right from the start.
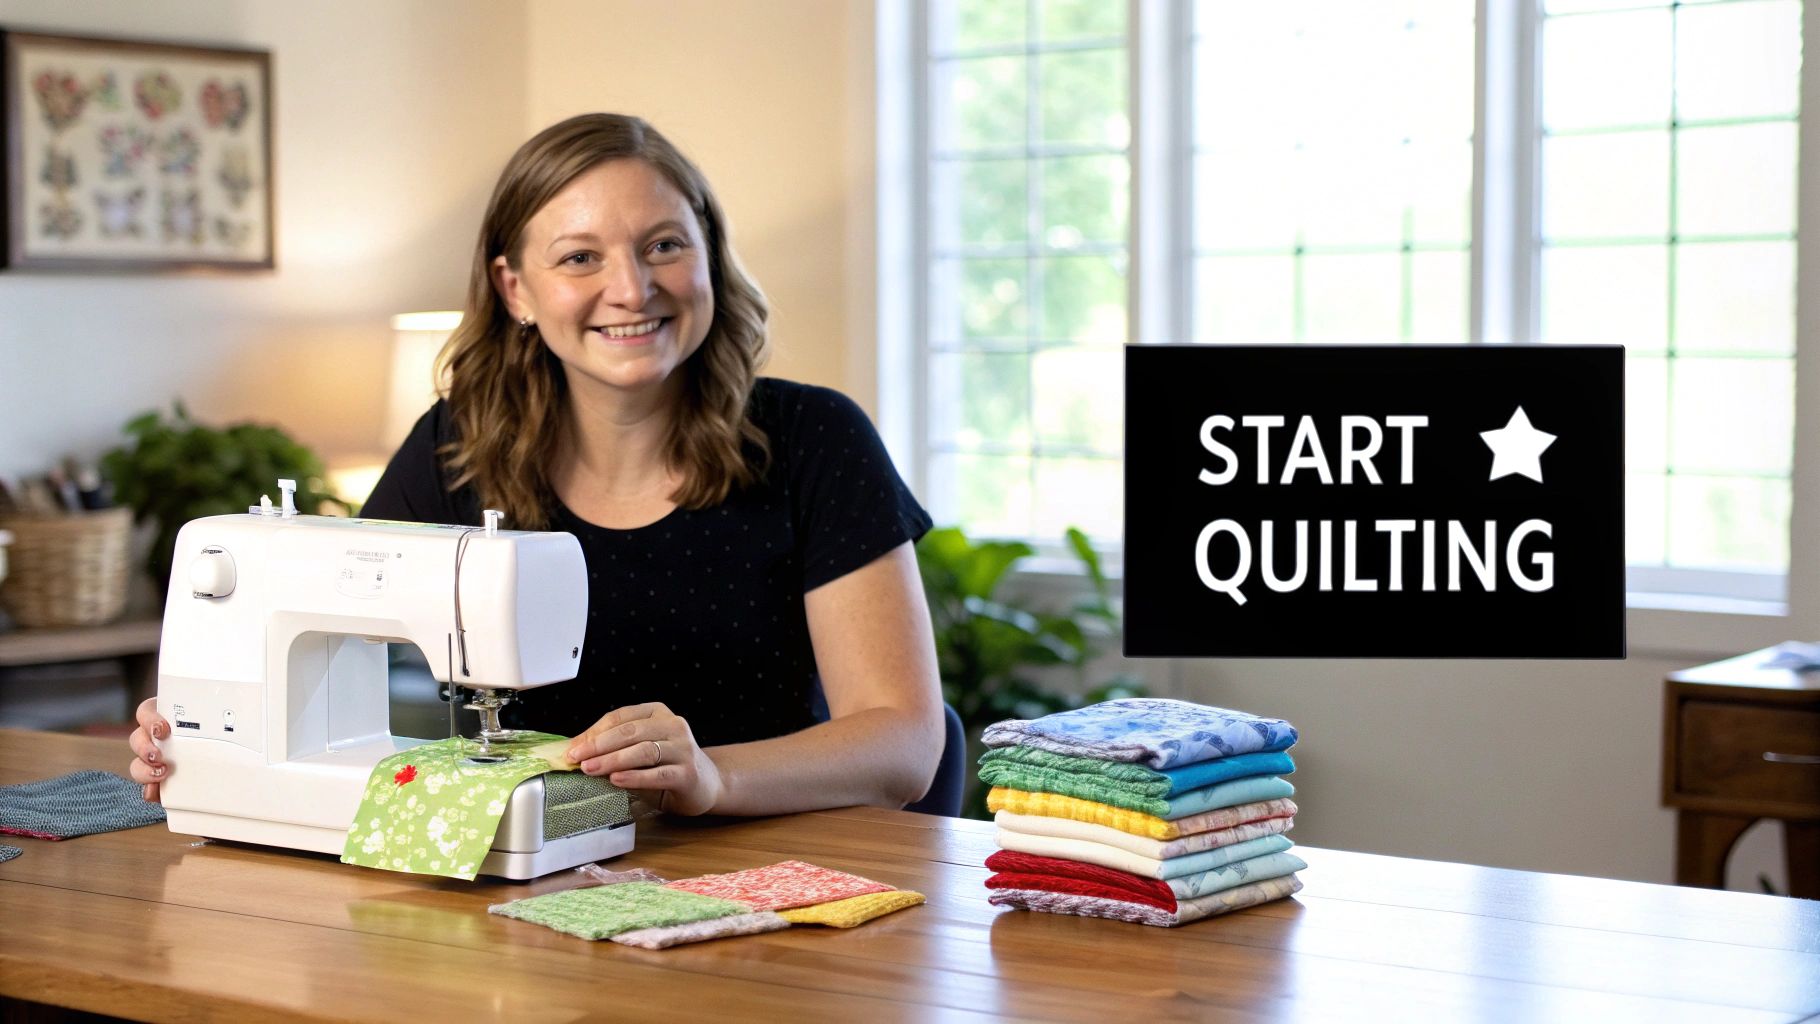
Let's be real—starting any new craft can feel a bit intimidating. You're probably worried about crooked seams, picking the wrong fabric, or buying a bunch of tools you'll never touch again. What if I told you your very first project could be simple, fun, and result in a quilt you'll actually love? It absolutely can.
This guide is here to demystify the process by zeroing in on the easiest quilt you can possibly make. This isn't about perfection; it's about the pure joy of making something cozy and personal with your own two hands. I'll be your guide every step of the way, helping you turn that stack of fabric into your first finished quilt.
The magic of starting with precut squares (like a Charm Pack, which is full of 5-inch squares) is that the most tedious and nerve-wracking step is already done for you. You don't have to worry about rotary cutters, rulers, or getting every single piece perfectly accurate. You get to jump right into the fun part: arranging your colors and starting to sew.
This approach lets you focus on the absolute fundamentals:
Honestly, the biggest hurdle for most new quilters is just getting started. A simple patchwork square quilt removes that initial barrier, making the entire process feel more approachable and rewarding from the get-go.
While I truly believe a simple patchwork quilt is the best place to start, there are a couple of other fantastic patterns to try for your second or third project. They build on the same core skills but introduce a new twist, like working with long strips instead of squares.
The quilting world has exploded in recent years, with beginners now making up 45-50% of the market. This has completely changed the game, as roughly 60% of new quilters want designs that skip fussy techniques like matching perfect points. In response, shops now dedicate 35-40% of their fabric inventory to precut fabrics. It's a great time to be a beginner! You can read more about how beginner preferences are shaping the quilting world and find even more inspiration.
To help you see the options, I've put together a quick comparison of the top three patterns I always recommend for new quilters.
Here’s a quick look at the most popular beginner patterns to help you decide where you want to start. Each one is a fantastic entry point into the craft.
| Quilt Pattern | Why It's Easy | Skills You'll Learn |
|---|---|---|
| Patchwork Squares | Uses precut squares, so there's no complex cutting. The simple grid layout is very forgiving. | Quarter-inch seams, pressing, and joining rows. |
| Rail Fence | Made entirely from fabric strips of the same width, which you sew together into simple blocks. | Strip piecing, chain piecing, and consistent seams. |
| Simple Strips (Jelly Roll) | Uses precut 2.5-inch strips sewn together side-by-side. It’s one of the fastest quilts you can make. | Sewing long, straight seams and managing fabric strips. |
No matter which one you choose, the key is to have fun with it. Each of these patterns will teach you the foundational skills you'll use in every quilt you make from here on out.
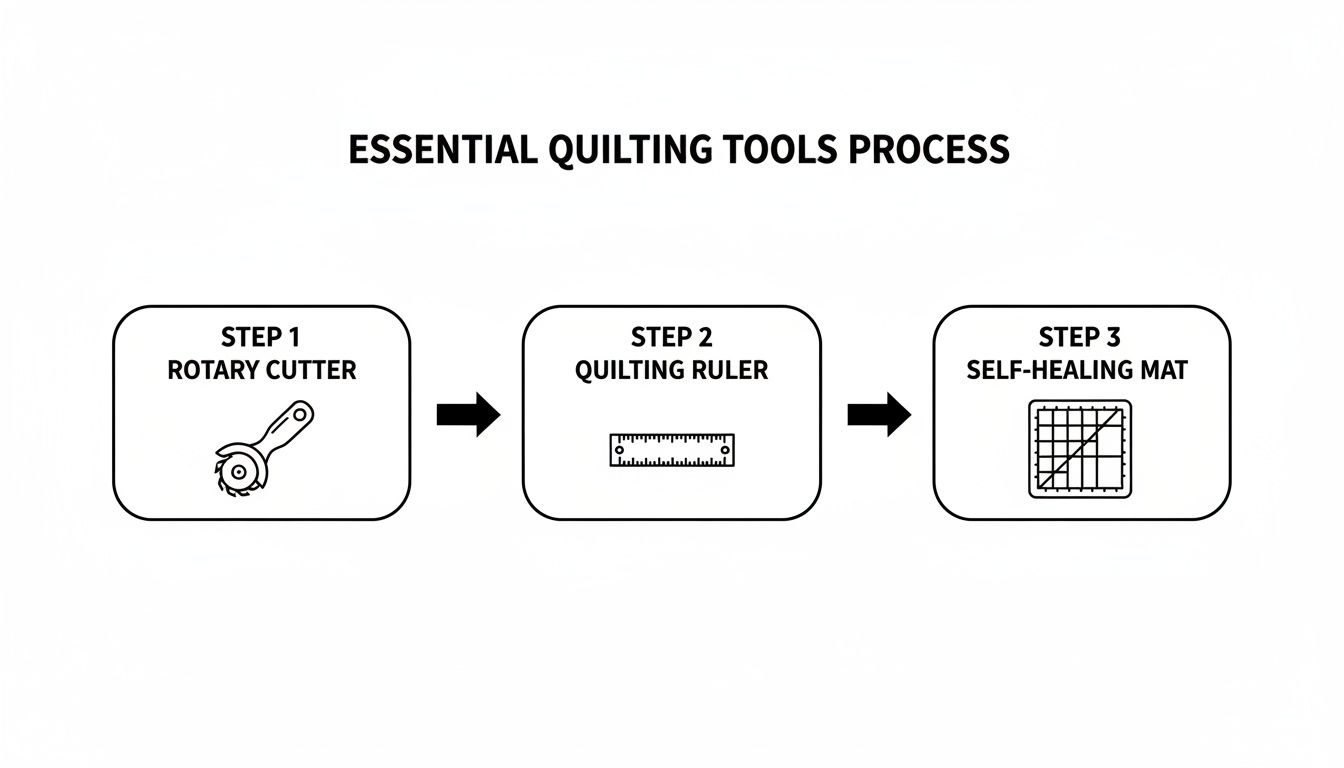
Walking into a fabric store for the first time can be a lot to take in. There's an entire wall of rulers, a dozen different kinds of pins… where do you even begin? Let's tune out all that noise and get right to what you actually need for your first quilt.
Think of this as your starter kit. These are the core tools that will make quilting fun and accurate right from the get-go. Investing in good basics now will save you a ton of frustration later on.
In quilting, everything starts with a good, clean cut. These three tools are a team—you really can't have one without the others. They're the secret sauce behind making that first quilt a total success.
A little advice from my own experience: Don't go for the cheapest option on these three items. A dull blade, a mat that gets chewed up, or a warped ruler will make the prep work an absolute chore. Good tools here make everything else that follows so much smoother.
Once your fabric is all cut and ready, it's time to head to the sewing machine. You don't need a lot of fancy gear, just a few key things to get your pieces joined together perfectly.
The Right Machine and Needles Honestly, any sewing machine that can sew a decent straight stitch will get the job done. You absolutely don't need one with a million decorative stitch options. We’ve always found BERNINA machines to be incredibly reliable, but what's most important is that you're comfortable with the machine you're using.
Make sure you have the right needle for the job. A universal needle in size 80/12 is your best bet for piecing standard quilting cottons. A good rule of thumb is to swap it out for a fresh one after about 8-10 hours of sewing. This little habit prevents all sorts of headaches like skipped stitches and snagged fabric.
Why Thread Quality Is a Big Deal Grab a spool of good quality, 100% cotton thread in a neutral color like gray, cream, or off-white. It might be tempting to use cheap polyester thread, but it's often too strong for cotton fabric and can actually cut or tear your seams over time as the quilt ages and is washed. For piecing, 50-weight cotton thread is the gold standard.
A Few Other Must-Haves You could technically get by without these, but they make life so much easier:
And that's it! This is the core of your quilting toolkit. With these items, you'll have everything you need to tackle that first project with confidence. You can always add fun gadgets like wonder clips or specialty rulers down the road as you get more quilts under your belt.
Alright, this is where the magic really starts to happen. You’ve got your tools and your beautiful fabric, and now it's time to turn that pile of squares into a quilt top. Don't worry about complicated patterns or confusing instructions—we're going to walk through this together, step by step.
We'll start by laying out your design, then I'll introduce you to a time-saving trick called chain piecing. You'll learn the secret to getting perfectly flat blocks (it’s all about the pressing!), and then we'll stitch it all together. It’ll feel like you have a seasoned quilter sitting right next to you, sharing all the best shortcuts.
Before you even think about touching your sewing machine, lay out your fabric squares. This is your first creative step. Spread them out on a big table or a clean patch of floor so you can see what you're working with.
If you’re using a standard Charm Pack for a small lap quilt, a 6x7 grid (that’s six squares across and seven down) is a great starting point. Shuffle the squares around until the colors and patterns feel just right. Once you have an arrangement you love, pull out your phone and snap a picture. Trust me, this little photo will be your best friend, saving you from any mix-ups later.
In the world of quilting, one thing reigns supreme: the quarter-inch seam. This isn't just a suggestion; it's the golden rule that ensures all your pieces fit together like a perfect puzzle. If your seams are even a little too wide or too narrow, it can throw off the entire quilt's dimensions.
Most modern sewing machines come with a special quarter-inch presser foot, which usually has a little metal guide on the side. This foot is your secret weapon. All you have to do is keep the edge of your fabric running alongside that guide, and you'll nail a perfect seam every single time.
No quarter-inch foot? No problem. You can easily make your own guide. Just stick a few layers of painter's tape or a stack of sticky notes on your machine's throat plate, exactly a quarter-inch away from the needle.
These are the tools that make precision possible. The workflow is always the same: cut accurately first, then sew.
Ready for a technique that will change how you quilt forever? It’s called chain piecing. Instead of sewing two squares, cutting the thread, sewing the next two, and so on, you just feed them through your machine one after another without stopping.
Here’s how you’d do it for your first row:
You'll create a long string of paired squares that looks like a little fabric banner. This method is a game-changer. It saves a ton of thread and can seriously speed up your sewing time, sometimes by up to 30%. Once you’ve chained all your pairs, just snip the threads between them. It’s a fantastic habit to get into from day one.
First things first: pressing is not ironing. Ironing involves sliding the iron back and forth, which can easily stretch your carefully cut fabric out of shape. For quilting, you want to press—just lift the iron and set it straight down onto the seam.
The real secret to getting your blocks to line up perfectly is pressing your seams in opposite directions for each row.
Keep up this alternating pattern for all your rows. When you go to sew Row 1 and Row 2 together, the seams will "nest" or lock into each other. This simple trick is what creates those sharp, professional-looking corners where your squares meet.
Now that your pairs are sewn and pressed, it's time to build out your rows. Take the first two pairs from Row 1 and place them right sides together. You’ll feel those seams you just pressed nestle right into each other. Stick a pin right at that intersection to make sure they don't budge while you sew.
Sew the pairs together, and just like that, you have a little four-patch block. Keep adding pairs until the row is complete, using that photo on your phone to keep everything in the right order.
After each row is finished, give it one last good press. The long seam connecting the pairs can be pressed open or to one side—since you alternated the smaller seams, you won't have too much bulk either way.
You're in the home stretch! The last step is sewing the finished rows to each other. This is where all that careful pressing and precise sewing really pays off.
Lay Row 1 on top of Row 2 with the right sides facing each other. Because you alternated your pressing directions, the seams at each corner should lock together beautifully. Be generous with your pins here, placing one at every seam intersection to prevent any shifting. Fabric has a mind of its own on long seams, and pins keep it in line.
Sew the rows together with your trusty quarter-inch seam. Open them up and press the long seam that connects them. Many quilters like to press these long seams open to help distribute the bulk, which makes the quilt top lie nice and flat.
Continue adding rows one at a time. Sew Row 3 to the bottom of the piece you just made, press, and repeat until your masterpiece is complete. Go slow and steady here—rushing is the enemy of straight rows!
A few small tweaks on your sewing machine can make a huge difference in the final result. These are the little things that seasoned quilters do to get a professional finish.
If you’re in the Colorado Springs area and want some in-person guidance, swinging by a local shop like High Country Quilts is a great idea. Seeing different machine setups and getting real-time advice can be incredibly helpful. We often host beginner workshops that cover these very skills in a fun, supportive setting—a perfect way to get started on the right foot.
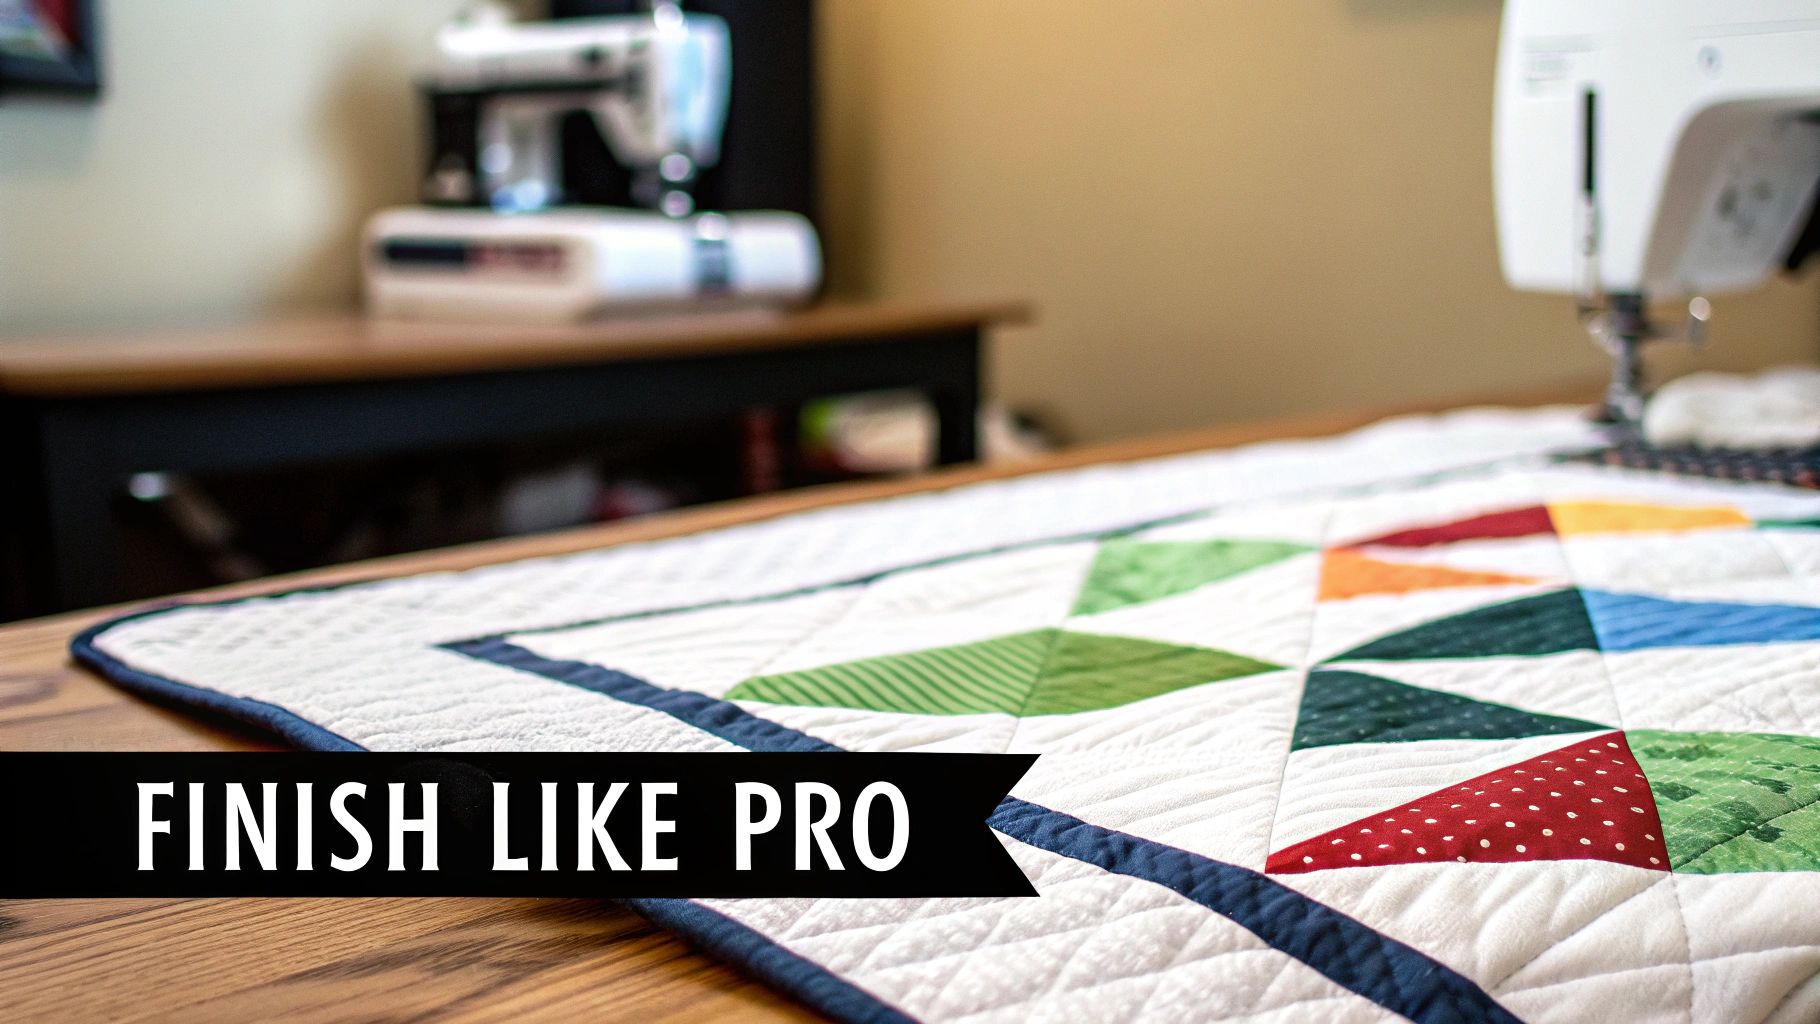
You’ve pieced your quilt top, and it’s lying there looking amazing. Now for the magic. This is the moment a flat piece of fabric becomes a real, three-dimensional quilt. A great finish is what turns a project into an heirloom, and we're going to walk through the final two steps that make it happen: quilting and binding.
Don't let these final stages feel daunting. We're going to stick to the most straightforward techniques you can easily do on your home sewing machine. By the end, you'll have a beautifully finished quilt to be proud of.
Before you can add those lovely stitches, you need to assemble your "quilt sandwich." It’s just what it sounds like—the three layers that make up a quilt. You have your quilt top, the fluffy batting in the middle, and the backing fabric.
With the layers in place, it’s time to baste them together. For your first quilt, safety pins are your best friend. Start pinning from the center out, placing a pin every 4–5 inches (about a hand's width apart) all over the quilt. Make sure each pin goes through all three layers to stop anything from shifting while you quilt.
For your first quilt, you can't go wrong with straight-line quilting. It’s clean, modern, and gives your quilt a beautiful texture without needing any complex free-motion skills. The absolute easiest and most effective way to do this is called "stitching in the ditch."
This technique is exactly what it sounds like: you stitch directly in the "ditch" created by the seam lines of your patchwork. It’s a brilliant way to secure your layers because the stitches practically disappear into the seams, giving you a very neat, professional look.
To get started, attach a walking foot to your sewing machine. If you don't have one, it's a worthwhile investment. This special foot has feed dogs built in, so it pulls all three layers of your quilt sandwich through the machine evenly, which is a lifesaver for preventing puckers and tucks.
Pro Tip: Always, always start quilting from the center of your quilt and work your way out. This helps push any excess fabric or fullness toward the edges, keeping your quilt top beautifully smooth and flat.
To manage the bulk, roll up the sides of your quilt so it fits more easily through the throat of your machine. Pick one of the central vertical seams and stitch all the way from the top edge to the bottom. Then, just move to the next seam over and repeat the process. Once you’ve stitched all the vertical lines, turn the quilt 90 degrees and do the same for all the horizontal lines.
Binding is the final frame for your artwork. It’s a fabric strip that wraps around the raw edges of your quilt, giving it a durable and polished finish. A machine-stitched binding is strong, fast, and absolutely perfect for a quilt that’s going to be loved, used, and washed often.
First things first, you need to trim the excess batting and backing so they are perfectly even with your quilt top. A long quilting ruler and a sharp rotary cutter are essential for getting this step perfectly straight.
Next, grab your prepared binding strip (typically 2.5 inches wide). Fold it in half lengthwise with the wrong sides together and give it a good press. You'll end up with a long, double-layered strip that’s ready to attach.
Here's a simple method for machine binding:
Those sharp, professional-looking corners are much easier to achieve than you think. Once you've stopped a quarter-inch from the corner, take the quilt out from under the needle.
Fold the binding strip straight up and away from the quilt, which will create a 45-degree angle. Then, fold the strip straight back down so it's aligned with the next raw edge of the quilt. This creates a neat little triangular fold of fabric at the corner—that's your miter. Now you can start sewing again from the very top of this new side.
Just repeat this fold-and-sew process at all four corners. When you get back around to where you started, stop about a foot away from your starting stitches. You'll then trim and join the two ends of your binding, and finally, sew the last little section down.
The last step is to wrap the folded edge of the binding around to the back of the quilt, secure it with clips, and stitch it down. Many quilters like to "stitch in the ditch" from the front again, which catches the folded edge of the binding on the back for an incredibly clean finish.
For a hands-on look at quilting and binding techniques, consider stopping by our shop, High Country Quilts, in Colorado Springs. We have all the tools you need and love to share tips with new quilters.
Every quilter I know keeps a seam ripper close by. Every single one. Mistakes aren't just part of quilting; they're how you learn the craft inside and out. So instead of getting frustrated, let's look at these little hiccups as valuable lessons.
Think of this as your personal troubleshooting guide for the most common issues you'll run into with your first few quilts. Getting past these hurdles is what turns a beginner into a quilter for life.
This is the big one. You've just finished piecing your top, you lay it out for a victory lap, and... it's a field of ripples. It just won't lie flat.
What Happened: Nine times out of ten, this is because the fabric got stretched out, especially when you were adding the outer borders. It’s easy to just line up a long border strip and sew it on, but the feed dogs on your machine can gently pull and stretch the quilt top as you go. Suddenly, your quilt center is bigger than the border you're attaching, and that extra fabric has to go somewhere—so it ripples.
How to Fix It: Prevention is your best friend here. Before you even think about attaching borders, measure your quilt top. Get a measurement through the center, both top-to-bottom and side-to-side. Cut your border strips to those exact lengths. Pin the border on, easing in any fullness, and then sew. This simple step forces the quilt top to fit the border, not the other way around.
You sew two blocks together, expecting a perfect little intersection where four corners meet, but they're off. It’s a common frustration, but luckily, it's all about precision.
What Happened: This usually comes down to one of three things: your quarter-inch seam isn't quite a quarter-inch, your pressing is inconsistent, or you didn't pin right at the intersection. Even a thread's width of difference in your seam allowance can throw everything off by the time it multiplies across a block.
How to Prevent It Next Time:
Online videos are incredible for getting started, but working through these little frustrations is where hands-on guidance can be a game-changer. Beginners who take a class have a 92% project completion rate, which is a huge jump from the 58% for those who are entirely self-taught. That in-person advice really makes an impact. You can discover more insights about quilting education and its benefits.
You know you cut a perfect square, but after a trip to the sewing machine and ironing board, it looks more like a wonky diamond. Welcome to the wonderful world of fabric bias!
What Happened: Woven fabric has a straight grain and a cross-grain. The bias, which runs at a 45-degree angle to those, is incredibly stretchy. If you handle cut pieces too roughly or drag your iron across them instead of pressing, those bias edges can stretch out of shape in a heartbeat.
How to Fix It: A good dose of steam and some spray starch can often help you gently press the piece back into its intended shape. If it's really distorted, though, you might just have to recut it. To avoid this problem, always handle your pieces gently. And remember: press, don't iron. Lift your iron up and set it down, don't slide it back and forth across the fabric.
When you're just starting out, a few questions always seem to pop up. Don't worry, every quilter has asked these before! Let's get you some clear answers so you can get back to the fun part: sewing.
Ah, the great debate in the quilting world! While you'll find seasoned quilters on both sides of this fence, my advice for your very first project is simple: do NOT wash your precut fabrics.
Precuts like Charm Packs are perfectly sized and a dream to work with right out of the package. Washing these little squares can cause them to fray, shrink, and warp, making it a real headache to sew them together accurately. Trust me, you can skip this step and save yourself a ton of frustration.
Honestly, the best machine is one you feel comfortable using. You absolutely do not need a fancy, computerized model with a million stitches to make the easiest quilt for beginners.
What you should look for is a machine that’s sturdy and reliable. Key features to keep an eye out for are:
We're an authorized BERNINA dealer because their machines are workhorses that can grow with you. But truly, any well-maintained machine that can do a straight stitch is all you need to get started.
What’s a "Scant" 1/4 Inch Seam? You'll hear this term a lot. A "scant" 1/4 inch seam is just a hair's breadth narrower than a true 1/4 inch. This tiny bit of wiggle room is crucial because it compensates for the fabric that gets "eaten up" in the fold when you press your seams open. Nailing this ensures your blocks finish at the perfect size.
This is where precut bundles like Charm Packs and Layer Cakes are a beginner's best friend! The fabric designers have done all the hard work for you, putting together collections where every single piece coordinates beautifully. It’s a foolproof way to get a gorgeous-looking quilt top.
If you feel adventurous and want to pick your own fabrics from the bolt, here’s a simple trick: choose a mix of light, medium, and dark tones. It also helps to pair larger-scale prints with some smaller, more subtle ones to create balance and keep the eye moving.
Ready to dive in? The team at High Country Quilts lives for helping new quilters find their footing. Swing by our shop in Colorado Springs to feel the fabrics for yourself and test-drive a BERNINA, or browse our beginner-friendly selection online anytime at https://hcquilts.com. We're here for you
At High Country Quilts we care deeply about community. With our experiences in retail, we know that a store is not only a place to shop but also a place for the community to gather and share. During this busy...

Hi! We’re Adam and Renee Wheaton, the new owners of High Country Quilts! For more than 40 years, we’ve owned and operated vacuum and sewing businesses. Following in Renee’s father’s footsteps after he retired from All Discount Vacuum and Sewing in Colorado...


Leave a comment