

We Love Our Quilting Community
At High Country Quilts we care deeply about community. With our experiences in retail, we know that a store is not only a place to shop but also a place for the community to gather and share. During this busy...


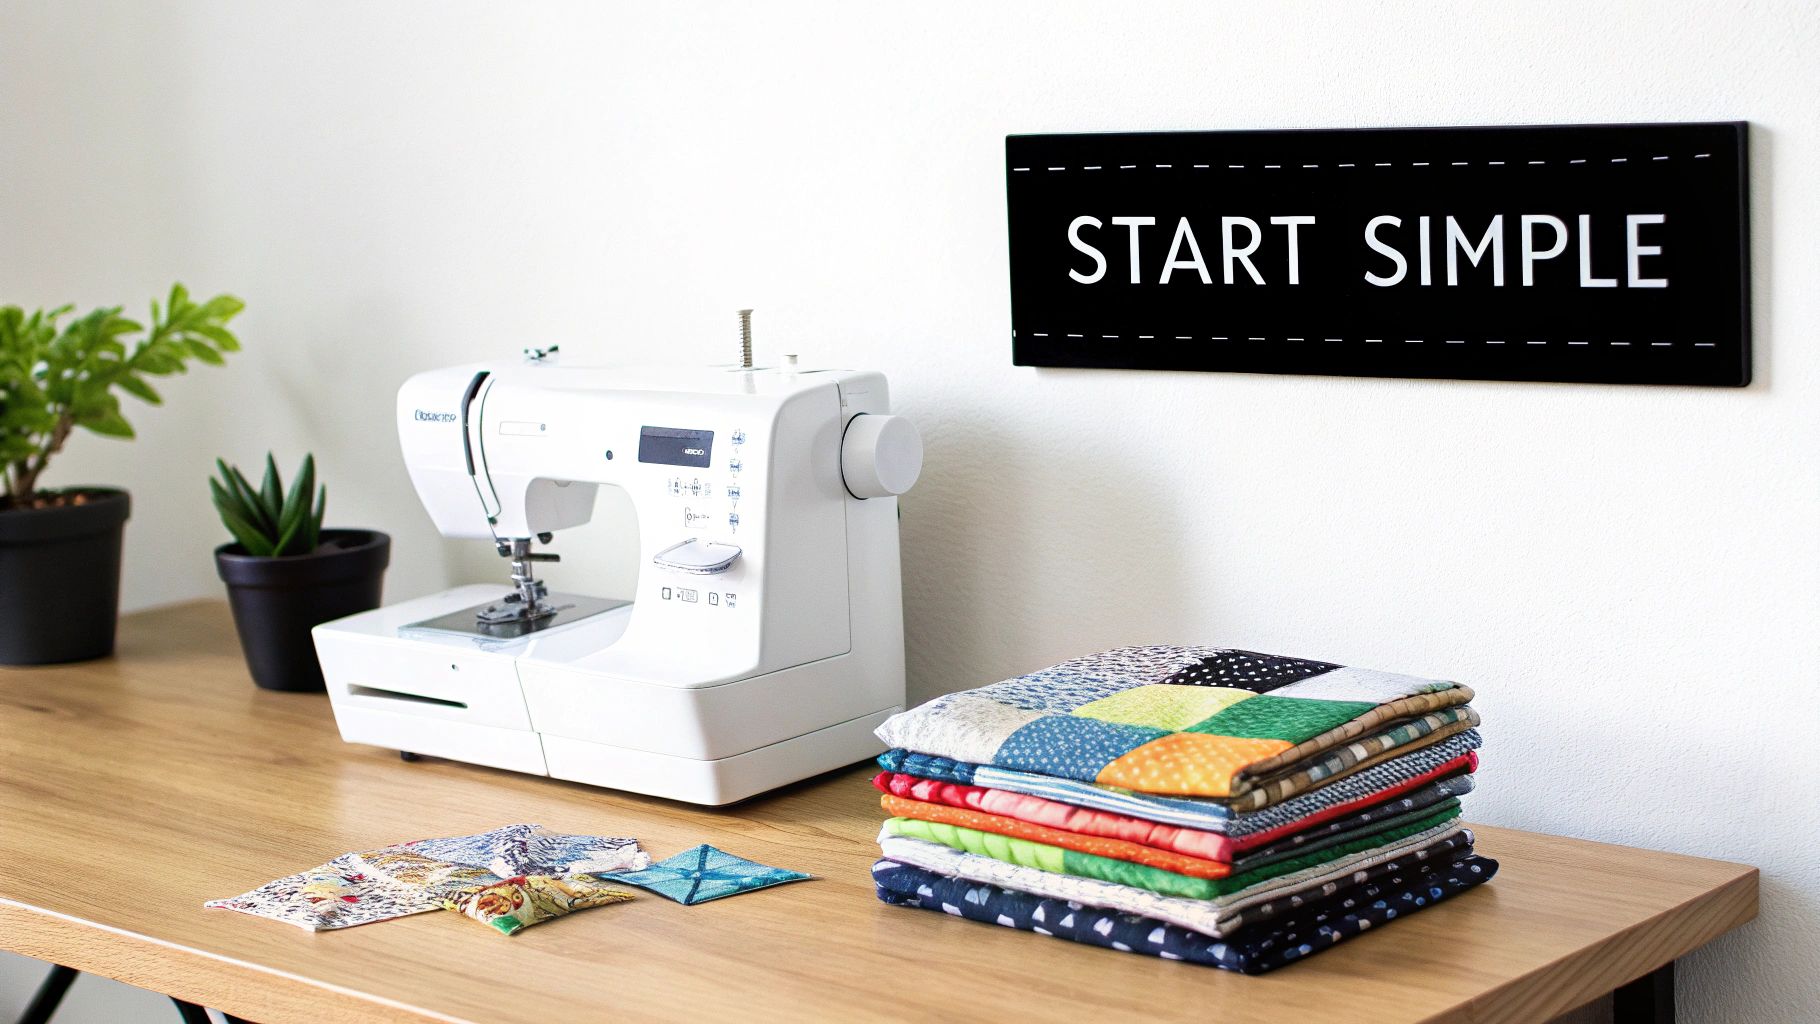
So, you're ready to make your first quilt! When you’re just starting out, the absolute easiest beginner quilt to make is one that doesn't require you to cut a mountain of fabric first. Using precut fabric bundles like charm packs (5-inch squares) or jelly rolls (2.5-inch strips) is a game-changer. It lets you skip what can be a really intimidating step and dive right into the fun part: sewing.
Trust me, this approach helps ensure everything lines up nicely and builds your confidence from the very first stitch.
Starting a new hobby is supposed to be exciting, not a chore that makes you want to pull your hair out. The whole point of your first quilting project is to learn the basic skills and end up with something you're genuinely proud of. When you choose a simple pattern that's designed for success, you sidestep all those common frustrations that can trip up newcomers.
This guide will walk you through two fantastic starter projects: a Classic Patchwork Quilt made from simple squares and a super-fast Speedy Strip Quilt.
Before we get sewing, it's pretty neat to know what makes a quilt, well, a quilt. They're quite different from other kinds of bedding! If you're curious, this Comforter vs Quilt vs Duvet breakdown explains the unique construction. A quilt is made of three layers—a decorative top, a cozy middle layer called batting, and a fabric backing—all stitched together to create that classic, textured look you love.
Think of precut fabric bundles as your secret weapon. Designers have already done the hard work of picking out perfectly coordinated colors and patterns, which solves that "what fabrics even go together?" headache right off the bat.
Even better, they are machine-cut with incredible precision. This is huge, because slightly wonky cutting is probably the number one source of error for beginners. When your pieces are perfectly sized from the get-go, everything else just clicks into place.
This simple trick allows you to focus all your attention on mastering that crucial 1/4" seam allowance and just enjoying the magic of seeing your quilt top come together. It’s a strategy we recommend all the time here at High Country Quilts because we've seen the wonderful results it produces day after day.
Starting with precuts is like learning to cook with a meal kit. All the ingredients are prepped and measured, so you can focus on the fun part—the actual cooking—and still get a delicious result.
To help you decide which path to take first, here’s a quick look at the two easy quilt projects in this guide. Both are fantastic choices, but they teach slightly different skills and have their own unique charm.
| Feature | Classic Patchwork Quilt | Speedy Strip Quilt |
|---|---|---|
| Primary Material | Charm Packs (5" squares) | Jelly Rolls (2.5" strips) |
| Main Skill Learned | Nesting seams and block layout | Sewing long, straight seams |
| Estimated Time | 15-20 hours | 12-18 hours |
| Best For | Learning classic block construction | Achieving fast results with a modern look |
No matter which you choose, you're going to learn a ton and create something beautiful. Let's dive into the details for each one
Before you even think about making that first stitch, let's talk about tools. Having the right gear can be the difference between a frustrating afternoon and a truly joyful creative session. Think of this as your starter shopping list—we'll separate the absolute must-haves from the nice-to-haves so you don't get overwhelmed. You really don't need a whole aisle of gadgets to make a beautiful quilt.
Your core toolkit is actually pretty simple. You’ll need a reliable sewing machine, a rotary cutter with its mat and ruler, some quality thread, and something to hold your fabric together. These are the tools that will form the foundation for countless projects to come.
For those beautifully clean, precise cuts, nothing—and I mean nothing—beats a rotary cutter. If you're just starting out, the 45mm size is your best bet. It’s the most versatile, feels comfortable in your hand, and is perfect for slicing through fabric strips and squares. A rotary cutter is a non-negotiable, but for safety and accuracy, it needs a couple of partners.
First, you'll need a self-healing cutting mat. This mat is brilliant because it protects your table from the blade and, just as importantly, keeps your blade from dulling too quickly. A good starter size is around 18" x 24". It gives you plenty of room to work without taking over your entire dining table.
The other essential partner is a clear acrylic ruler. The quilting world pretty much runs on the 6" x 24" ruler. It’s a total workhorse. Because it’s transparent, you can see the fabric right through it, making it easy to line everything up perfectly before you make a cut.
Investing in a quality rotary cutter, mat, and ruler is one of the best decisions you can make as a new quilter. Getting your cuts right from the very beginning saves so many headaches down the line and makes the actual sewing a much smoother ride.
Don't worry, your sewing machine doesn't need a hundred fancy stitches. A simple, sturdy machine that can do a reliable straight stitch is your new best friend. Here at High Country Quilts, we’re partial to our BERNINA models for their precision, but honestly, any well-maintained machine will get the job done beautifully for these first projects.
Next up is thread, and this is a detail that really matters. Always opt for a 100% cotton thread. A neutral color like white, cream, or a light grey will blend in with almost anything. The reason for cotton is simple: it shrinks at the same rate as your cotton fabric, which means you won't get weird puckering after you wash your quilt. It's a small thing that makes a huge difference.
Finally, you’ll need a way to hold your fabric pieces together while you guide them through the machine. You have a couple of great options:
Want to know the single best tip for ensuring your first quilt is a roaring success? Use precut fabrics. These are curated bundles of coordinating fabrics that have been cut with machine precision. They save you a ton of time and, more importantly, eliminate the stress of making a cutting mistake.
For the projects we're about to tackle, you'll want to grab one of these:
Starting with precuts gives you such a confidence boost right out of the gate. The team here at High Country Quilts can always help you pick out the perfect bundle and put together a starter kit that feels just right for you.
This is where the real fun begins—turning that lovely pile of fabric squares into a beautiful quilt top. We're going to make a charming baby quilt that finishes at about 36" x 45" using two coordinating Charm Packs. I'll walk you through my simple process: first designing the layout, then sewing the squares into rows, and finally joining those rows together. It’s a fantastic first project because you'll master the basics without getting overwhelmed.
The heart of a great patchwork quilt is a layout that makes you happy. Before you even think about touching your sewing machine, find a clean spot on the floor or a large table and lay out your squares. This is your design wall! Arrange your pieces in a grid of 8 squares across by 10 squares down. Don't be afraid to just play around, moving them until the colors and patterns feel just right.
There are no strict rules for arranging your squares, but after years of quilting, I’ve picked up a few tricks that really help.
Honestly, this part is all about trusting your own creative instincts. Quilts made from precuts are often called the easiest for beginners because all that tedious cutting is done for you. This frees you up to focus on the fun part: playing with color and design. It's no wonder that simple projects like this one can be finished in just 10-15 hours, offering a huge sense of accomplishment for new quilters. You can learn more about how beginners are thriving with these quick projects.
Pro Tip: Keep your rows organized with a simple numbering system. I like to use little scraps of paper and a pin to label the first square of each row from 1 to 10. It makes it so much easier to keep everything straight.
Okay, with your layout set, it's time to sew! The secret weapon for a crisp, professional-looking quilt top is a consistent 1/4" seam allowance. This is the one rule that's not meant to be broken in quilting. If your machine has a special 1/4" quilting foot, now is the time to use it—it makes sewing perfect seams almost effortless.
To start your first row, take the first two squares (Square 1 and Square 2) and place them with their right sides facing each other. Pin them along one edge and sew that 1/4" seam. Open them up and press the seam to one side; I usually press toward the darker fabric to prevent it from showing through the lighter one. Now, grab Square 3, place it right sides together with the edge of Square 2, and sew. Keep going like this until all eight squares in your first row are joined.
Repeat this process for all ten rows. Want to work a little faster? Try chain piecing. This is a game-changing technique where you sew pairs of squares one after another without snipping the threads in between. You'll end up with a long "chain" of connected pairs, and it saves a surprising amount of time and thread.
No matter what you're making, a few core tools are essential for getting those perfect cuts and measurements.
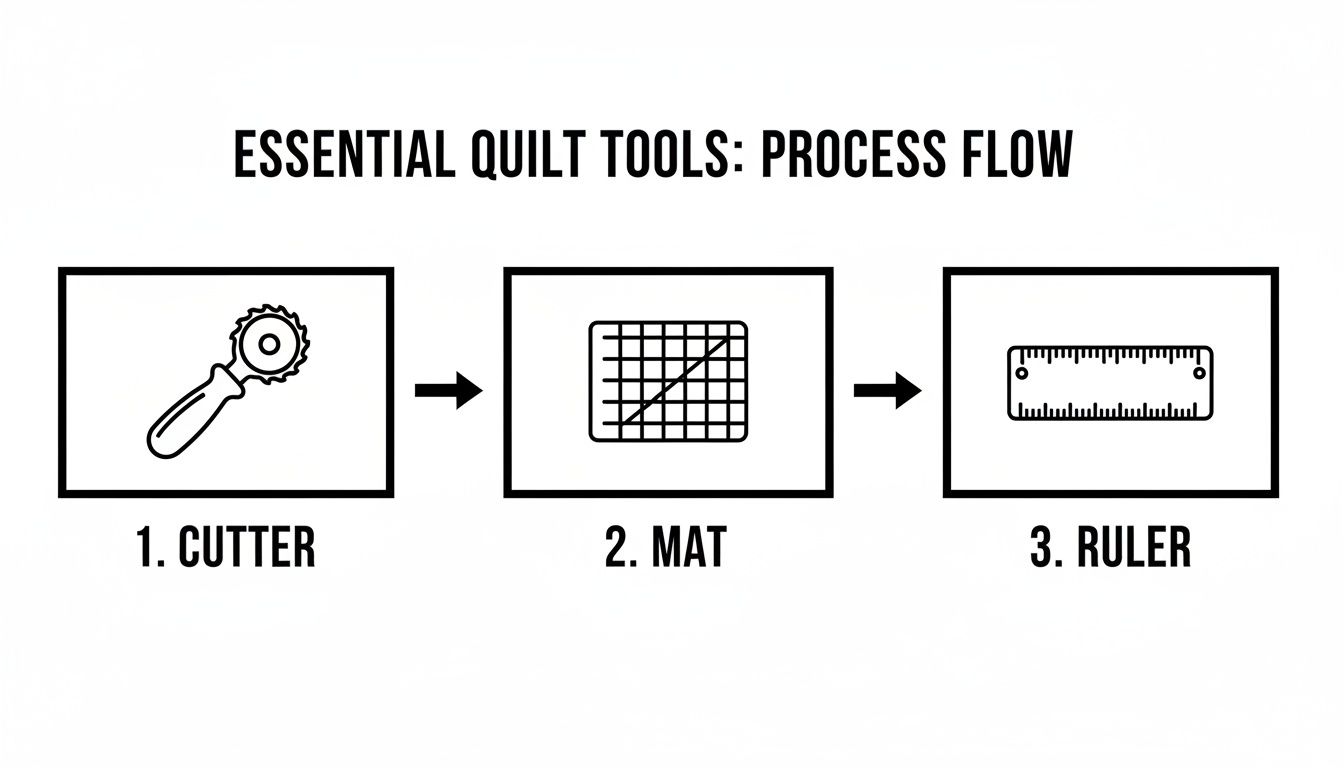
This trio—the rotary cutter, mat, and ruler—is the foundation of accurate quilting. Master these, and you're well on your way.

If you're looking for a project that feels like an instant win, the Speedy Strip Quilt is it. This design is modern, fun, and built from a Jelly Roll—a fantastic bundle of pre-cut 2.5-inch fabric strips. For a new quilter, there’s nothing more encouraging than watching a big, beautiful quilt top come together in just a couple of hours!
The secret here is a technique called "strip piecing." You’ll sew several long strips of fabric together to create wider panels, which we call "strip sets." Then, you'll slice those sets into blocks and arrange them in an alternating pattern. The final result looks incredibly intricate, but you'll know how simple it truly was. It's also the perfect way to practice sewing a long, straight seam.
First things first, let's get your Jelly Roll strips organized. A typical roll has around 40 strips, which is perfect for making ten strip sets, each using four different fabrics.
Go ahead and play with combinations! Once you've laid out four strips you like, place the first two with their "right sides" facing each other. Sew along one of the long edges, keeping that 1/4-inch seam allowance as consistent as possible. Now, open them up and add your third strip to the edge of the second one, and finally the fourth to the third. And just like that, you've made your first strip set!
Quick Tip: When you're sewing these long strips, trust your sewing machine. The feed dogs are designed to pull the fabric through evenly. If you push or pull the fabric, it can stretch and warp your strips. Just gently guide it with your hands.
Keep this process going until all your strips are sewn into ten wide strip sets. Now, we've arrived at what might be the most crucial part of this whole step: pressing.
Good pressing is the difference between a quilt top that lies flat and beautiful and one that’s a bit of a puckered mess. It’s a game-changer.
This method of creating and pressing is a cornerstone of strip piecing. It’s a technique quilters love for how fast and efficient it is, and it's fantastic for using up scraps. It’s the same basic idea behind classic patterns like the Log Cabin block, which uses strips from 1.5" to 2.5" wide to build a design. You can discover more about quilting trends to see just how valuable this skill is.
With all your strip sets perfectly pressed, it’s time to cut them into blocks. Lay one set on your cutting mat. Using your rotary cutter and a clear ruler, slice it into 6.5-inch wide blocks. You should be able to get six blocks from each strip set, giving you a grand total of 60 blocks.
And now, the magic happens! Clear some floor space and start laying out your blocks. Place the first block so the strips run horizontally. Take the next block and place it beside the first, but turn it so the strips run vertically. Keep alternating between horizontal and vertical to create a gorgeous woven or "rail fence" effect.
Remember how you alternated the pressing direction of your seams? This is where it pays off. The seams where the blocks meet will "nest" together perfectly, creating crisp points and helping your quilt top lie beautifully flat. It’s this kind of built-in trick that makes this the easiest beginner quilt to make—it’s designed to give you a professional-looking finish right from the start.
Your beautiful quilt top is officially done! Now for the really exciting part: turning that flat piece of fabric into a real, three-dimensional quilt you can actually use. This is where all your hard work comes together.
The final stage involves three main parts: building your "quilt sandwich," stitching through all the layers, and finally, putting on the binding. Let's walk through it.
The "quilt sandwich" is exactly what it sounds like—three layers stacked together. You have your backing fabric (pretty side facing down), the fluffy batting in the middle, and your finished quilt top on the very front. Getting these layers perfectly smooth is the secret to a great finish.
First, you'll need a large, clean floor space to work on. Start by taping your backing fabric down. You want it taut, but be careful not to stretch it out of shape. Make sure the wrong side is facing up at you.
Next, lay your batting smoothly over the top, followed by your carefully pressed quilt top. Once everything is perfectly flat, it's time to "baste" the layers together so nothing shifts while you're sewing.
For your first project, you can't go wrong with safety pins. They're simple and effective.
This method pushes any wrinkles or bubbles out to the edges, preventing them from getting trapped in the middle of your quilt.
The easiest and most popular quilting technique for beginners is called "stitch in the ditch." All this means is that you'll be quilting directly on top of the seam lines you already sewed when piecing your top together.
The beauty of this method is that your stitches sink right into the "ditch" of the seam, making them nearly invisible from the front. It secures all three layers perfectly and adds that wonderful, classic quilted texture.
A crucial tip: always start quilting from the center of your quilt and work your way outwards. This approach methodically pushes any remaining fullness towards the edges. If you have a walking foot for your sewing machine, now is the time to use it! It grips all three layers at once and helps feed them through evenly, preventing puckers.
Your first few quilting lines won't be perfect, and that's completely okay. The goal is to secure the layers and add that classic quilted dimension. Remember: finished is always better than perfect.
The binding is that final fabric border that neatly encloses all the raw edges of your quilt. It's like a picture frame for your work, giving it a durable and polished look.
To make it, you’ll cut several 2.5-inch wide strips of fabric. You'll then sew these strips together end-to-end to create one long continuous piece, which you’ll press in half lengthwise.
Sew the raw edge of this binding strip to the raw edge of your quilt top, stopping a quarter-inch from each corner. This little gap is what lets you create those sharp, mitered folds. After it’s attached all the way around, you'll simply fold the binding over to the back of the quilt and hand-stitch it down for a clean, invisible finish. For many of us, this final, quiet hand-sewing step is one of the most relaxing and rewarding parts of the entire process.
It's totally normal to have a million questions swirling in your head when you start your first quilt. Let's tackle some of the most common ones I hear from new quilters—getting these answers straight will save you a lot of guesswork and let you focus on the fun stuff.
If you're using a precut bundle like a Charm Pack or Jelly Roll for this first project, the answer is a simple and emphatic no. Don't even think about it!
Precuts are designed to be sewn right out of the package. Washing them first can lead to a frayed, shrunken mess, and you'll lose that crisp edge that makes them so easy to work with. We'll save the great pre-washing debate for when you start mixing fabrics from different designers on a future quilt.
Hands down, the most common trip-up for new quilters is the 1/4" seam allowance. It sounds tiny, but even a slight wobble over dozens of seams can make your blocks come out wonky and your points not line up. It's the one thing that can throw an entire project off.
Your best friend here is a 1/4" quilting foot for your machine. Before you even touch your pretty quilt fabric, grab some scraps and sew a few test seams. Get a feel for where the edge of the fabric needs to be. Mastering this one simple skill is the secret to making everything else fall into place.
Welcome to the club! Chasing perfect points is a rite of passage for every quilter, even those of us who have been at it for decades. Just remember the golden rule of quilting: "Finished is better than perfect."
Not a chance! Seriously, take a step back and look at the whole quilt. The colors, the pattern, the cozy texture—that's what people will see. Those tiny imperfections are just proof that it was made by a human, with love. They're part of its story.
Once you’ve finished your masterpiece, you'll want to keep it looking great. For some fantastic, in-depth advice on washing and storage, check out this guide on caring for your quilt.
Here at High Country Quilts, we absolutely love helping quilters find their creative spark. Swing by our shop in Colorado Springs or see what's new online at https://hcquilts.com. We're always here to help you find your next favorite project, tool, or class.
At High Country Quilts we care deeply about community. With our experiences in retail, we know that a store is not only a place to shop but also a place for the community to gather and share. During this busy...

Hi! We’re Adam and Renee Wheaton, the new owners of High Country Quilts! For more than 40 years, we’ve owned and operated vacuum and sewing businesses. Following in Renee’s father’s footsteps after he retired from All Discount Vacuum and Sewing in Colorado...


Leave a comment