

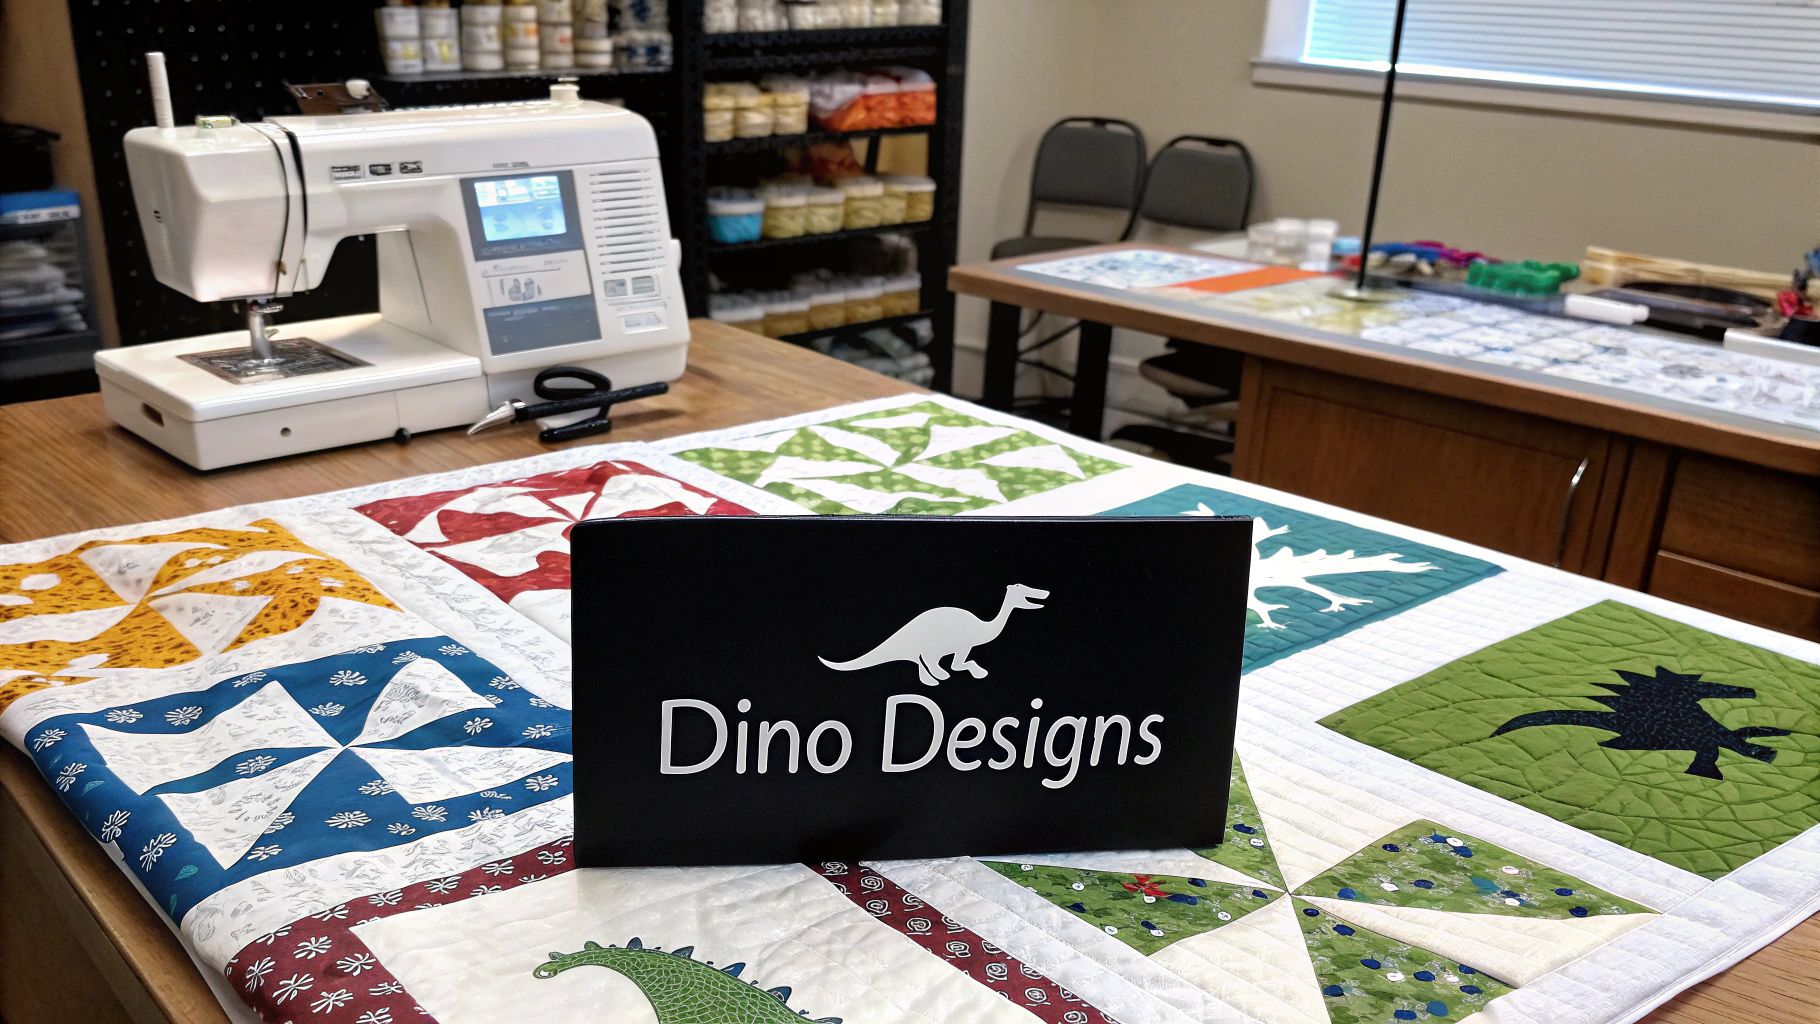
We Love Our Quilting Community
At High Country Quilts we care deeply about community. With our experiences in retail, we know that a store is not only a place to shop but also a place for the community to gather and share. During this busy...


Choosing the right dino quilt pattern is the first step toward creating an heirloom that any dinosaur fan will absolutely adore. I'm here to walk you through the entire process, from picking fabrics that really roar to nailing the piecing techniques that give your quilt that polished, professional look. Think of this as your personal roadmap to stitching a prehistoric masterpiece.
There's just something magical about dinosaurs that captures the imagination of kids and adults alike. When you bring these incredible creatures to life with fabric and thread, you're not just making a blanket—you're creating a treasured keepsake. My goal with this guide is to get you excited and fully prepared for the journey, ensuring it's a fun and successful one from the very first cut to the final stitch.
Making a dinosaur quilt is more than just a sewing project; it’s a rewarding DIY home decor project that adds a huge splash of personality to a room. Your finished quilt can easily become the stunning centerpiece of a child's bedroom or a cozy, playful throw for the family to snuggle under.
This guide is packed with all the skills and know-how you'll need to confidently tackle your dinosaur quilt. We'll dive into several key areas, building your confidence one step at a time so you can create something truly beautiful.
Here’s a little preview of what’s coming up:
By the time we're done, you won't just have a quilt. You'll have a handcrafted heirloom, filled with character and your own personal touch. The skills you pick up here will serve you well on countless future projects.
I've broken down each stage into easy, manageable steps. We'll cover practical advice and troubleshoot common hiccups along the way. So, let's gather our supplies and get ready for a quilting adventure
Before you even think about making that first exciting cut, let’s talk about prep work. Getting all your supplies together at the start is one of the best things you can do to ensure a smooth, fun quilting experience. Trust me, it saves you from those frustrating mid-project dashes to the fabric store. A well-organized space is a happy quilting space.
Think of this as assembling your personal quilting toolkit. Every dino quilt pattern starts with the basics, but the real magic happens when you start picking out fabrics that bring your prehistoric world to life. The right supplies don’t just make the job easier—they’re what will define the look and feel of your finished quilt.
Every quilter develops a preference for certain gadgets over time, but a few tools are simply non-negotiable if you want clean cuts and professional-looking results. You don’t need the most expensive gear out there, just reliable tools that feel right in your hands.
Here’s what I consider the absolute essentials:
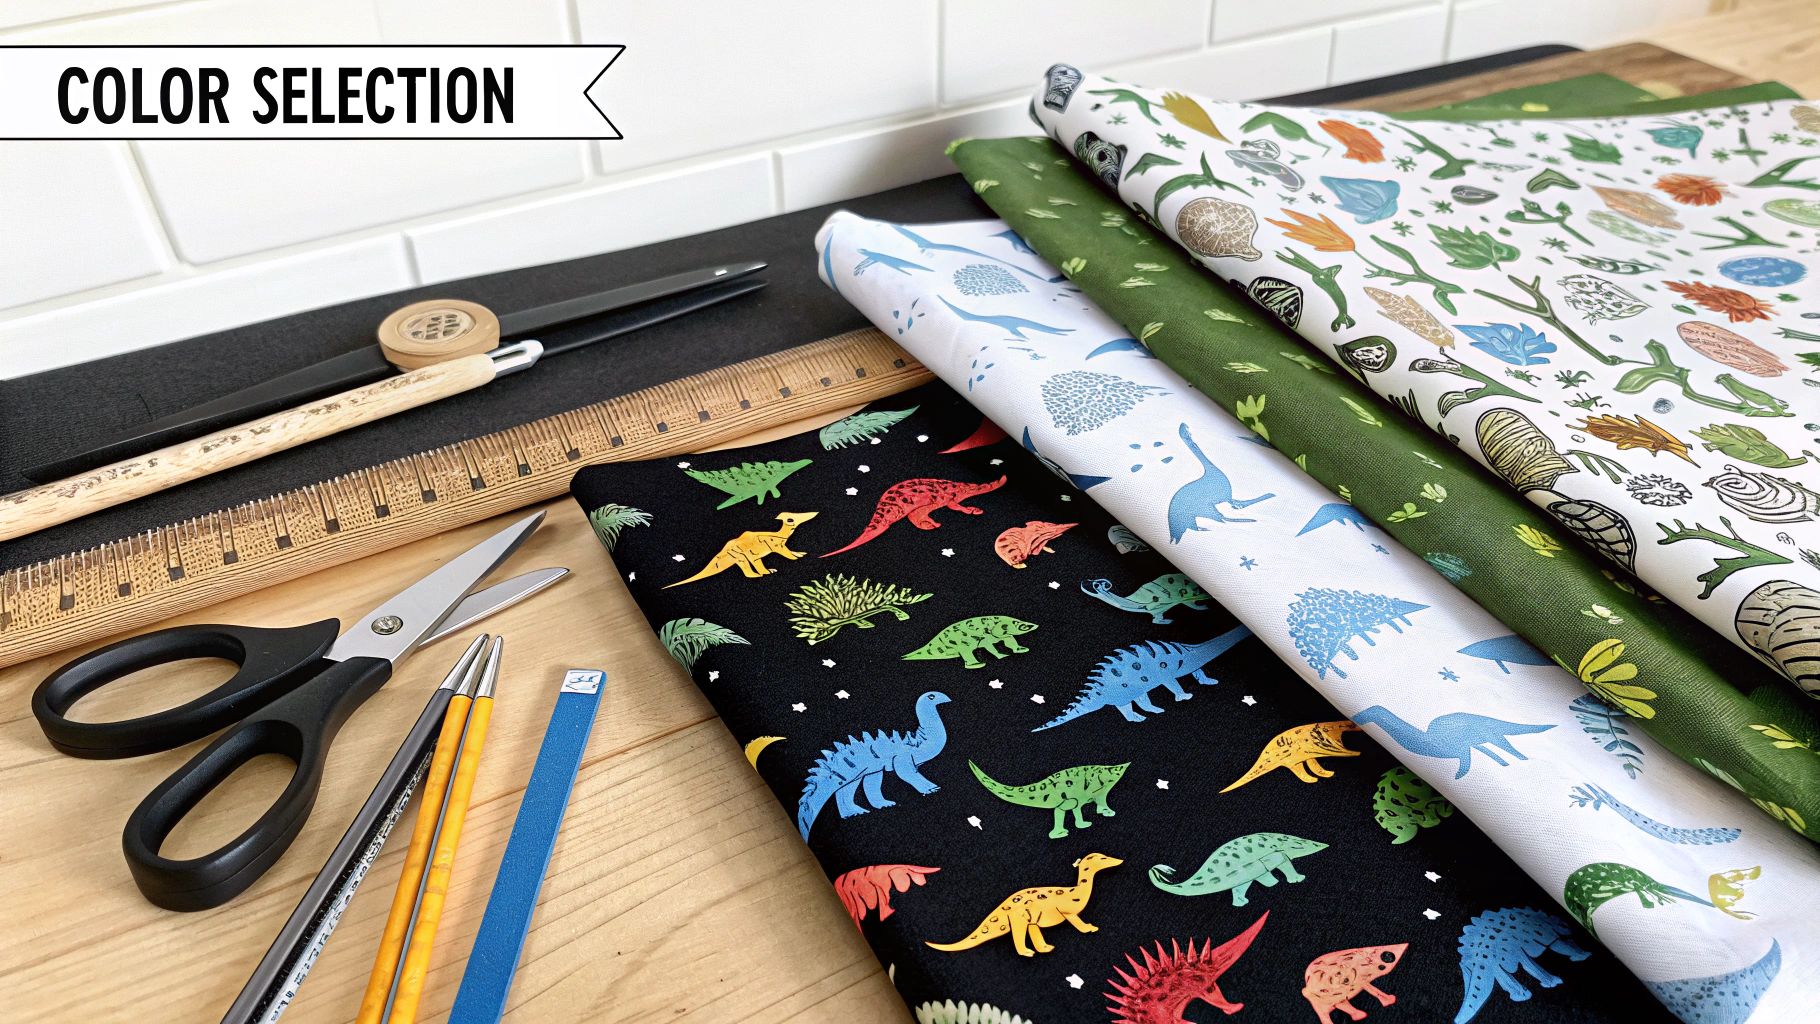
Okay, now for the really fun part—choosing the fabrics that will become your quilt! The prints and colors you pick will tell the story of your dinosaur world, and the batting you choose will determine how warm and cuddly it is.
For the quilt top, 100% quilting cotton is the gold standard for a reason. It’s a dream to work with because it holds its shape, presses crisply, and comes in an incredible variety of dinosaur prints and coordinating colors. When you're calculating how much you need, I always recommend adding about a half-yard extra to your order. It’s a little insurance policy for any cutting mistakes.
The choice of batting is just as important as the fabric. I’ve seen the popularity of dinosaur quilt patterns explode, and many quilters are using high-quality materials to make their projects extra special. For instance, intricate patterns often look amazing with a batting like Warm & White for that classic, flat look, while something like Hobbs Wool can add incredible loft and texture. You can see some fantastic examples of how material choices impact the final quilt by exploring these dinosaur quilt projects and insights on flyingparrotquilts.com.
Pro Tip: Don't forget about the backing and binding fabric! Your backing fabric needs to be larger than your finished quilt top—I usually aim for an extra 4-6 inches on all four sides. This gives your quilter (or you!) plenty of room to work. The binding is the final strip of fabric that will beautifully encase all the raw edges.
Choosing the right materials can feel overwhelming, but it's also where you get to infuse your personality into the project. Here’s a quick breakdown of some common options to help you decide.
| Material | Best For | Pros | Cons |
|---|---|---|---|
| 100% Quilting Cotton | Quilt tops, backing, and binding. The go-to for most projects. | Easy to cut and sew, holds a press well, huge variety of prints. | Can be prone to fraying, may shrink if not pre-washed. |
| Flannel | Backing for extra-cozy quilts, especially for kids. | Incredibly soft and warm, forgiving to work with. | Shrinks significantly, produces a lot of lint, can stretch. |
| Cotton Batting | A classic, traditional quilt feel with low loft. | Soft, breathable, drapes well, gets softer with each wash. | Can shrink, may not be warm enough for very cold climates. |
| Polyester Batting | Quilts needing extra puffiness or for allergy sufferers. | High loft, lightweight, holds its shape, hypoallergenic. | Less breathable than natural fibers, can "beard" (fibers poke through). |
| Wool Batting | Warm, lightweight quilts with beautiful texture. | Excellent insulation, resistant to creases, beautiful stitch definition. | Can be more expensive, requires special care when washing. |
| Cotton/Poly Blend Batting | A versatile, all-purpose option combining the best of both. | Stable, low shrinkage, good loft and stitch definition. | Not a purely natural fiber, which may be a drawback for some. |
Ultimately, the "best" choice comes down to the look you're going for and how the quilt will be used. A soft flannel backing and a fluffy polyester batting might be perfect for a toddler's bed, while a crisp cotton top, back, and batting would be ideal for a wall hanging.
Any seasoned quilter will tell you that a beautiful quilt is built on a foundation of precision. That whole process starts long before you even think about your first stitch. Taking a little extra time to prepare and cut your fabric properly will make all the difference in how smoothly your dinosaur blocks come together later. Trust me, it’s what guarantees those sharp points and perfectly flat blocks we all strive for.
First up is the great debate: to pre-wash or not to pre-wash? I’m firmly in the pre-washing camp, especially for quilting cottons. Fabrics can shrink and colors can bleed, and you definitely want to deal with that before you've spent hours piecing your dino quilt pattern. A quick, gentle wash cycle followed by a good press with a hot, steamy iron will stabilize the fabric. It just makes it so much easier to cut accurately.
With your fabric pressed and ready, it's time to cut. Your rotary cutter, a good ruler, and a self-healing mat are about to become your best friends. I can't stress this enough: always start with a fresh, sharp blade in your cutter. A dull blade is your enemy—it will drag and distort the fabric, leading to frustratingly inaccurate pieces.
When you lay out your fabric, make sure to align the grain with the lines on your cutting mat. Use a sturdy quilting ruler and apply firm, even pressure to hold it steady as you slice. This is where a steady hand really pays off, as a slipping ruler is the number one cause of wonky cuts. It’s the quilter’s version of “measure twice, cut once.”
A little organization goes a long way here. I like to make labels for my different stacks of cut pieces. A small sticky note or a pin with a tiny paper label can save you from the headache of confusing a 2.5-inch square with a 3-inch one. This becomes a real lifesaver when you're working on those intricate dinosaur blocks with tons of small, similar-looking pieces.
There are a few different ways to approach cutting your quilt pieces, and the best one often depends on your specific dinosaur design. Each method has its own strengths and can really influence the final look of your quilt.
This quick visual breaks down the basic workflow for getting your blocks made.
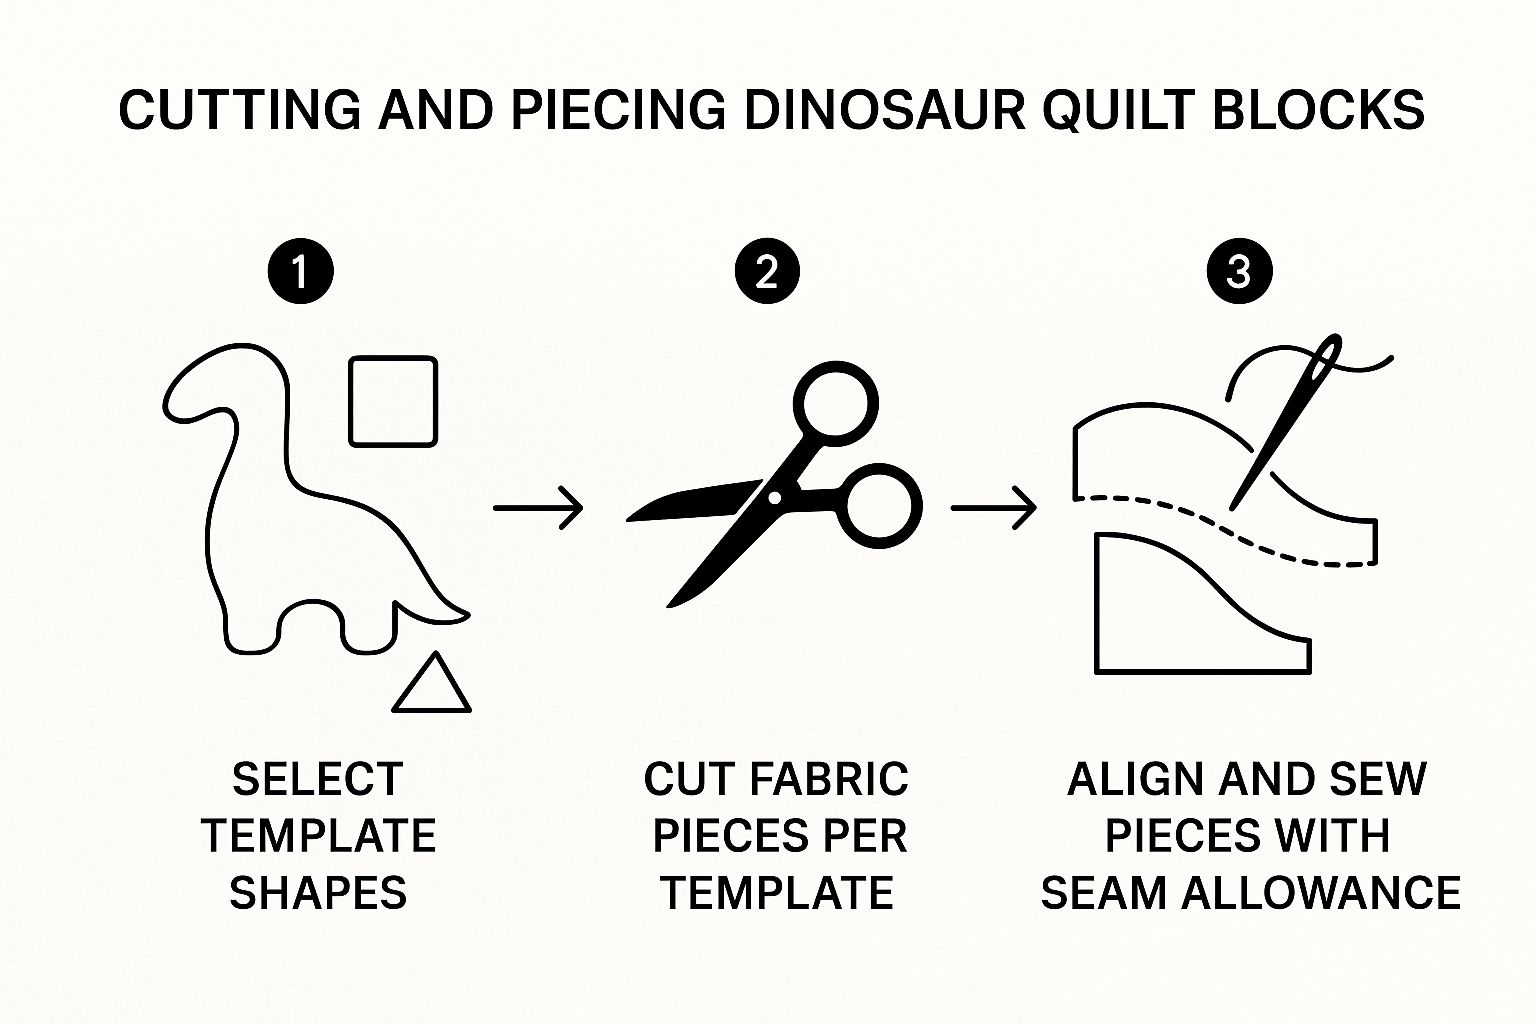
Seeing the process laid out like this, from the template to the final sewn unit, really shows how each step builds on the last to create a perfect block.
My Two Cents: The secret to perfect quilt blocks isn't just about sewing a straight seam. It all starts with perfectly cut pieces. An error of just 1/8th of an inch during cutting can throw off an entire block, making assembly a nightmare and your final quilt less than stellar.
Whichever technique you end up using, the goal is always the same: consistency. When every piece is cut to the exact same dimension, they’ll fit together like a perfectly engineered puzzle. That’s when quilting becomes truly joyful and rewarding.
With all your fabric cut and ready to go, we've arrived at my favorite part: piecing the blocks. This is where those stacks of little geometric shapes start to transform and you finally get to see your dinosaurs take shape.
The absolute foundation of a successful quilt block is the seam allowance. In the quilting world, a precise quarter-inch seam is the gold standard. I can't stress this enough—it's the secret to getting every point to match and every block to finish at the correct size. If your seams are even a little off, it can snowball into bigger issues across the entire quilt.
If you don't have one already, I highly recommend getting a dedicated quarter-inch presser foot for your sewing machine. It makes hitting that perfect seam allowance nearly effortless, letting you focus on guiding the fabric.
When you have a lot of small pieces to join, chain piecing will be your best friend. It’s a huge time-saver and conserves a surprising amount of thread. Instead of sewing two pieces, stopping, cutting the thread, and picking up the next pair, you just feed them through your machine one after another. You’ll end up with a long string of stitched units that you can snip apart later.
This assembly-line approach is perfect for a dino quilt pattern. Think about making all the Stegosaurus legs or the plates for its back—you can power through all the identical units at once. Just sew, snip, and press the whole batch.
A little tip from my own sewing room: Before I even sit down at my machine, I organize the pieces for each dinosaur into separate little piles or trays. This bit of prep saves me from the frustration of hunting for a tiny, missing triangle mid-sew and keeps the whole process flowing smoothly.
Dinosaur patterns have come a long way, too. Many modern designers are creating wonderfully clever patterns that give you that detailed look without wrestling with complicated techniques like paper piecing. It's common to find patterns with multiple size options, like a big quilt with 24 dinosaur blocks or a smaller baby quilt version. If you want to see a great example, Elizabeth Hartman’s dinosaur patterns on Etsy are incredibly popular and very well written.
Bring up how to press seams in a room full of quilters, and you're bound to start a lively conversation. There are two main camps, and honestly, both have their place.
Pressing to one side: This is the traditional method. You press both seam allowances toward the darker fabric, which cleverly prevents dark threads or fabric from shadowing through your lighter pieces. When you join units together, you can press the seams in opposite directions so they "nest" snugly against each other, making it super easy to get perfect points.
Pressing seams open: With this technique, you press the seam allowances open, almost like a book. Its biggest advantage is reducing bulk. The fabric is distributed evenly, resulting in a much flatter block. I find this especially helpful where many seams meet at one point—a common occurrence in detailed dinosaur blocks.
So, which way is right? It really depends on the block and your personal preference. For simpler piecing, pressing to the side is quick and works beautifully. For those complex intersections, pressing your seams open can be the key to a perfectly flat quilt top. The most important thing is to be consistent within each block.
You’ve done the hard work and now have a wonderful stack of finished dinosaur blocks. This is where the real fun begins—transforming those individual pieces into a finished quilt top! How you arrange your blocks is what gives the quilt its personality.
The most direct path is a simple grid layout. Just sew your blocks together in rows and columns. It’s clean, modern, and lets those amazing dinosaur designs be the star of the show. If you're feeling a bit more adventurous, try setting them on point by turning each square 45 degrees. This creates a really dynamic diamond pattern that adds a lot of movement.
Want to give your dinosaurs a little more breathing room? That’s where sashing comes in. Sashing is simply strips of fabric sewn between your blocks, creating a frame around each one. A solid, contrasting color will make your dinos pop, while a subtle, low-volume print can create a softer, more blended look.
For an extra design element, I love adding cornerstones—those little squares of fabric that sit where the sashing strips intersect. A tiny pop of a bright, unexpected color here can really tie the whole quilt together.
Once your blocks are all together, adding a border is like putting the perfect frame on a painting. It defines the edge of your design, gives the eye a place to rest, and keeps the whole composition from feeling like it's about to march right off the edge.
Some patterns really lean into this idea. Take the 'Dinosaur Lost World' pattern, which finishes at a generous 67 inches by 72 inches. It uses a big central panel and frames it with several beautiful borders to create a really balanced, artful quilt. You can see how fabric choices can elevate a great dino quilt pattern by checking out the details on this free dinosaur quilt pattern from eQuilter.
With your quilt top perfectly pieced, it's time to build the "quilt sandwich." This is exactly what it sounds like—three layers stacked together.
This three-layer stack is what officially turns your fabric creation into a quilt.
Before you start quilting, you have to make sure those three layers don’t shift around. This process is called basting. You have a few options here: you can use safety pins every few inches, a temporary spray adhesive made for fabric, or even long, loose hand stitches to hold it all in place.
Next up is the actual quilting—the stitching that holds it all together and adds incredible texture. You can keep it simple with straight lines that echo the seams, or you can get creative with free-motion quilting. This is like drawing with your sewing machine, allowing you to add fun swirls, pebbles, or even little dinosaur footprints across the surface.
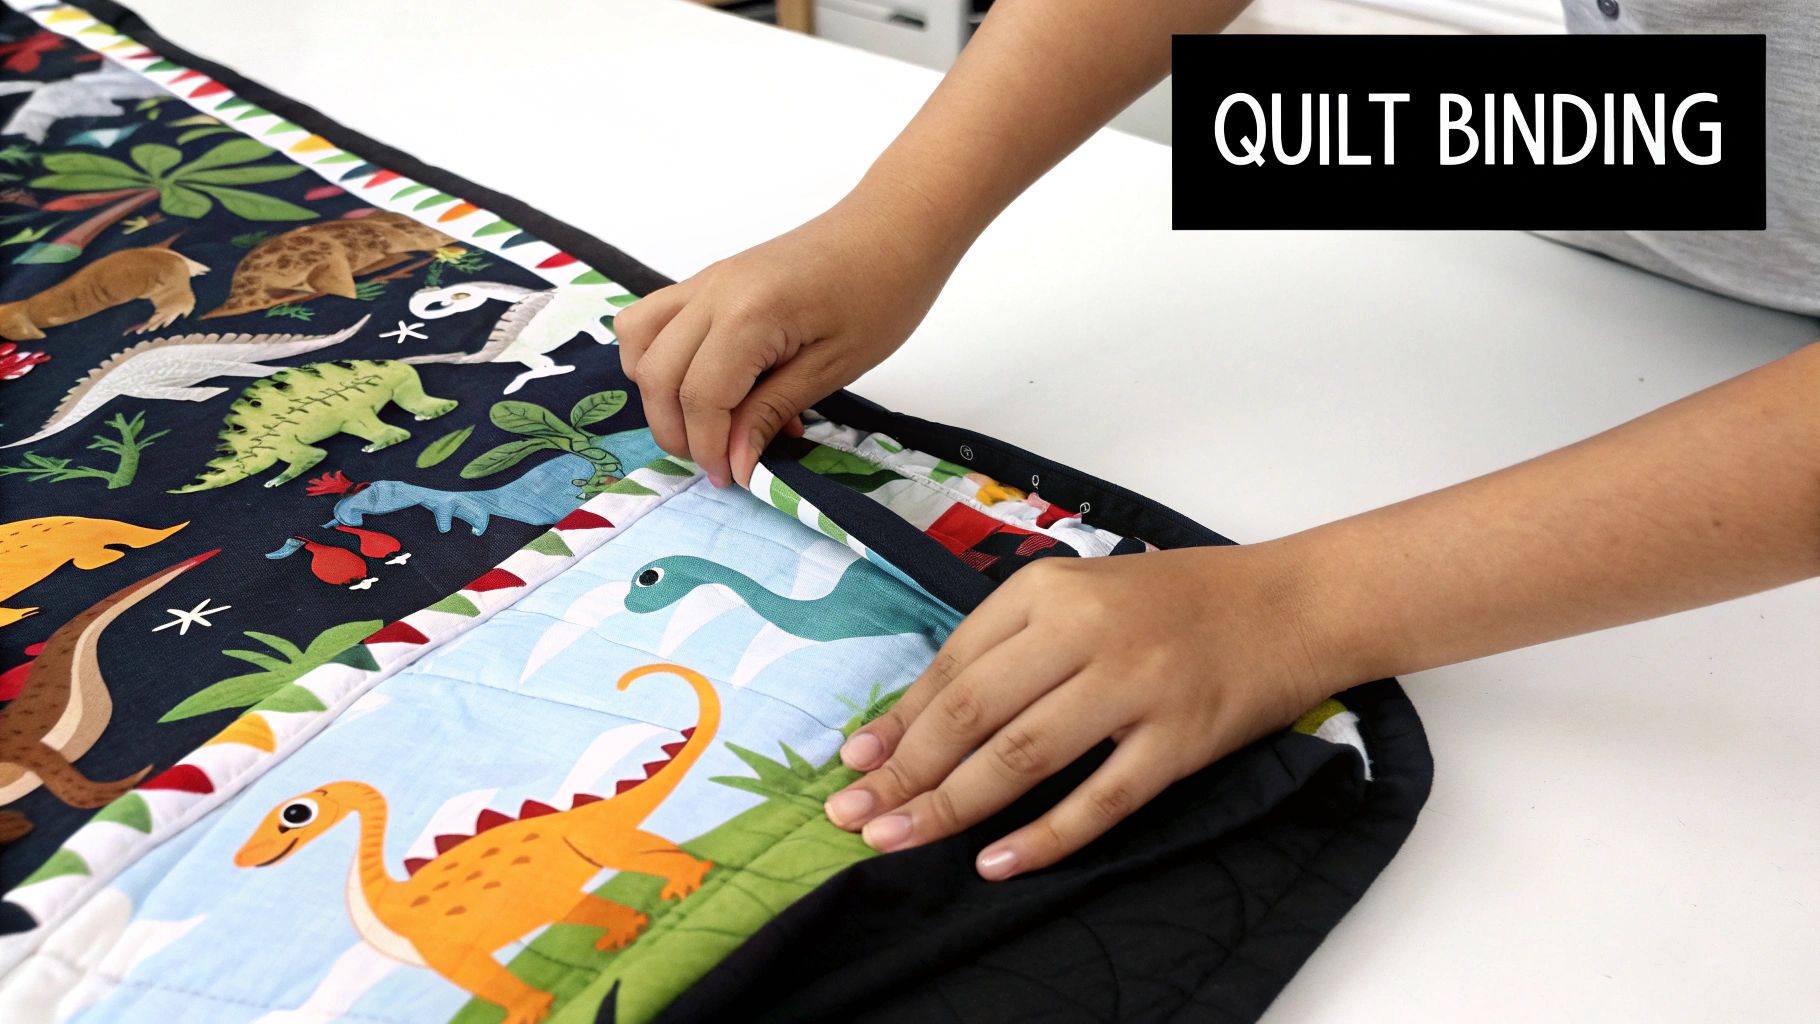
Once the quilting is done, trim the extra batting and backing fabric so they’re flush with the quilt top. The final step is adding the binding, which is a strip of fabric that neatly wraps around the raw edges, giving your quilt a durable and polished finish. It's the perfect final touch
Even the most seasoned quilter runs into a question or two, especially when starting a new project. It’s all part of the creative process! When you’re staring at a pile of dinosaur fabric, a few common queries tend to bubble up. Let's get those sorted out so you can keep your quilting mojo going strong.
Think of this as having an experienced quilter right by your side, ready to help you navigate those little bumps in the road.
For the quilt top, you really can't go wrong with 100% quilting cotton. It's the gold standard for a reason. It’s sturdy, easy to work with, presses like a dream, and the sheer number of amazing dinosaur prints out there is staggering. Plus, it holds its shape perfectly, which is exactly what you need for getting those block pieces to line up.
Now for the backing, you can introduce a wonderful, cozy texture. A lot of us love to use a soft flannel or even a plush minky fabric, particularly if the quilt is destined for a little one to snuggle. This gives you the best of both worlds: a crisp, beautifully pieced top and a cuddly, soft back.
When you're pulling your fabrics, think about how the prints will play together. A well-balanced design often includes a mix of:
And please, don't feel boxed in by the usual greens and browns! Some of the most stunning modern dino quilts I've seen use wild, imaginative color palettes. Think about hot pinks, vibrant teals, and fiery oranges. A little touch of metallic fabric can also add a magical spark.
Remember, the fabric tells the story. A mix of textures and print sizes adds depth and interest, making your quilt more dynamic and visually engaging from every angle.
Ah, the age-old quest for the perfect block! Accuracy in quilting almost always comes down to three things: your cutting, your sewing, and your pressing. If your blocks are coming out wonky, the culprit is hiding in one of those steps.
First, check your cutting. Is your rotary blade sharp? A dull blade can pull and distort the fabric. Make sure you’re using a quality quilting ruler and reading the lines carefully. It's so easy to be off by just a hair, and those hairs add up!
Next, it's all about that consistent quarter-inch seam. This is non-negotiable. Before you dive into piecing your first dinosaur, grab some scraps and sew a test seam. Measure it! A quarter-inch presser foot is a game-changer for many quilters and can really help you maintain that perfect seam allowance from start to finish.
Finally, press as you go. Don't wait until the whole block is pieced together. Pressing each seam as you sew—either to one side or open—helps your blocks lie beautifully flat, cuts down on bulk, and makes joining them together later on so much easier.
Absolutely! This is definitely something you can do. The most straightforward way to change the final size is simply to adjust the number of blocks you make. If the pattern calls for a 6x7 grid, you could shrink it to a 5x6 layout for a cozy lap quilt or make more blocks to fit a bed.
Adding wider or multiple borders is another fantastic trick. This lets you increase the quilt's dimensions without having to piece any more of the dinosaur blocks themselves. It's a simple, effective solution.
If you're thinking about resizing the actual dinosaur blocks, that’s a more advanced move. It means you’ll have to recalculate the measurements for every single piece within the block. For some digital patterns, you might be able to scale the design in a graphics program, but don't forget the most important part: you have to add the quarter-inch seam allowance back to every single resized piece before you cut.
At High Country Quilts, we have all the fabrics, tools, and expert advice you need to bring your dino quilt pattern to life. Explore our selection and get inspired at https://hcquilts.com.
At High Country Quilts we care deeply about community. With our experiences in retail, we know that a store is not only a place to shop but also a place for the community to gather and share. During this busy...

Hi! We’re Adam and Renee Wheaton, the new owners of High Country Quilts! For more than 40 years, we’ve owned and operated vacuum and sewing businesses. Following in Renee’s father’s footsteps after he retired from All Discount Vacuum and Sewing in Colorado...


Leave a comment