

We Love Our Quilting Community
At High Country Quilts we care deeply about community. With our experiences in retail, we know that a store is not only a place to shop but also a place for the community to gather and share. During this busy...


When it comes to picking the best sewing machine needles, the golden rule is to match the needle to your fabric. Think of a Universal needle as your reliable go-to for most woven fabrics like cotton. But if you’re working with knits, a Ballpoint needle is non-negotiable to avoid snags. And for those tough projects? A sturdy Denim needle is built to power through heavy materials without flinching.
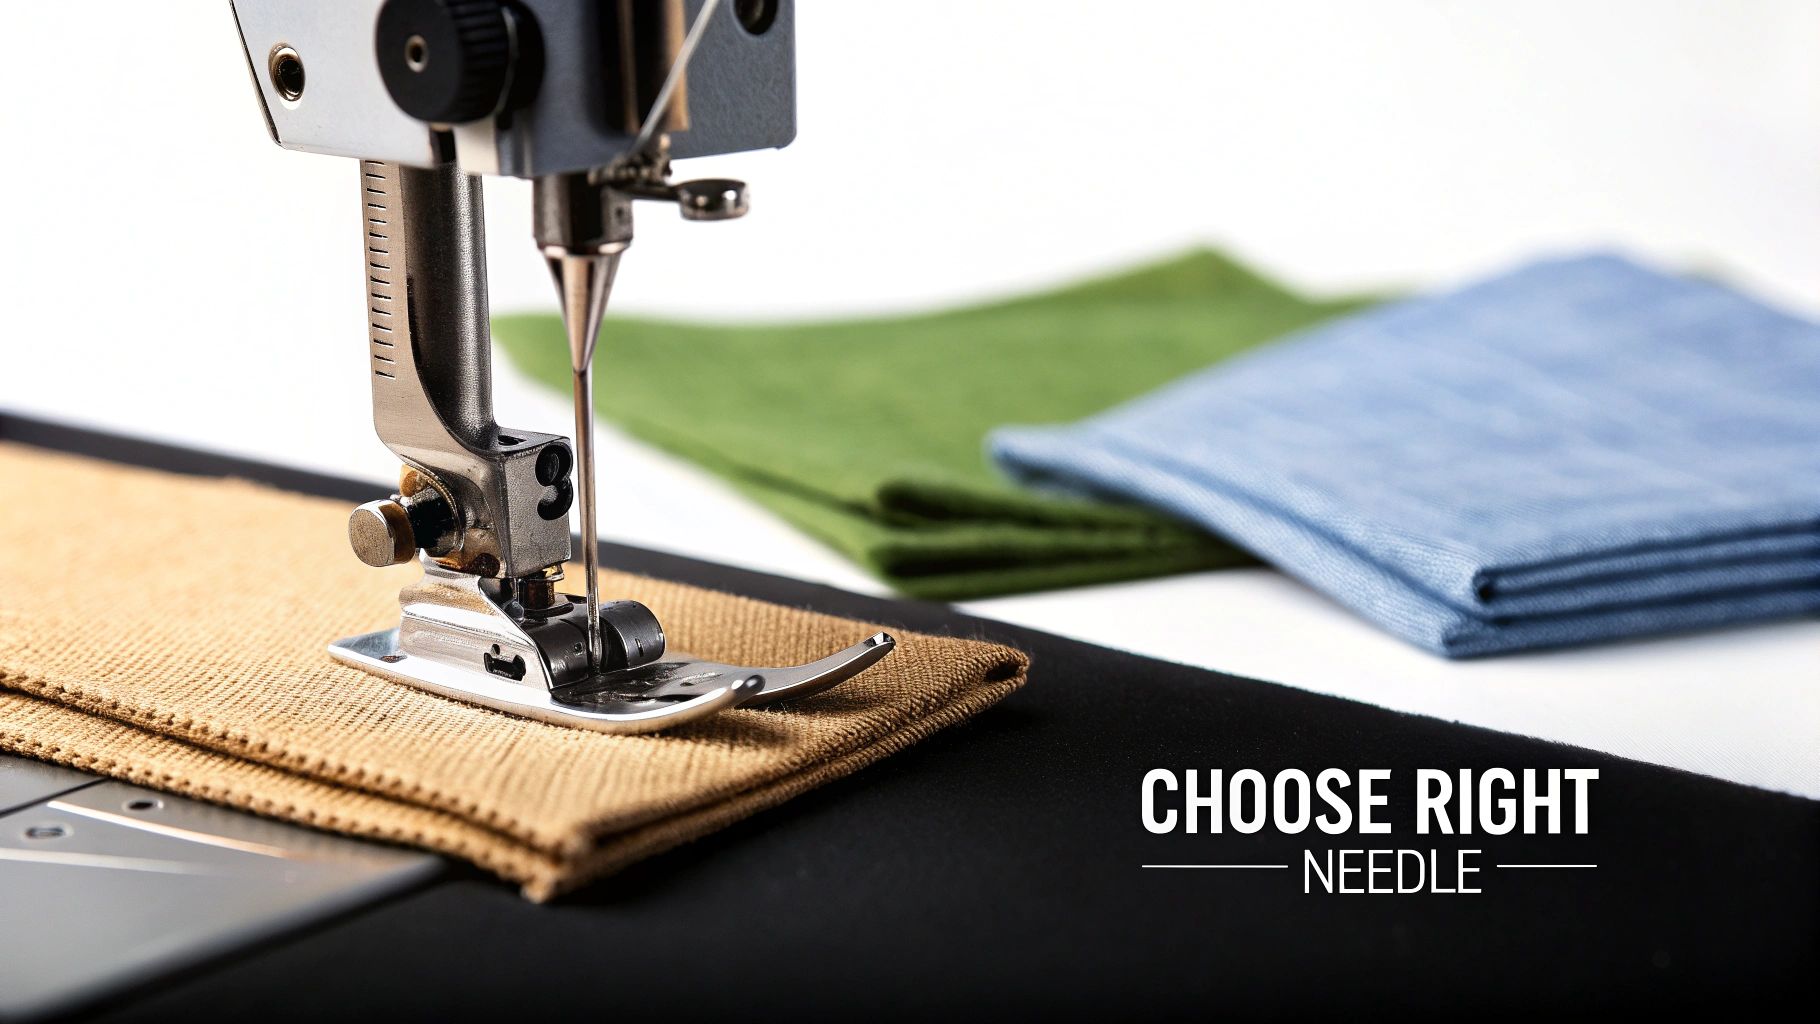
It’s so easy to get swept up in gorgeous fabrics and colorful threads, but the real hero of any sewing project is often the smallest, most overlooked part of your machine: the needle. I like to think of it as the handshake between your sewing machine and your fabric. Get that handshake right, and you’ll get smooth, strong, beautiful stitches every time.
But if you pick the wrong one? The conversation between machine and fabric falls apart, fast. This is where so many frustrating problems begin, for beginners and seasoned sewists alike. Choosing the right needle isn’t just a tiny detail—it's the very foundation of a great finished project.
Let's be honest, grabbing the wrong needle can do more than just mess up your stitches. Using a needle that’s dull, bent, or just not right for your fabric can cause real, permanent damage, like pulls or tiny holes in delicate knits. It’s also one of the top reasons people think their sewing machine is broken.
So many stitch issues—puckering, looping, you name it—get blamed on tension settings or thread quality. But more often than not, the needle is the real culprit. Learning to spot the warning signs will save you a ton of time, fabric, and headaches, all while protecting your machine from unnecessary wear and tear.
Keep an eye out for these tell-tale signs of a needle problem:
My best piece of advice? Change your needle after every 6-8 hours of active sewing, or simply start each new project with a fresh one. This one simple habit will eliminate the vast majority of stitch problems before they even start.
This guide is here to walk you through everything you need to know about choosing the perfect sewing machine needle. We’ll dive into the different types, make sense of those confusing size numbers, and show you how to match your needle to your fabric and your thread. Mastering this is a game-changer, and if you're looking for more ways to build your skills, our free sewing lessons are a great place to start.
By the time you're done here, you'll be able to walk into any craft store and pick out the right needle with total confidence.
To get the best stitches, it helps to stop thinking of a needle as just a sharp piece of metal. It's actually a tiny, brilliantly engineered tool. Every single part has a job, and understanding this anatomy is what separates good sewing from great sewing.
Think of it like this: the needle is a delivery system. Its whole purpose is to get the top thread through the fabric cleanly, hand it off to the bobbin thread below, and create a perfect lockstitch.
Every part of that needle is designed to work in sync with your machine. Once you see how the shank holds it in place or how the scarf helps form the stitch, you’ll have that "aha!" moment. You'll understand why a thick denim needle is worlds apart from a delicate ballpoint. This is how you go from guessing which needle to use to knowing you've picked the right one for the job.
Let's take a closer look at the different parts. Getting familiar with these will make you a pro at troubleshooting stitch problems later on.
The last two parts of the needle are the real MVPs of stitch formation. They work directly with the machine's hook, and understanding them is the key to solving a lot of common stitch issues.
First, you have the point. This is what makes contact with the fabric. Its shape is the most specialized part of the needle—it could be super sharp (like a Microtex needle), gently rounded (a Ballpoint), or even wedge-shaped (for leather). The point is designed to either pierce the fabric threads or gently push them aside.
Now for the secret weapon: the scarf. It’s that little indentation on the back of the needle, right above the eye. As the needle punches through the fabric and starts to rise back up, the scarf creates a tiny bit of space. This allows the machine's hook to swing in and grab the loop of thread, which is how a stitch is formed. If the hook misses that loop—maybe because the needle is in backward or is the wrong type—you get skipped stitches. Simple as that.
Understanding this anatomy turns you into a sewing detective. For example, if your thread keeps shredding, you now know to check if the needle's groove and eye are the right size for your thread. For more complex machines like sergers, a visual guide can be a lifesaver, which is why we love this Essential Serger Reference Tool. Knowing how a needle is built is the first step to mastering your machine.
Once you’ve got a handle on how a needle is built, it's time to dive into the incredible variety out there. Choosing the right needle isn’t about finding one magic bullet; it’s about building a small, smart collection of tools for the projects you love to sew. Each needle type is engineered with a specific point and eye to solve a unique problem, whether that’s gliding through stretchy knits or punching through tough leather.
Think of your needles like a set of specialized keys. A Universal needle might open a few common doors, but it’s not going to work on a high-security lock. For that, you need a key cut with absolute precision—just like you need a Microtex needle for delicate silks or a Denim needle for heavy twill. Using the right "key" makes all the difference.
This diagram breaks down the essential parts of a sewing machine needle, showing how each component works together to create that perfect stitch.
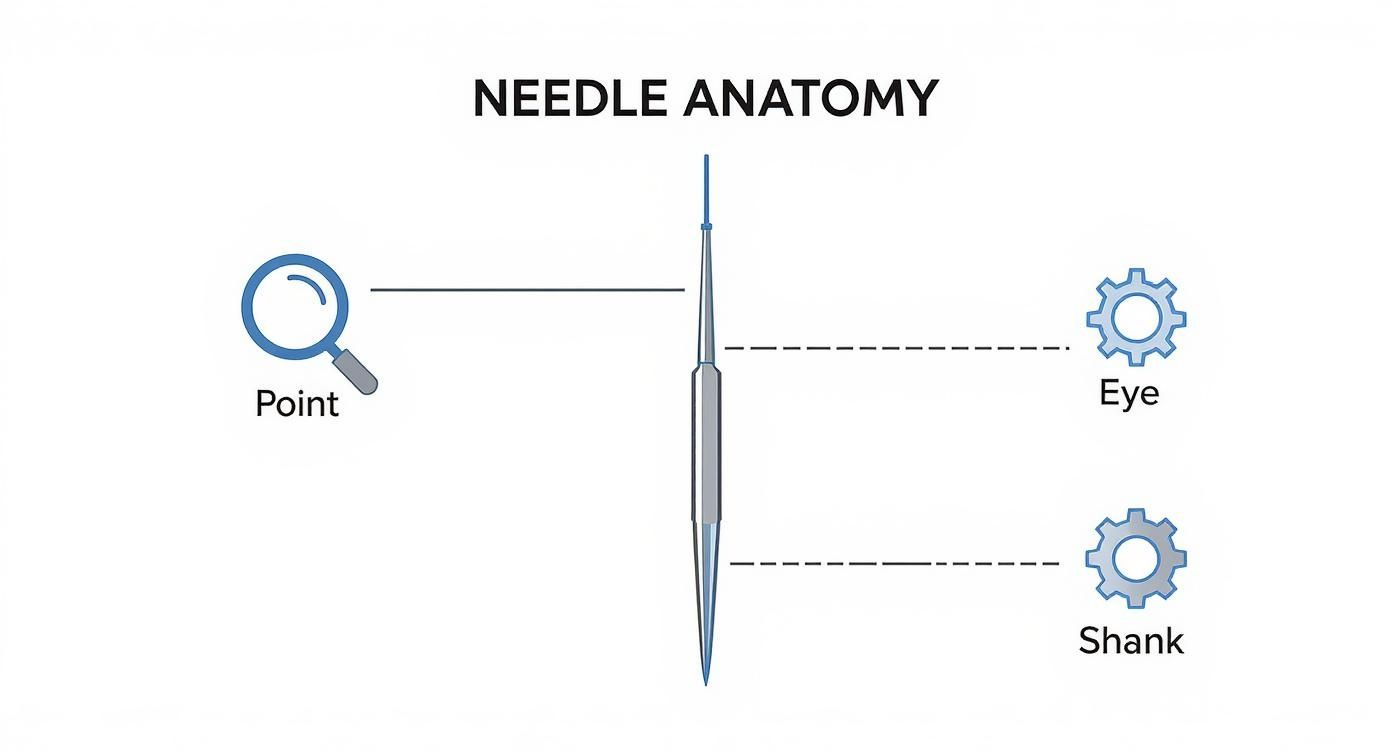
As you can see, a needle's performance comes from its entire design, not just a sharp tip. Every single part is optimized for different threads and fabrics.
Getting to know the main players in the needle world is the first step to sewing with confidence. Let’s break down the most common types you'll find and what they’re actually for.
Universal Needles: This is your go-to, the jack-of-all-trades. With a slightly rounded point, it’s designed to perform reasonably well on a whole host of woven fabrics like cotton, linen, and basic polyester blends. It’s the needle that usually comes with a new machine and is a solid starting point for general projects.
Ballpoint (or Jersey) Needles: If you sew with knits, this one is a must-have. Its rounded tip doesn't actually pierce the fabric. Instead, it gently pushes the fibers apart, slipping between the threads of the knit. This simple design trick is what prevents the runs, holes, and skipped stitches that happen when a sharp needle tears right through a knit's delicate loops.
Stretch Needles: Think of this as the ballpoint’s highly specialized cousin. A stretch needle is your best friend for fabrics with a lot of spandex or Lycra, like swimwear and activewear. It has a deeper scarf (the groove on the back) and a specially shaped eye to eliminate skipped stitches when you’re working with super-stretchy materials.
A classic beginner's mistake is using a Universal needle on knit fabric. It might seem fine for a few stitches, but that sharp point is actually shredding the tiny fibers. This creates permanent holes that often get bigger and more obvious after the first wash.
When you graduate from basic cottons, you’ll need a needle with a bit more muscle or finesse. These specialized options are engineered for demanding materials, giving you clean, professional results where a standard needle would just give up.
These are your precision instruments. A Microtex needle has an extremely fine, sharp point designed to pierce delicate or high-thread-count woven fabrics without leaving a trace. It’s the perfect choice for:
Built tough, the Denim needle has a reinforced blade and a very sharp point. This design gives it the strength to penetrate dense, tightly woven fabrics like denim, canvas, and duck cloth without bending or breaking.
This needle is in a class of its own. It features a unique wedge-shaped point that acts like a tiny blade, cleanly slicing through leather, suede, and heavy vinyl. A word of caution: never use a leather needle on woven or knit fabrics. That slicing action will permanently sever the fibers and ruin your material.
Once you’ve picked the right type of needle, the last piece of the puzzle is selecting the right size. You’ve probably seen two numbers on the package, like 80/12. This dual-numbering system can seem confusing, but it’s actually pretty straightforward.
For both systems, the rule is the same: the lower the number, the finer the needle. A 60/8 needle is very fine and best for delicates, while a 110/18 is thick and strong, ready for heavy-duty work. The goal is always to match the needle size to the fabric's weight. A fine needle will snap on heavy fabric, and a thick needle will leave unsightly holes in delicate fabric.
To make things easier, here’s a quick reference chart to help you match needle sizes to common fabrics.
This table is a great starting point for matching the needle size to your fabric's weight. Remember to also consider your thread weight—heavier thread may require a slighter larger needle.
| Needle Size (American/European) | Fabric Weight | Fabric Examples |
|---|---|---|
| 60/8, 65/9, 70/10 | Very Fine/Light | Chiffon, Organza, Silk, Voile, Batiste |
| 75/11, 80/12 | Lightweight | Quilting Cotton, Poplin, Linen, Chambray, Knits |
| 90/14 | Medium Weight | Flannel, Corduroy, Heavier Knits, Light Denim |
| 100/16 | Heavy Weight | Denim, Canvas, Duck Cloth, Upholstery Fabric |
| 110/18, 120/19 | Very Heavy Duty | Heavy Canvas, Thick Leather, Multiple Layers |
By pairing the right needle type with the correct size, you’re not just guessing—you’re making a strategic choice. This knowledge is what separates frustrating sewing sessions from successful projects with stitches you can be proud of.
Getting a beautiful, strong stitch is all about teamwork. Think of your needle, fabric, and thread as a trio that needs to be in perfect harmony. If one of them is out of sync, the whole project can fall flat. Nailing this combination is what separates a frustrating sewing session from a fantastic one.
The basic idea is pretty simple: your needle has to be the right partner for both the fabric it’s piercing and the thread it’s pulling. This single decision affects everything from how your stitches look to how smoothly your machine runs.
Once you get the hang of it, choosing the right needle becomes second nature. Let's walk through how to get it right every single time.
First things first, let's talk about the relationship between your needle’s point and your fabric. The goal here is simple: get through the fabric without hurting it. Using the wrong needle is like trying to use a sledgehammer to hang a picture frame—you might get the job done, but you’ll leave a mess behind.
For instance, if you try sewing a stretchy t-shirt knit with a super-sharp Microtex needle, you're in for trouble. That sharp point won't gently nudge the delicate knit fibers apart; it will slice right through them. This creates tiny, permanent holes that can easily turn into runs after a few washes.
Now, flip that scenario. What happens if you use a rounded ballpoint needle on a tough, tightly woven fabric like denim? The needle’s duller point will struggle to get through, often causing it to bend or deflect. This is when you hear that awful "thwump-thwump-thwump" sound and see a trail of skipped stitches.
The Golden Rule of Needle and Fabric: Wovens need a sharp point to cleanly pierce the threads. Knits need a rounded or ballpoint to slide between the fibers without breaking them.
The next crucial partnership is between your thread and your needle. The thread has to glide effortlessly through the needle's eye and groove. Any friction or strain here is a recipe for disaster.
A classic mistake is forcing a thick, heavy topstitching thread through the eye of a fine 70/10 needle. The eye is just too small. The thread will shred, fray, and eventually snap, all while gumming up the needle’s eye with lint and throwing your tension completely out of whack.
But the opposite can also cause problems. Using a very fine thread—like this lovely 60wt polyester—with a huge topstitching needle isn't ideal either. The thread has too much wiggle room in that oversized eye, which prevents the machine from forming a tight, controlled stitch. The result? Sloppy loops and inconsistent tension.
You don't need to overthink it. Just run through this quick two-step check before you start any new project. It'll become a habit in no time.
Start with the Fabric: First, figure out if your fabric is a woven, knit, denim, or something else. This tells you which needle type to grab (Universal, Ballpoint, Denim, etc.). Next, check its weight—is it a lightweight chiffon or a heavy canvas? This helps you pick the right needle size (like a 70/10 for the light stuff or a 100/16 for the heavyweights).
Then Check the Thread: Now, look at your thread. A good rule of thumb is that the needle's eye should be about 40% larger than the thread's diameter. The easiest way to check is with a quick visual test: thread the needle and hold it up. The thread should fill about two-thirds of the eye, moving freely without being pinched.
Choosing the right needle isn't just a personal preference; it's part of a massive global industry. In recent years, worldwide needle consumption hit an estimated 46 million units, a 33% increase fueled by both industrial manufacturing and a renewed passion for home sewing. It’s a small reminder of how many people rely on this tiny tool. By taking a moment to match your needle to your project, you're not just avoiding problems—you're honoring a tradition of quality craftsmanship.

Even after you’ve carefully selected what seems like the perfect needle, things can still go sideways. A sudden flurry of skipped stitches or a puckered seam can completely derail your creative flow. Before you start fiddling with your machine’s tension dials, take a deep breath. More often than not, the needle is the silent culprit.
Think of yourself as a sewing detective. When a problem pops up, your needle should be the very first suspect. Learning to spot the clues it leaves behind will help you solve issues in a snap, saving you from frustrating guesswork and wasted fabric. It's a skill that truly separates beginners from confident, experienced sewists.
Before you dive into any complex fixes, always start with the simplest solution: a fresh needle. You’d be amazed how many stitch problems vanish with that one easy step.
Your sewing machine is constantly talking to you through its stitches. When something’s off, the message is usually pretty clear, and it almost always points back to a dull, damaged, or incorrect needle.
One of the most obvious clues is an audible "thumping" or "punching" sound as the needle tries to enter the fabric. A sharp, happy needle should glide through the material almost silently. That thumping is the sound of a blunt point literally forcing its way through the fibers, which can cause permanent damage.
Here are a few other common cries for help from your machine:
Pro Tip: Never underestimate how critical proper needle installation is. If a needle isn't pushed all the way up into the shaft or is facing the wrong direction, it's a guaranteed recipe for skipped stitches and wonky seams. Always, always double-check that the flat side of the shank is facing the back of your machine.
When stitch problems strike, stay calm and work through this simple process. This methodical approach will help you pinpoint the real cause without messing up your machine's settings for no reason.
Step 1: Assess the Stitch Problem
Step 2: Examine Your Needle Ask yourself two questions. Is it the right type for your fabric (e.g., ballpoint for knit, sharp for woven)? And is it the right size for your fabric's weight? A needle that's too fine will bend or break on heavy denim, while one that's too thick will leave gaping holes in delicate silk.
Step 3: Just Change the Needle Even if it looks perfectly fine, swap it for a new one. Needles get dull and develop microscopic burrs that you can't see with the naked eye. Stick to the golden rule: change your needle after every 6-8 hours of sewing. This one simple habit prevents the vast majority of stitch problems before they even start, making it the most powerful troubleshooting tool you have.
Taking care of your needles is just as important as picking the right one. Honestly, it’s the best preventative maintenance you can do for your sewing. A little bit of attention here will save you a world of frustration down the road. When your needle collection is organized and well-maintained, you’ll always have the perfect tool ready to go for any project that inspires you.
The single most important habit you can build is changing your needle often. Most of us who sew for a living will tell you the same thing: a needle is only good for about 6 to 8 hours of actual sewing time. After that, it's done. A good rule of thumb is to start every new project with a fresh needle.
Even after just a few hours, the needle's point gets microscopically dull. Instead of piercing the fabric cleanly, it starts punching its way through. That’s when you get skipped stitches, snagged fabric, and that awful thump-thump-thump sound that makes you cringe.
It's hard to make a good choice when all your needles are in a jumbled mess. You end up grabbing what’s closest, not what’s correct. A little organization here makes a massive difference.
When a needle is done, you can't just toss it in the bin. A used needle can easily poke through a trash bag and hurt someone. I keep an old spice jar on my sewing table as a "sharps" container. An empty pill bottle or small tin works perfectly, too. Once it's full, just tape it shut and then throw it away.
Staying organized isn't just about being tidy—it protects your fingers and makes your sewing time so much more efficient. A clear workspace lets you focus on your creativity, not on hunting for a tool. For anyone who finds threading a hassle, a gadget like the Quick Desk Needle Threader is an absolute game-changer. It makes the process so much faster and saves your eyes a ton of strain.
It’s amazing how important this tiny component is. The global sewing machine needle market was recently valued at around USD 1.24 billion, a figure that’s growing thanks to both industrial manufacturing and the huge community of home sewists like us. It just goes to show how vital this little piece of steel is to creators everywhere. You can learn more about these market findings and the needle's global impact.
It's totally normal to have questions when you're sorting through all the different sewing machine needles out there. Getting the right answers can save you a lot of headaches and keep your projects on track. Let's tackle a couple of the most common ones I hear from fellow sewists.
This is the big one! As a rule of thumb, it's best to pop in a fresh needle after every 6 to 8 hours of actual sewing time. A simpler way to remember is to just start each new project with a new needle.
Needles are cheap, but the problems a dull one can cause—like skipped stitches, pulled threads, and even fabric damage—are a huge pain. Swapping it out regularly is probably the easiest, most affordable thing you can do to get that clean, professional look.
Oh, I wish! While a universal needle is a fantastic workhorse for a lot of basic woven fabrics (think cotton poplin or quilting cotton), it's definitely not a one-size-fits-all solution.
If you try to use one on a stretchy knit fabric, you're practically asking for skipped stitches and little holes, because its slightly sharp point can tear the delicate fibers. A ballpoint needle is what you need there; it's designed to slide between the threads instead of piercing them.
When you're working with specialty fabrics, grabbing the right tool for the job makes all the difference. A Microtex needle will glide through silky chiffon like a dream, and a tough Jeans needle will prevent a world of frustration on denim. Don't be afraid to specialize—it's worth it!
At Famcut, we're all about making sure you have the right tools to bring your ideas to life. Come explore our hand-picked selection of high-quality sewing supplies and find local classes to build your skills with confidence. Let's get your next project started
At High Country Quilts we care deeply about community. With our experiences in retail, we know that a store is not only a place to shop but also a place for the community to gather and share. During this busy...

Hi! We’re Adam and Renee Wheaton, the new owners of High Country Quilts! For more than 40 years, we’ve owned and operated vacuum and sewing businesses. Following in Renee’s father’s footsteps after he retired from All Discount Vacuum and Sewing in Colorado...


Leave a comment