

We Love Our Quilting Community
At High Country Quilts we care deeply about community. With our experiences in retail, we know that a store is not only a place to shop but also a place for the community to gather and share. During this busy...


Embarking on a sewing journey is an exciting step towards creating beautiful, handmade items you can be proud of. Whether you've just unboxed your first sewing machine or are rediscovering a cherished hobby, the key to success is starting with projects that build confidence and teach fundamental skills without becoming overwhelming. This guide is your roadmap to the best beginner sewing projects, each carefully selected to help you master the basics one stitch at a time.
We've designed this roundup to be your go-to resource, moving beyond generic lists to provide a structured path for learning. Instead of complex patterns and frustrating techniques, we are focusing on fun, functional, and genuinely achievable creations. From a simple tote bag and quilted coasters to your first patchwork quilt block, each project is a practical stepping stone. They are specifically chosen to introduce core concepts in a manageable way, such as sewing straight lines, finishing seams, and understanding fabric grain.
In this comprehensive listicle, you will find everything you need to start your first creation with confidence. For each of the handpicked projects, we'll provide:
Think of this as your first class in a needle and thread. Each project builds upon the last, equipping you with a versatile skill set that will serve you for years to come. Let's thread your needle and begin creating something wonderful together.
A simple tote bag is arguably one of the best beginner sewing projects because it builds a strong foundation of core skills on a forgiving and practical item. The project involves cutting two main rectangular fabric pieces, sewing them together, and attaching handles. This straightforward process is the perfect introduction to sewing machine operation, straight-line stitching, seam finishing, and pressing.
Unlike more complex garments, a tote bag doesn't require precise fitting or intricate techniques like inserting zippers or creating buttonholes. Its simple, geometric construction allows you to focus purely on mastering the fundamentals. You’ll leave your first session with a functional, stylish bag you can use immediately for groceries, books, or craft supplies.
This project is your training ground for essential sewing habits. Focus on cutting your fabric accurately using a rotary cutter and mat for clean, straight edges. Before you even touch your main fabric, run a few practice stitches on a scrap piece to test your machine's tension and get a feel for controlling the speed.
For a guided experience through your first tote, learn more by exploring our hands-on sewing fundamentals course at High Country Quilts.
Quilted coasters are a fantastic gateway into the world of quilting, offering a small-scale project to practice layering, quilting, and binding. This project involves sandwiching a small piece of batting between a top and backing fabric, stitching through all layers to create a "quilted" effect, and then finishing the raw edges with binding. It’s an ideal way to learn the basic anatomy of a quilt without the commitment of a large-scale project.
These mini-quilts are perfect for using up fabric scraps and building confidence. Because they are small and quick to complete, you can experiment with different piecing techniques, quilting designs, and color combinations. The result is a charming and practical set of coasters, perfect for gifting or adding a handmade touch to your home decor, making it one of the best beginner sewing projects for aspiring quilters.
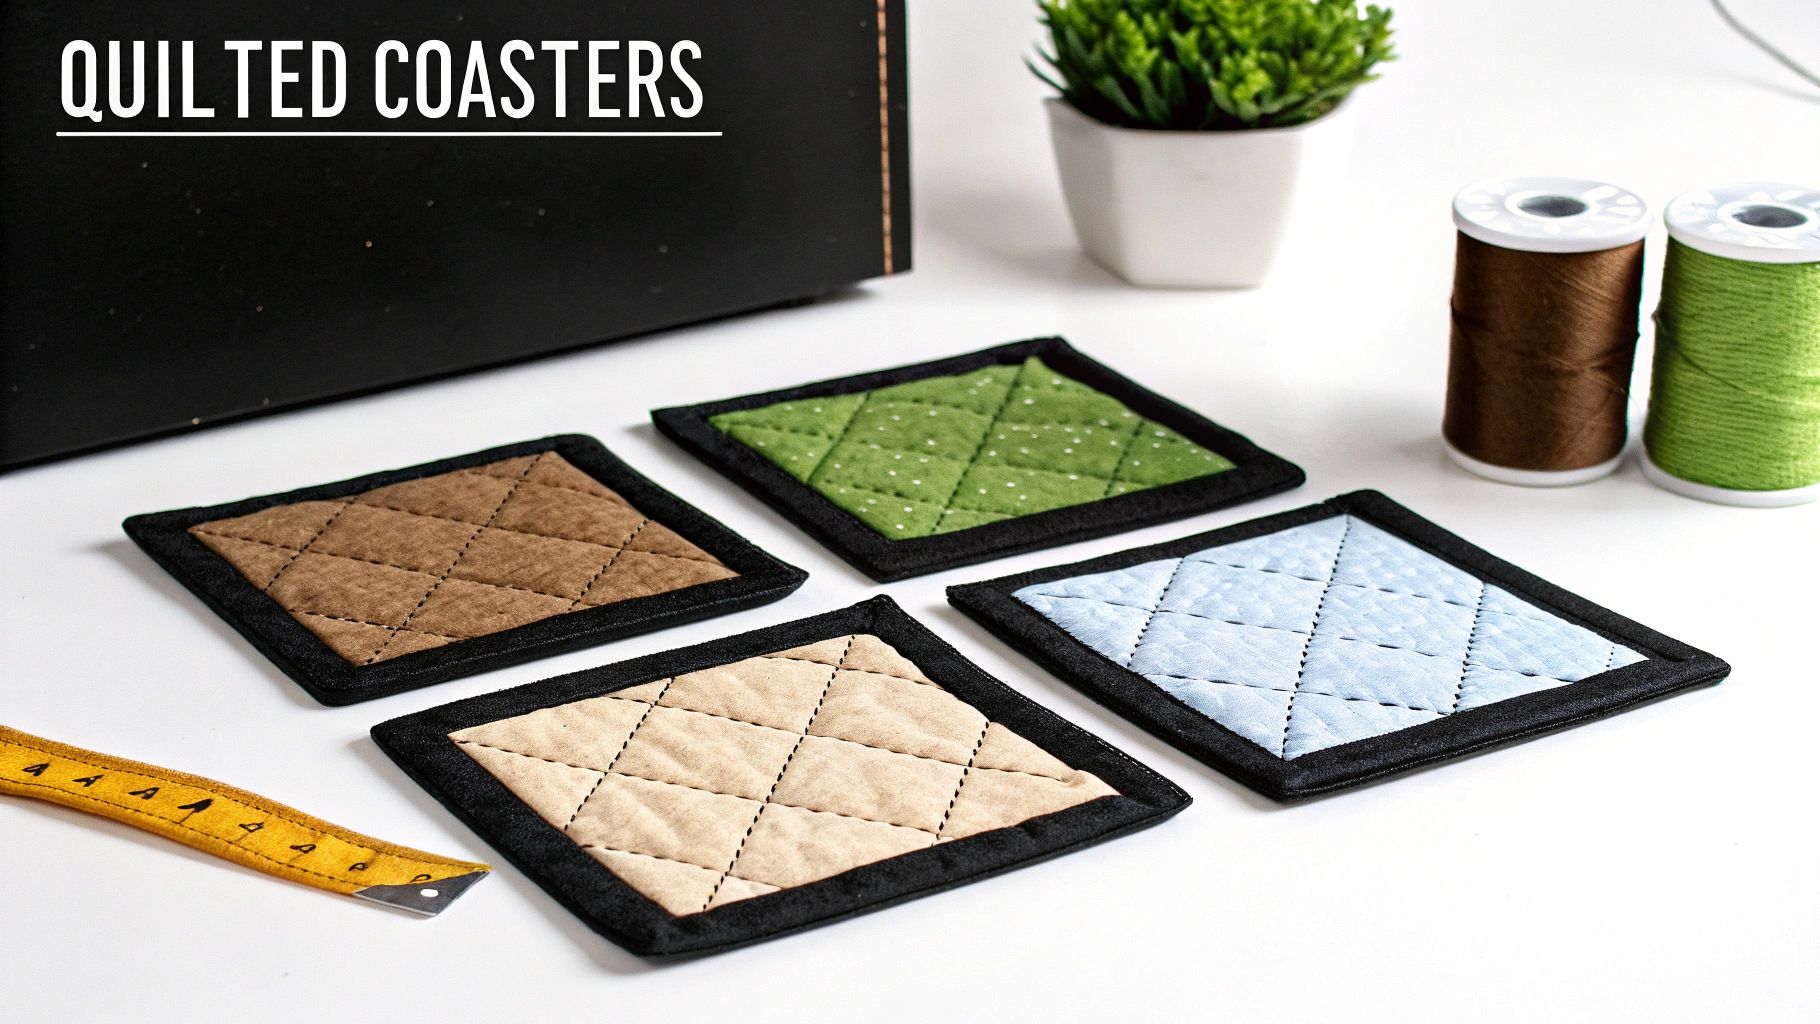
This project introduces you to the concept of a "quilt sandwich" (top, batting, backing) and the importance of even stitching through multiple layers. Before you start, press all your fabric pieces thoroughly to ensure accurate piecing. When you quilt the layers together, start from the center and work your way out to prevent the fabric from bunching up.
For those interested in partnering on creative projects like this, you can explore opportunities to work with us by reviewing our gifted collaboration application.
Sewing a pillowcase is a classic entry into the world of home décor projects and stands out as one of the best beginner sewing projects for its simplicity and practicality. The process involves sewing a few straight lines to join rectangular fabric pieces, making it an excellent way to build confidence. It introduces fundamental skills like creating a clean hem, sewing French seams for a professional finish, and achieving sharp, tidy corners.
This project offers immediate gratification, transforming a yard of fabric into a functional and decorative item for your home in just a short time. Unlike a tote bag, a pillowcase requires a bit more attention to seam finishing and precise corner turning, providing a gentle step up in skill without being overwhelming. You'll finish with a custom piece that adds a personal touch to any bedroom or living space.
A well-made pillowcase hinges on clean finishing techniques. Mastering these will elevate all your future sewing projects. Focus on sewing straight seams and pressing at every step to ensure your final product is crisp and professional.
For more inspiration on using custom textiles in your projects, you can explore how creators are getting their unique designs noticed by submitting an influencer gifting application form.
Dipping your toes into the world of quilting can seem intimidating, but starting with a basic patchwork quilt block is one of the most rewarding beginner sewing projects available. A simple Nine-Patch (nine squares in a 3x3 grid) or a Four-Patch (four squares in a 2x2 grid) block is the perfect introduction to the art of piecing. This project teaches precision cutting and the importance of a consistent quarter-inch seam allowance, two of the most critical skills in quilting.
Unlike a large, single-piece project, creating small, manageable blocks allows you to build confidence with each completed square. The process of arranging simple geometric shapes into a beautiful, repeating pattern is incredibly satisfying. You can start with just one block to make a coaster or potholder, or continue making them to assemble a larger item like a table runner, pillow cover, or even your very first quilt top.
Accuracy is the name of the game in quilting. This project hones your ability to cut and sew with precision, which translates to all other types of sewing. Taking the time to master these fundamentals will pay off immensely as your skills grow.
Ready to start your quilting journey? Join our Quilting 101 workshop to master the Nine-Patch and build your first project with expert guidance.
A simple drawstring bag is a fantastic project that introduces a new mechanical element: a casing and closure system. The project involves sewing a basic pouch and then creating a channel at the top to thread a cord or ribbon through. This process teaches you how to create a functional closure without the complexity of zippers or buttons, making it one of the most rewarding and best beginner sewing projects.
These versatile little bags are incredibly quick to make and can be used immediately for countless purposes. Whether you need a dice bag for game night, a reusable gift bag, or a small pouch to organize your notions, this project delivers a satisfying and useful finished product. Its simple construction allows you to practice straight stitching and pivoting at corners while learning a valuable new technique.
This project is your first step into creating functional closures and moving parts. The key to a great drawstring bag is a well-constructed casing that allows the cord to move freely. Take your time folding and pressing the casing to ensure it's even all the way around.
Creating your own napkins and table linens is a fantastic way to practice one of the most essential sewing skills: hemming. This project is deceptively simple yet offers a huge payoff, transforming any dining experience with a personal, handmade touch. The core task involves cutting fabric into squares or rectangles and finishing the edges, which is the perfect, low-stakes way to master sewing straight, even hems.
Unlike projects that require complex patterns, napkins allow you to focus entirely on precision and technique. You can start with basic folded hems and gradually advance to more decorative finishes like mitered corners or bias-bound edges. The result is a beautiful and functional set of linens that makes this one of the most rewarding and best beginner sewing projects for building foundational skills.
This project is all about creating crisp, professional-looking edges. Accuracy in cutting and pressing is paramount to achieving a polished result. Before you begin, decide on your hemming method, as this will influence how much seam allowance you need.
For more inspiration on how to style and share your beautiful creations, you can explore platforms that feature handmade content.
A fat quarter project is a fantastic entry point into the world of quilting, offering one of the best beginner sewing projects for those who love color and pattern. Fat quarters are pre-cut pieces of fabric (typically 18x22 inches) sold in coordinating bundles, which removes the guesswork of fabric selection. Using them to create a small wall hanging or mini quilt introduces core quilting skills like piecing, quilting, and binding on a manageable scale.
This project is perfect for learning precision and straight-line sewing without the commitment of a large, bed-sized quilt. The pre-cut nature of the fabric allows you to dive straight into the fun part: arranging your squares and sewing them together. You’ll finish with a beautiful piece of art to hang on your wall or use as a table topper, providing a huge sense of accomplishment.
Accuracy is the name of the game in quilting. This project teaches you the importance of a consistent quarter-inch seam allowance, which is the standard for piecing quilt blocks together. Pressing your seams correctly is also crucial for helping your points and corners match up neatly.
To get started with the fundamentals of quilting, join our Beginning Quilting workshop where we guide you through every step.
An apron is a fantastic first garment project because it introduces key clothing construction concepts without the stress of precise fitting. It combines straight and curved sewing, attaching straps, and adding functional details like pockets, all on a simple, flat piece of fabric. Whether you opt for a basic bib style or a more detailed full apron, the process teaches valuable skills in a forgiving format.
This project is one of the best beginner sewing projects as it allows for immense creativity while remaining practical. You'll end up with a useful item for the kitchen, garden, or craft room, built with skills that directly translate to more complex future garments. It's the perfect stepping stone from simple rectangles to wearable art.
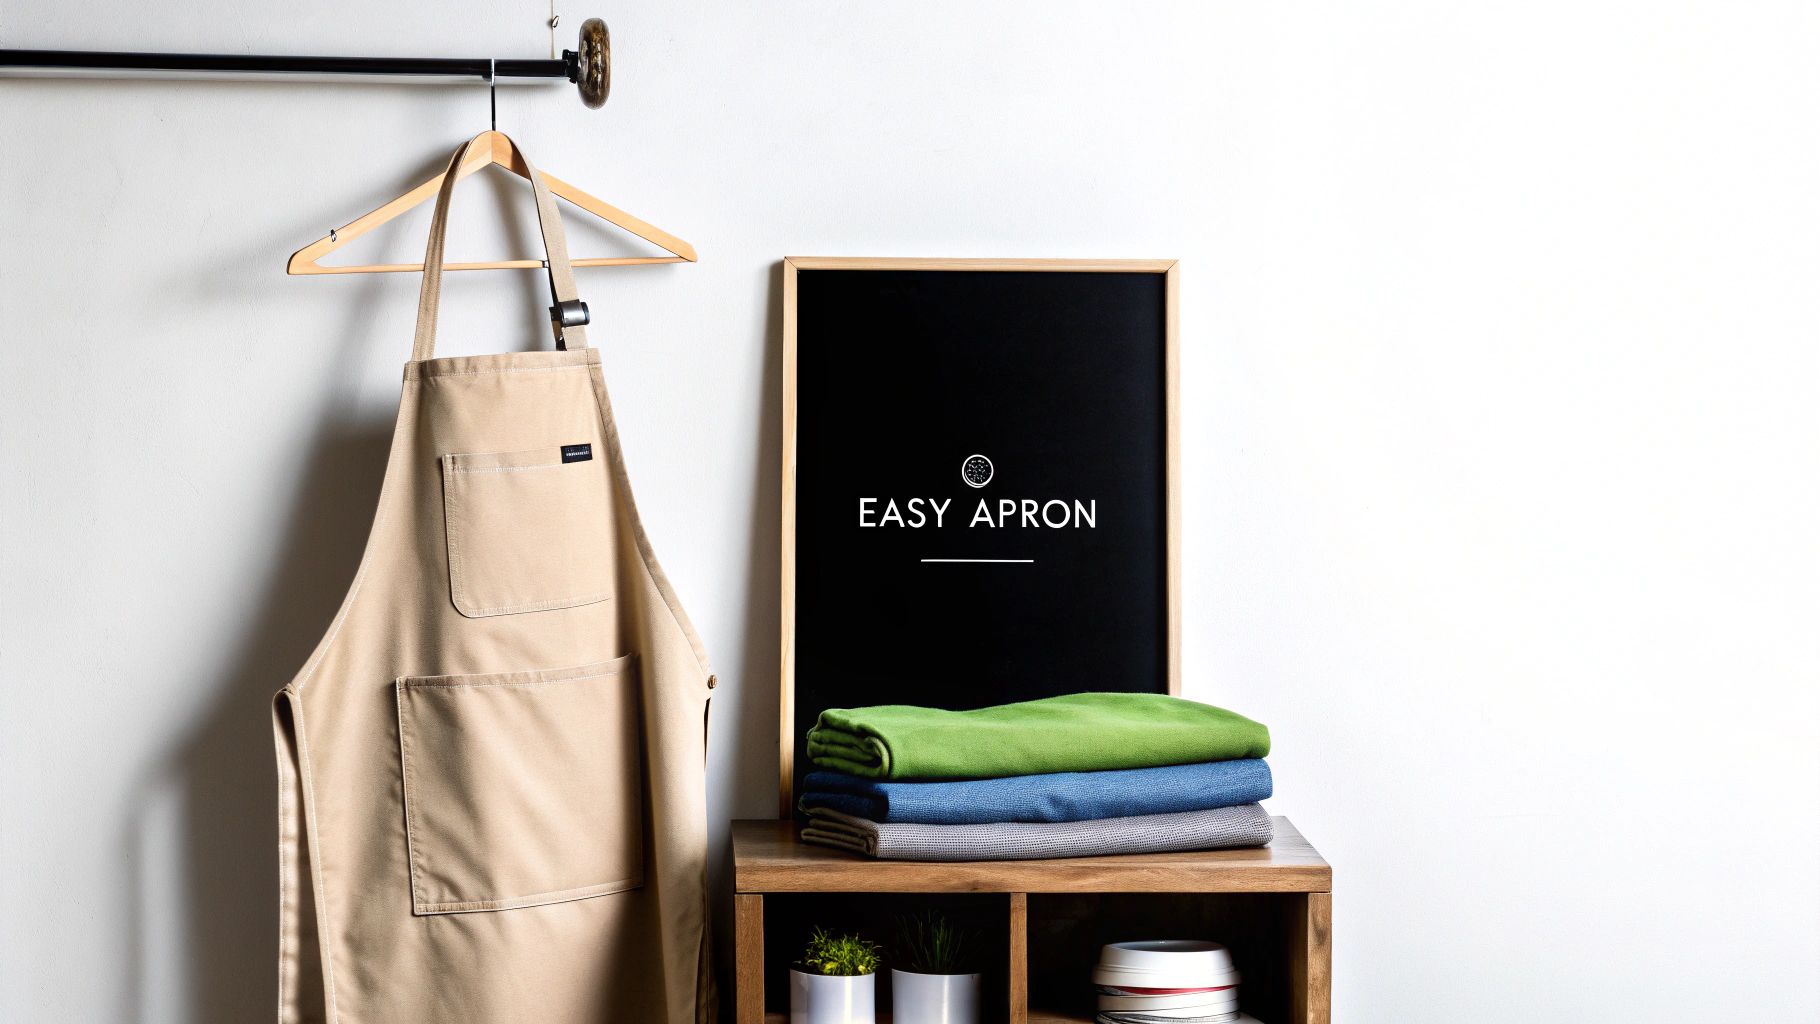
The beauty of an apron lies in its details. This is your chance to practice topstitching, adding pockets, and creating ties or straps. Focus on clean finishes to give your project a professional look that will last through many uses.
Ready to create your own custom apron? Join one of our beginner sewing workshops to get expert guidance and master these new techniques.
A quilted placemat set is an ideal entry into the world of quilting, offering all the essential steps of a full-sized quilt on a small, manageable scale. The project involves creating a "quilt sandwich" with a top fabric layer, batting in the middle, and a backing fabric. These layers are then stitched together (quilted), and the raw edges are finished with binding. This process introduces you to piecing, quilting, and binding without the commitment of a large project.
Unlike a massive bed quilt, a set of placemats provides quick gratification and a highly functional result. You'll learn how to handle multiple layers of fabric and batting, create decorative stitching, and apply a neat binding. By the end, you'll have a beautiful, handmade set of linens to decorate your table or give as a thoughtful gift, making this one of the most rewarding and best beginner sewing projects.
This project is a fantastic introduction to quilting fundamentals. Precision is helpful, but the small size makes it very forgiving. Using precut fabric squares (charm packs) or strips can simplify the piecing process, allowing you to focus on assembly and quilting.
Diving into quilting can seem intimidating, but a fabric scrap quilt is one of the most accessible and rewarding best beginner sewing projects. Using pre-cut fabric bundles like charm packs (5-inch squares) or jelly rolls (2.5-inch strips) removes the most tedious step: cutting. This allows you to jump straight into the fun part of arranging colors and piecing them together.
This project introduces you to the core principles of quilting, including sewing a consistent quarter-inch seam, pressing seams, and assembling blocks into a larger design. The result is a beautiful and functional quilt top made from a coordinated collection of fabrics. You’ll create something cozy and impressive while building skills that translate to more complex quilting endeavors.
Accuracy is the name of the game in quilting. Focus on sewing a consistent seam allowance, as even small variations can affect how your final blocks line up. A quarter-inch presser foot is an invaluable tool for achieving this precision from the very start.
| Project | 🔄 Implementation Complexity | ⚡ Resource Requirements & Time | 📊 Expected Outcomes | 💡 Ideal Use Cases | ⭐ Key Advantages |
|---|---|---|---|---|---|
| Simple Tote Bag | Low — straight seams, basic assembly | Minimal fabric (1–2 yd), thread, optional webbing; 2–3 hrs | Functional bag; builds basic machine skills | Beginner practice, reusable shopping bag | Low cost, quick, highly customizable |
| Quilted Coasters | Low–Medium — three-layer quilting, small binding | Scrap fabric, batting, binding; 30–60 min per coaster | Small decorative set; quilting & binding basics | Learning quilting, gift sets, scrap use | Fast, uses leftovers, introduces quilting |
| Pillowcase | Low–Medium — turning, neat corners, optional zipper | 2–3 fabric pieces; finishing tools; 2–4 hrs | Usable home décor; finishing technique practice | Learning turning seams, closures, décor projects | Teaches neat finishing; versatile designs |
| Patchwork Quilt Block (Four/Nine‑Patch) | Medium — precise ¼" seams, rotary cutting | Small squares, rotary cutter, ruler; minutes per block | Foundation quilting skills; repeatable blocks | Skill-building for quilting, accuracy practice | Teaches precision; scalable to full quilts |
| Simple Drawstring Bag | Low — casing and turning | Minimal fabric, cord/ribbon; 1–2 hrs | Small pouch; casing/closure skill | Quick gifts, storage pouches, gaming dice bag | Very quick, minimal materials, practical |
| Napkins & Table Linens | Low–Medium — hemming, mitered corners | Fabric by set size; hemming tools; efficient in batches | Elegant table linens; hemming proficiency | Home décor, gifts, practicing hems | Teaches hemming; produces coordinated sets |
| Fat Quarter Bundle Projects | Medium — piecing, quilting small quilt | Fat quarters (pre-cut), batting, backing; weekend project | Mini quilt/wall hanging; full quilt process overview | Quick full-quilt experience, display pieces | Pre-cuts simplify prep; quick complete quilt |
| Apron (Simple/Bib) | Medium — straps, pockets, binding on curves | 1–2 yd cotton/linen, straps, pockets; 3–4 hrs | Functional garment; pocket & binding skills | Garment basics without fitting, gifts | Teaches garment construction; practical item |
| Quilted Placemat Set | Medium — three-layer quilting, binding all sides | Fabric, batting, backing for 4–6; more time than coasters | Coordinated table set; medium-scale quilting practice | Batch quilting, home décor, gifting sets | Full quilt process at manageable scale |
| Fabric Scrap Quilt | Medium–High — large assembly, handling bulk | Charm packs/jelly rolls or scraps; large backing/batting; significant time; possible longarm | Large finished quilt; color/design and large‑scale quilting skills | Using scraps, impressive full-size quilts | Minimal cutting, sustainable, impactful finish |
Congratulations on exploring this collection of fantastic beginner sewing projects! You've just taken a tour through a curated selection of foundational builds, from the straightforward utility of a Simple Tote Bag to the creative potential of a Fabric Scrap Quilt. Each project was chosen not just for its simplicity, but for the specific, essential skills it teaches.
As you've seen, mastering the basics isn't about one single project; it's about building a versatile toolkit of techniques. The journey we've outlined provides a clear, manageable path forward. You started with the fundamental skill of sewing straight seams with a pillowcase, then advanced to mastering corners and topstitching with quilted coasters and placemats. You explored basic patchwork with quilt blocks and learned the practical application of creating channels and casings with a simple drawstring bag. Each item on this list represents a stepping stone to greater confidence and creativity.
The most important takeaway from this guide is that progress is made one stitch at a time. No one creates a masterpiece on their first try. The value lies in the process and the small victories along the way.
Remember these core principles as you move forward:
By embracing these beginner sewing projects, you are not just making items; you are building a foundation of skills that will unlock a lifetime of creativity. You're learning the language of fabric and thread, a language that allows you to create personalized gifts, beautiful home decor, and eventually, wearable art and intricate quilts. The satisfaction of saying, "I made this," is an incredible reward, and it all begins with these simple, accessible starts.
What’s next on your creative journey? Perhaps you feel ready to tackle a larger project, like a full Jelly Roll Quilt, or maybe you want to refine your technique by making a set of perfectly matched cloth napkins for your next dinner party. The path is yours to choose. The beauty of sewing is its endless potential for growth and experimentation. Don't be afraid to try a new fabric, play with bold color combinations, or modify a pattern to make it uniquely your own.
Every project you complete, no matter how small, adds to your skill set and boosts your confidence. The techniques you practiced making an apron are the same ones you'll use to construct a garment. The precision you honed on a single quilt block is the foundation for creating a king-sized heirloom quilt. This is more than a hobby; it’s a rewarding skill that brings ideas to life. We encourage you to keep learning, keep practicing, and most importantly, keep creating.
Ready to turn inspiration into reality? Visit us at High Country Quilts in Colorado Springs for premium fabrics, essential notions, and expert advice to get started on any of these beginner sewing projects. Explore our collection of world-class BERNINA sewing machines and sign up for a local class to build your skills in a fun, supportive community. High Country Quilts is here to support you every stitch of the way.
At High Country Quilts we care deeply about community. With our experiences in retail, we know that a store is not only a place to shop but also a place for the community to gather and share. During this busy...

Hi! We’re Adam and Renee Wheaton, the new owners of High Country Quilts! For more than 40 years, we’ve owned and operated vacuum and sewing businesses. Following in Renee’s father’s footsteps after he retired from All Discount Vacuum and Sewing in Colorado...


Leave a comment