

We Love Our Quilting Community
At High Country Quilts we care deeply about community. With our experiences in retail, we know that a store is not only a place to shop but also a place for the community to gather and share. During this busy...


Embarking on your first quilt can feel both thrilling and a little daunting. The world of quilting is vast, filled with beautiful fabrics, intricate patterns, and a rich history. But where does a newcomer begin? The key to a successful start is choosing the right project, one that builds foundational skills without overwhelming you. This guide is your curated roadmap, designed to introduce you to the core techniques of quilting through manageable, rewarding projects.
We've compiled a comprehensive list of eight beginners quilting projects that are perfect for developing your skills. Each entry provides a clear breakdown, including material lists, estimated time and difficulty, and step-by-step cues to guide you. We'll move beyond generic advice and provide you with actionable steps and professional tips to ensure your first quilting experience is a joyful one. Whether you're aiming to create a cherished gift or a cozy addition to your home, these projects are the perfect starting point.
As you embark on your quilting adventure, selecting the right materials is a crucial first step. Quality quilting cotton is typically the best choice for beginners due to its stability and ease of handling. Gaining insight into the different qualities of materials, including understanding the texture of fabrics, can significantly guide your selection for comfort, durability, and aesthetic appeal.
Let's unfold the fabric and begin your creative journey. We'll explore everything from simple patchwork pillows and baby quilts to more complex-looking designs like the Disappearing Nine-Patch. This list will equip you with the confidence and knowledge to move from your first stitch to a finished masterpiece, with a special nod to the excellent resources and BERNINA machines available right here in Colorado Springs at High Country Quilts.
A baby quilt is one of the most classic beginners quilting projects for good reason. Typically measuring around 36" x 52", its smaller size makes it far less intimidating than a full-size bed quilt. This manageable scale allows you to focus on mastering the core skills of quilting: precise cutting, accurate piecing, consistent pressing, and the final quilting and binding process.
The reduced fabric requirement also means a lower initial investment, making it perfect for experimentation without pressure. More importantly, the satisfaction of creating a beautiful, functional, and heartfelt gift for a new baby is incredibly motivating and provides a tangible reward for your efforts.
A crib quilt is the ideal training ground for fundamental techniques. You'll learn how individual fabric squares and strips come together to form a larger, cohesive design, all within a project that can realistically be completed in a few weekends. Its smaller dimensions make basting the quilt layers (top, batting, and backing) much easier to handle on a standard home sewing machine.
This project type also introduces you to the joy of using pre-cut fabrics. Brands like Moda Fabrics and Riley Blake Designs offer perfectly coordinated "charm packs" (5-inch squares) or "jelly rolls" (2.5-inch strips) that eliminate the most tedious cutting work, letting you get straight to the fun part: sewing.
For those interested in sharing their quilting journey, exploring partnerships can be a rewarding next step. You can discover more about these opportunities and apply for a gifted collaboration to showcase your beautiful creations.
The Nine-Patch is one of the most foundational and recognizable blocks in quilting, making it an exceptional choice for beginners quilting projects. This classic design consists of a simple 3x3 grid of fabric squares. A throw-sized quilt, typically around 50" x 60", uses these repeating blocks to create a stunning final product that is both functional and beautiful.
This project strikes the perfect balance between manageable and substantial. You get the satisfaction of creating a cozy, usable quilt for your sofa while reinforcing core skills through repetition. The process of constructing multiple identical blocks builds muscle memory for cutting, sewing a scant 1/4" seam, and pressing, which are essential for all future quilting endeavors.
The Nine-Patch block is the perfect step up from a simple square quilt. It introduces the crucial skill of sewing smaller pieces together to create a larger unit (a block) and then sewing those blocks together to form the quilt top. This modular approach teaches you how to handle seams that need to intersect precisely, a technique known as "nesting seams."
This project is also incredibly versatile. You can create a scrappy look by using a variety of fabrics from a charm pack, a bold modern design with high-contrast solids, or a traditional feel with reproduction prints. The repetitive nature allows you to perfect your technique on each block, and the slightly larger throw size gives you more practice with the quilting and binding stages without being overwhelming.
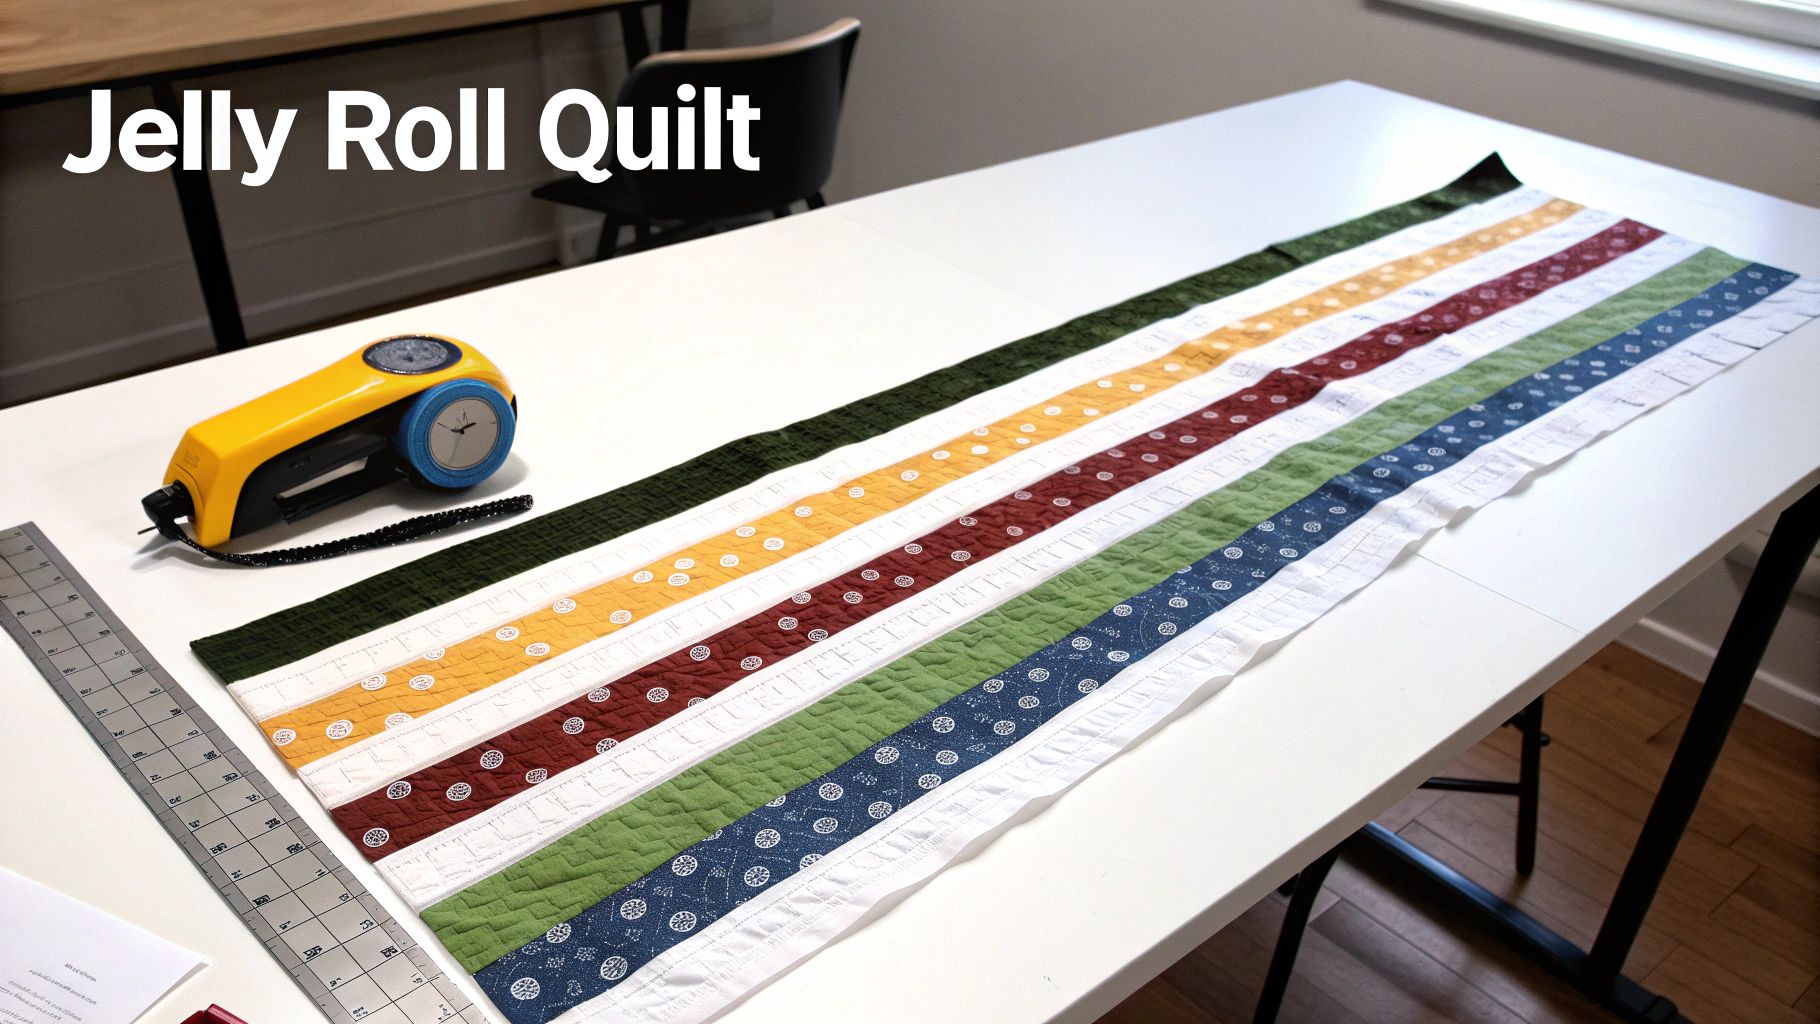
A strip pieced quilt is one of the most satisfying beginners quilting projects because it removes the most intimidating step for many newcomers: cutting. By using pre-cut fabric bundles like Jelly Rolls (2.5" strips) or Charm Packs (5" squares), you can dive straight into sewing. This method focuses on accurately piecing long strips or squares together, teaching you essential skills in seam allowance and pressing without the pressure of rotary cutter work.
The beauty of these pre-cuts, offered by brands like Moda and Benartex, is that they come in coordinated collections. This eliminates the guesswork of choosing fabrics that match, ensuring a beautiful, harmonious quilt top from the start. A simple project might involve sewing strips from a Jelly Roll together to create a colorful, striped quilt top that comes together surprisingly fast.
Strip piecing is all about building confidence. Sewing long, straight seams repeatedly helps you develop a steady hand and a feel for your machine, which is fundamental to all quilting. Because the cutting is done for you, you're less likely to encounter issues with inaccurate pieces that don't fit together, a common point of frustration for beginners.
This project type introduces you to the concept of "chain piecing," a time-saving technique where you feed your pieces through the sewing machine one after another without cutting the threads in between. It's a highly efficient way to work that you'll use throughout your quilting journey. The quick progress you see with a strip quilt provides instant gratification and motivates you to see the project through to completion.
Once you’ve completed a few projects, you might feel inspired to share your work with a wider audience. Exploring partnerships through UGC creator platforms can be a great way to connect with brands and fellow quilters.
A patchwork pillow cover is one of the best beginners quilting projects because it delivers a beautiful, finished product in just one or two sewing sessions. Typically measuring between 14" x 14" and 18" x 18", this project is a low-stakes way to practice the fundamentals of piecing without the commitment of a full quilt. It provides immediate gratification and a functional item to display in your home.
The small scale means you only need a few fabric scraps or a "mini charm pack" (2.5-inch squares), making it incredibly budget-friendly. This allows you to experiment with color combinations and block designs like the classic Log Cabin or simple Courthouse Steps on a miniature canvas, building confidence with every stitch.
A pillow cover isolates the skill of patchwork piecing. You can focus entirely on cutting accurately and sewing a consistent 1/4" seam without worrying about the more advanced steps of basting, quilting, and binding a large project. This makes it the perfect warm-up before tackling a bigger quilt.
This project is also an excellent introduction to finishing techniques. Learning how to create a simple envelope closure on the back is a valuable skill that you can apply to many other sewing projects. It’s a fast, zipper-free method that gives your pillow a professional look and feel, providing a big confidence boost early in your quilting journey.
As your skills grow and you start creating beautiful quilted items, you might consider sharing your work with a wider audience. If you're interested in showcasing your talent, you can explore the possibility of an influencer gifting application to collaborate with brands.
A table runner is one of the most rewarding beginners quilting projects because it combines simplicity with immediate function. Typically measuring around 13" x 45-60", its long, narrow shape makes it exceptionally easy to handle while teaching you every essential step of the quilting process, from piecing and quilting to binding. This project is a fantastic confidence builder, resulting in a beautiful piece of home decor you can use right away.
The manageable scale means you can complete it quickly, often in a single weekend. This allows you to practice fundamental skills without the commitment of a larger quilt. Whether using simple squares, long strips, or even beginner-friendly patterns like flying geese or half-square triangles, a table runner provides a perfect canvas for learning.
A table runner is the ideal project for mastering quilting on a smaller, more focused scale. Its narrow width makes it incredibly easy to manage on a home sewing machine, especially during the quilting stage. You get the full quilting experience without having to wrestle with the bulk of a large quilt, which is a common challenge for newcomers.
This project is also a great introduction to creative freedom. It's the perfect size to experiment with different quilting techniques, from simple straight lines to more intricate free-motion designs. Because the fabric and time investment is low, you can try new patterns and color combinations without pressure, creating seasonal decor or thoughtful handmade gifts.
After creating a few beautiful home decor pieces, you might consider sharing your work with a wider audience. Working with top influencer gifting platforms can help connect your craft with brands and followers who appreciate handmade quality.
The Disappearing Nine-Patch or Four-Patch is one of the most magical beginners quilting projects you can try. This technique involves sewing a simple block, such as a nine-patch, and then strategically cutting it apart and rearranging the pieces. The result is a surprisingly intricate and complex-looking design that seems far more advanced than it actually is.
This method teaches a crucial quilting lesson: how simple actions can lead to stunning, unexpected outcomes. The process of creating, cutting, and re-sewing a block builds immense confidence, showing a beginner how to create sophisticated geometric patterns with minimal initial piecing. It’s the perfect project for a quilter who wants a "wow" factor without tackling complicated techniques.
This project is a fantastic introduction to the power of precision and the "what if" creativity in quilting. By taking a basic block and deconstructing it, you learn to see your fabric and seams in a new way. The technique itself is straightforward, relying on just a few cuts to transform your work, making it incredibly rewarding.
Furthermore, these quilts are exceptionally forgiving and work beautifully with scraps or pre-cut charm packs. The seemingly random yet cohesive patterns that emerge are great at hiding minor imperfections in seam allowances or points. It’s a project that delivers a high-impact visual with a low-stress process, making it ideal for building skills and enthusiasm.
The Half-Square Triangle, or HST, is a foundational block in quilting that opens up a world of design possibilities. As one of the most versatile beginners quilting projects, an HST quilt teaches you how to create dynamic patterns like pinwheels, chevrons, and flying geese from simple squares. The technique involves sewing two fabric squares together, cutting them diagonally, and pressing them open to reveal two identical blocks made of two right-angle triangles.
This method is incredibly satisfying because it allows you to create intricate-looking designs with a straightforward and repeatable process. Mastering the HST is a significant milestone for any new quilter, as it provides the skills needed to tackle countless patterns while teaching the importance of precision and consistent trimming for sharp, professional results.
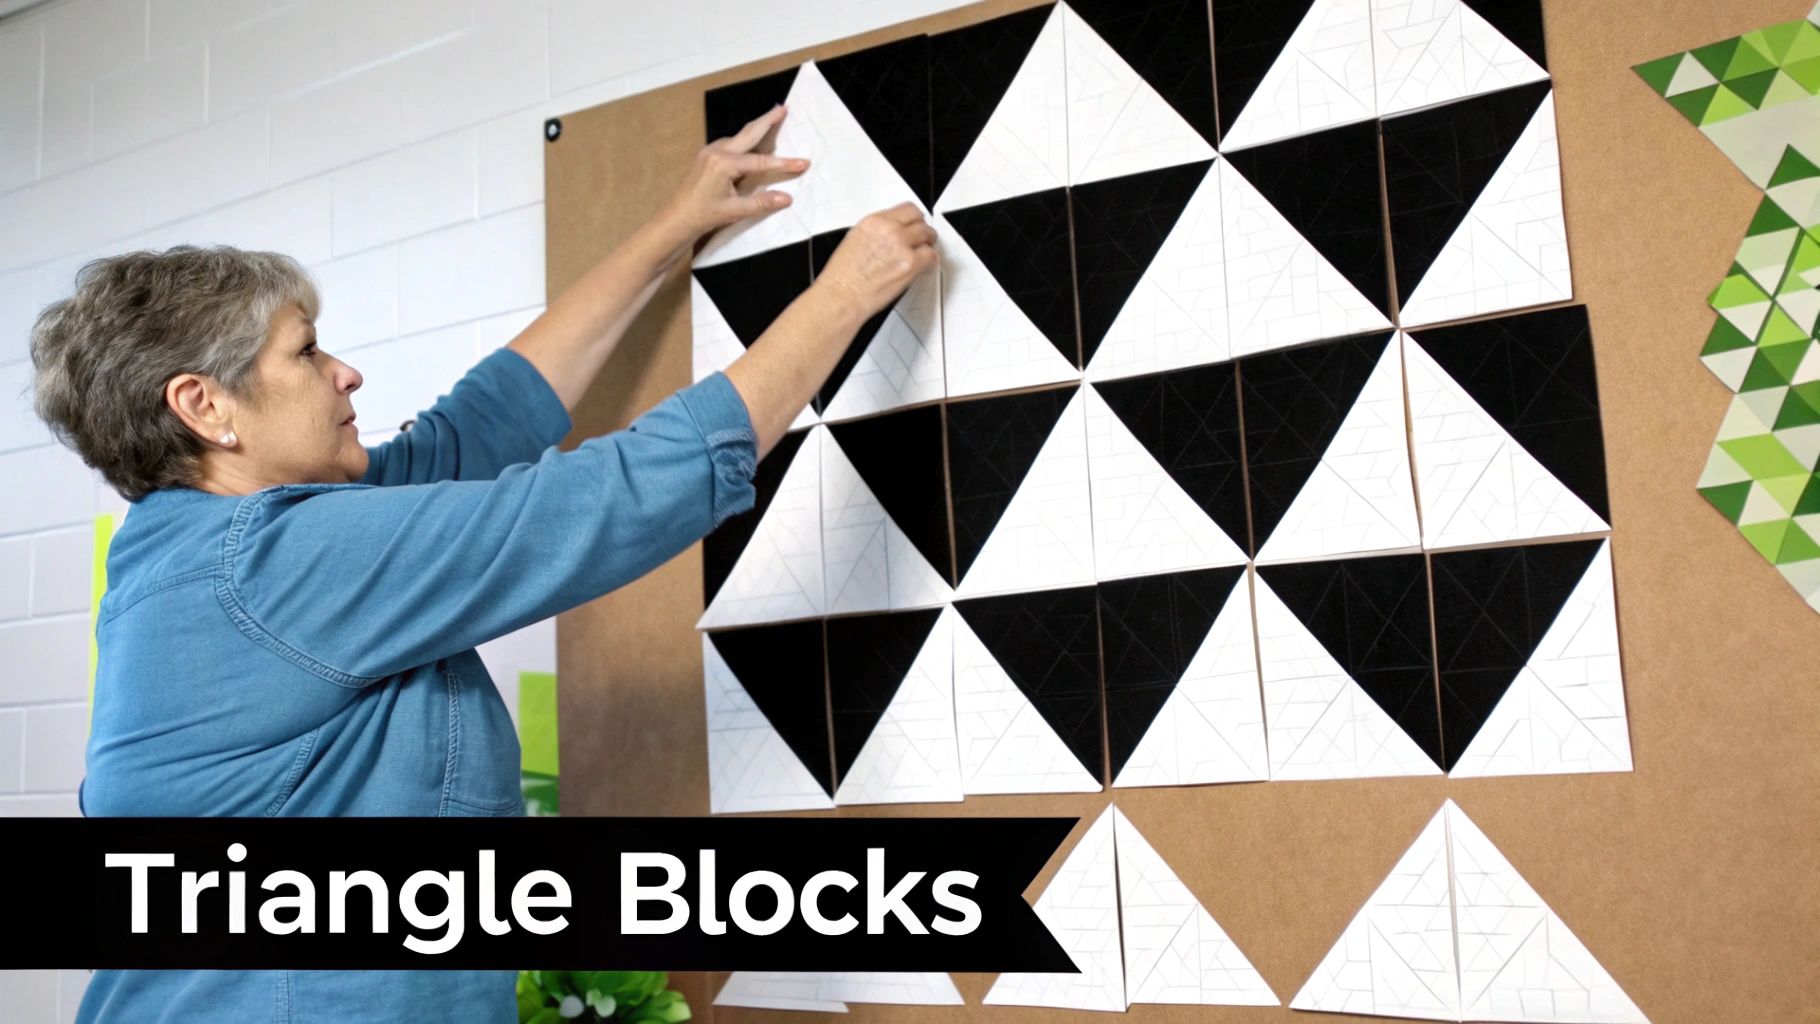
An HST quilt is the perfect project for understanding how color, contrast, and block orientation work together to create a larger pattern. The process of arranging the finished HST units on a design wall or floor before sewing them together is a fun, creative exercise that reveals the magic of secondary patterns. It’s an excellent way to practice nesting seams to get perfect points where your corners meet.
Because the core unit is so simple, an HST quilt is ideal for using up fabric scraps or building your skills with pre-cut layer cakes (10-inch squares). The repetition of creating the blocks helps build muscle memory for accurate sewing and pressing, turning fundamental skills into second nature.
For those who find traditional quilting's strict rules intimidating, a modern quilt is one of the most liberating beginners quilting projects you can choose. This style embraces improvisation, bold colors, and graphic designs, often prioritizing personal expression over perfect points. Techniques like improvisational piecing and Foundation Paper Piecing (FPP) allow newcomers to create stunning, complex-looking designs without the pressure of absolute precision.
Modern quilting teaches that creativity is the goal, and "mistakes" can become beautiful design elements. Whether you're creating a wonky log cabin block or a sharp geometric pattern with FPP, this approach is less about following rigid rules and more about enjoying the creative journey. The satisfaction comes from making something that is uniquely yours.
Modern quilting is fantastic for anxious beginners because it removes the fear of failure. Improvisational or "wonky" piecing celebrates asymmetry and imperfection, allowing you to learn fabric handling skills without stressing over every seam. Foundation Paper Piecing, on the other hand, provides a printed paper guide to sew onto, making it possible to achieve incredibly intricate designs with straight seams, even as a total novice.
This project type encourages you to play with high-contrast fabrics and negative space, teaching fundamental design principles in a fun, hands-on way. You can start with a few small FPP blocks or an improvisational mini quilt, building skills and confidence before tackling a larger project. It's an empowering entry into the quilting world, popularized by organizations like the Modern Quilt Guild.
If you're looking to document and share your modern quilting journey online, you might be interested in enhancing your content creation skills. You can discover new strategies for creative projects and learn how to best showcase your work.
| Project | 🔄 Implementation Complexity | ⚡ Resources & Speed | ⭐ Expected Effectiveness / Quality | 📊 Expected Outcomes / Skills Learned | 💡 Ideal Use Cases / Key Advantages |
|---|---|---|---|---|---|
| Baby Quilt (Crib Size) | Low–Moderate — basic cutting, piecing, binding | Low fabric (3–5 yd), basic tools; 2–4 weeks | ⭐⭐ — very good for beginner proficiency | Teaches cutting, 1/4" seams, block assembly, binding | Perfect first quilt; affordable gift; manageable scale 💡Use precuts to shorten prep |
| Simple Nine-Patch Throw Quilt | Moderate — repetitive piecing, many seams | Moderate fabric (~50"×60"); 2–4 weeks | ⭐⭐ — reliable, classic results | Strip piecing, seam nesting, block squaring | Builds muscle memory; versatile color play 💡Pre-cut strips and design wall help |
| Strip-Pieced Quilt (Jelly Roll/Charm) | Low — minimal cutting, straightforward assembly | Precut bundles (jelly roll/charm), fast (1–3 weeks) | ⭐⭐⭐ — high visual success with little effort | Piecing sequence, pressing, working with precuts | Fast, low-decision projects; coordinated palettes 💡Start with single-strip designs |
| Beginner's Patchwork Pillow Cover | Very Low — small, no quilting required | Minimal fabric ($10–25); few hours | ⭐ — excellent for targeted skills | Accurate cutting, straight seams, closures | Quick gratification; tests color combos; great gift 💡Envelope closure easiest |
| Simple Squares/Strips Table Runner | Low–Moderate — includes quilting & binding on small scale | Moderate materials ($15–30); 2–3 weeks | ⭐⭐ — practical, good finish practice | Full quilting workflow, binding, narrow piecing | Teaches complete process without large scale 💡Use walking/free-motion foot for practice |
| Disappearing Nine/Four-Patch Quilt | Moderate — sewing then re-cutting requires precision | Moderate fabric; 3–4 weeks | ⭐⭐⭐ — complex look from simple blocks | Precision piecing, creative cutting, design understanding | Makes sophisticated quilts quickly; great confidence builder 💡Cut a test block first; label pieces |
| Half-Square Triangle (HST) Quilt | Moderate — diagonal seams, bias handling | Moderate–higher fabric/time; variable size; 3–6 weeks | ⭐⭐⭐ — striking results when precise | Diagonal cutting, triangle piecing, color/contrast | Highly adaptable designs; excellent for learning contrast 💡Press seams open; square up HSTs |
| Modern Beginner Quilt (Improv / FPP) | Variable — improvisation or paper piecing options | Moderate materials ($45–75); paper removal time | ⭐⭐–⭐⭐⭐ — high creativity, quality via FPP | Paper piecing, creative decision-making, modern design | Ideal for expressive beginners; reduces perfection pressure 💡Embrace wonky results; remove paper carefully |
You’ve just explored a curated collection of fantastic beginners quilting projects, each designed to be an accessible and rewarding entry point into the world of fabric and thread. From the heartwarming simplicity of a Baby Quilt to the creative puzzle of a Disappearing Nine-Patch, these projects are more than just patterns; they are your personal curriculum for mastering the fundamentals of quilting. The journey you're about to embark on is built on a few core skills that each of these projects reinforces: precise cutting, consistent seam allowances, and the satisfying process of bringing individual blocks together into a cohesive whole.
Remember, the goal of your first project isn't perfection. It's about building "muscle memory" with your sewing machine, understanding how different fabrics behave, and experiencing the joy of creating something beautiful and functional with your own hands. Every quilter, no matter how advanced, started with a first seam. The key is to embrace the learning process and celebrate your progress at every stage.
As you move forward, keep these essential insights in mind to ensure your quilting journey is both successful and enjoyable:
Feeling inspired? The best way to maintain momentum is to take immediate, concrete steps. Don't let this newfound knowledge sit idle. Here’s a simple, actionable plan to get you started on your very first of many beginners quilting projects:
Your quilting adventure is a marathon, not a sprint. Each finished project, no matter how simple, is a testament to your growing skill and dedication. You are learning an art form steeped in history, community, and personal expression. Embrace the journey, trust the process, and soon you'll have a beautiful, handmade quilt to show for it.
Ready to take the first step from inspiration to creation? Visit High Country Quilts in Colorado Springs or explore our website to find everything you need for your beginners quilting projects, from premium fabrics and BERNINA machines to expert-led classes. Let us be your partner in creativity on this exciting new adventure. High Country Quilts
At High Country Quilts we care deeply about community. With our experiences in retail, we know that a store is not only a place to shop but also a place for the community to gather and share. During this busy...

Hi! We’re Adam and Renee Wheaton, the new owners of High Country Quilts! For more than 40 years, we’ve owned and operated vacuum and sewing businesses. Following in Renee’s father’s footsteps after he retired from All Discount Vacuum and Sewing in Colorado...


Leave a comment