

We Love Our Quilting Community
At High Country Quilts we care deeply about community. With our experiences in retail, we know that a store is not only a place to shop but also a place for the community to gather and share. During this busy...


The 9-patch quilt block is one of those foundational patterns every quilter should know. At its heart, it’s just nine fabric squares stitched together in a three-by-three grid. But don't let that simplicity fool you—it's one of the most versatile and beloved blocks out there, perfect for your first quilting project and a go-to for seasoned pros.
There's a special kind of magic in the 9-patch block. Its straightforward construction makes it the ideal practice ground for the skills that truly matter in quilting: accurate cutting, a consistent seam allowance, and precise piecing. If you can master these on a simple 9-patch, you're building a rock-solid foundation for whatever complex pattern catches your eye next.
For those of us with a few more quilts under our belts, the 9-patch is a creative playground. It’s amazing how much you can change the look just by swapping out fabrics and thinking about color and value.
When you sew a 9-patch, you're not just making a quilt block; you're connecting with a long and rich history. This pattern has been around for centuries, born from the resourcefulness of early American quilters who needed to make every last scrap of precious fabric count.
It’s one of the oldest and most recognizable patterns, with some examples dating as far back as 1802. It's a true testament to creating something beautiful and functional from simple means.
The 9-patch block is simple genius. It’s proof that you don’t need a complicated pattern to make something stunning. All you need is a good grasp of the fundamentals.
As you start making your own 9-patch blocks, remember that every stitch connects you to that long line of quilters. It's a fantastic first step, and once you get the hang of it, you might even be inspired to create effective how-to guides to share what you've learned.
The heart of any 9 patch quilt block is, of course, the fabric. This is where you get to play artist and decide on the whole personality of your quilt. I always recommend a good quilting cotton because it behaves beautifully—it's stable, easy to press, and holds a seam well.
But the real magic happens when you start thinking about contrast.
Imagine a bold, large-scale floral print right next to a quiet, low-volume text print. Then, toss in a solid color that you’ve pulled from one of the floral's petals. Suddenly, you have a block with life and depth. It's this dance between "loud" and "quiet" fabrics that makes a simple patchwork design truly sing.
This isn't a new concept, either. The nine-patch has a long history as a beginner-friendly block, often mixing simple ditsy prints with plain cream or white fabric. You can see beautiful historic examples of this in the Quilt Discovery Experience from the National Park Service, where classic red and blue color palettes were common.
Here’s a little trick I swear by: lay your chosen fabrics out together, take a few steps back, and snap a quick black-and-white photo on your phone. It instantly shows you if you have enough contrast between your light, medium, and dark values. You'll know right away if the design will pop or just blend together.
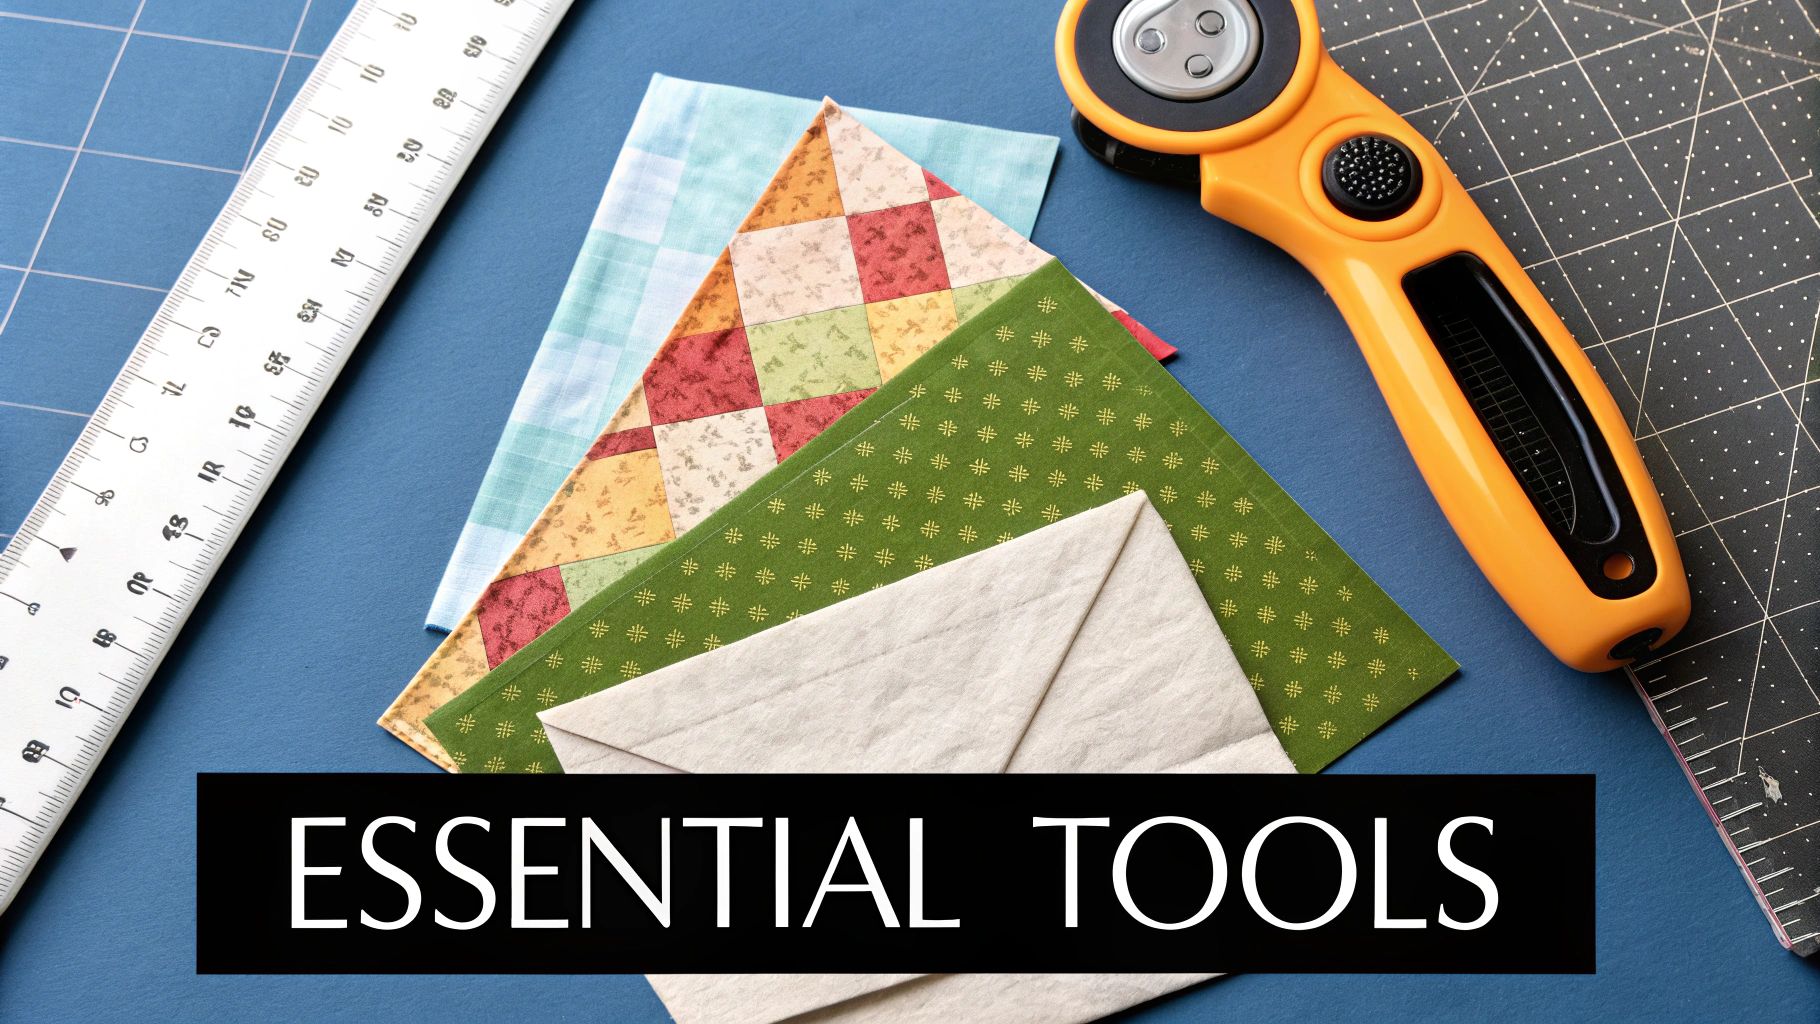
Once your fabrics are sorted, it's time to gather your gear. Having the right tools isn’t about being fancy; it's about making your life easier and your patchwork more accurate. Good tools lead to good results, simple as that.
For this project, you'll want your trusted quilting basics by your side:
In quilting, precision is everything, and it all starts with the cut. A beautifully pieced 9 patch quilt block relies entirely on having perfectly cut squares from the get-go. Don't worry, the math is simpler than you think.
The golden rule for any quilt piece is to add a 1/4 inch seam allowance to every side that will be stitched. For a square, that means adding 1/4 inch on all four sides, which comes out to a total of 1/2 inch added to your desired finished measurement.
The formula is a quilter's best friend:
Finished Square Size + 1/2 inch = Cut Square Size
For instance, if you're aiming for squares that finish at 3 inches inside your completed block, you'll need to cut them at 3.5 inches. That extra half-inch is your seam allowance, and it’s what guarantees your block will come out to the right size after piecing.
A little secret from seasoned quilters: always square up your fabric first. Taking a moment to trim a perfectly straight edge before you begin cutting strips will save you from wonky squares and a world of frustration later.
Here's a visual guide showing how you can efficiently sew fabric strips together before cutting them into the final block segments.
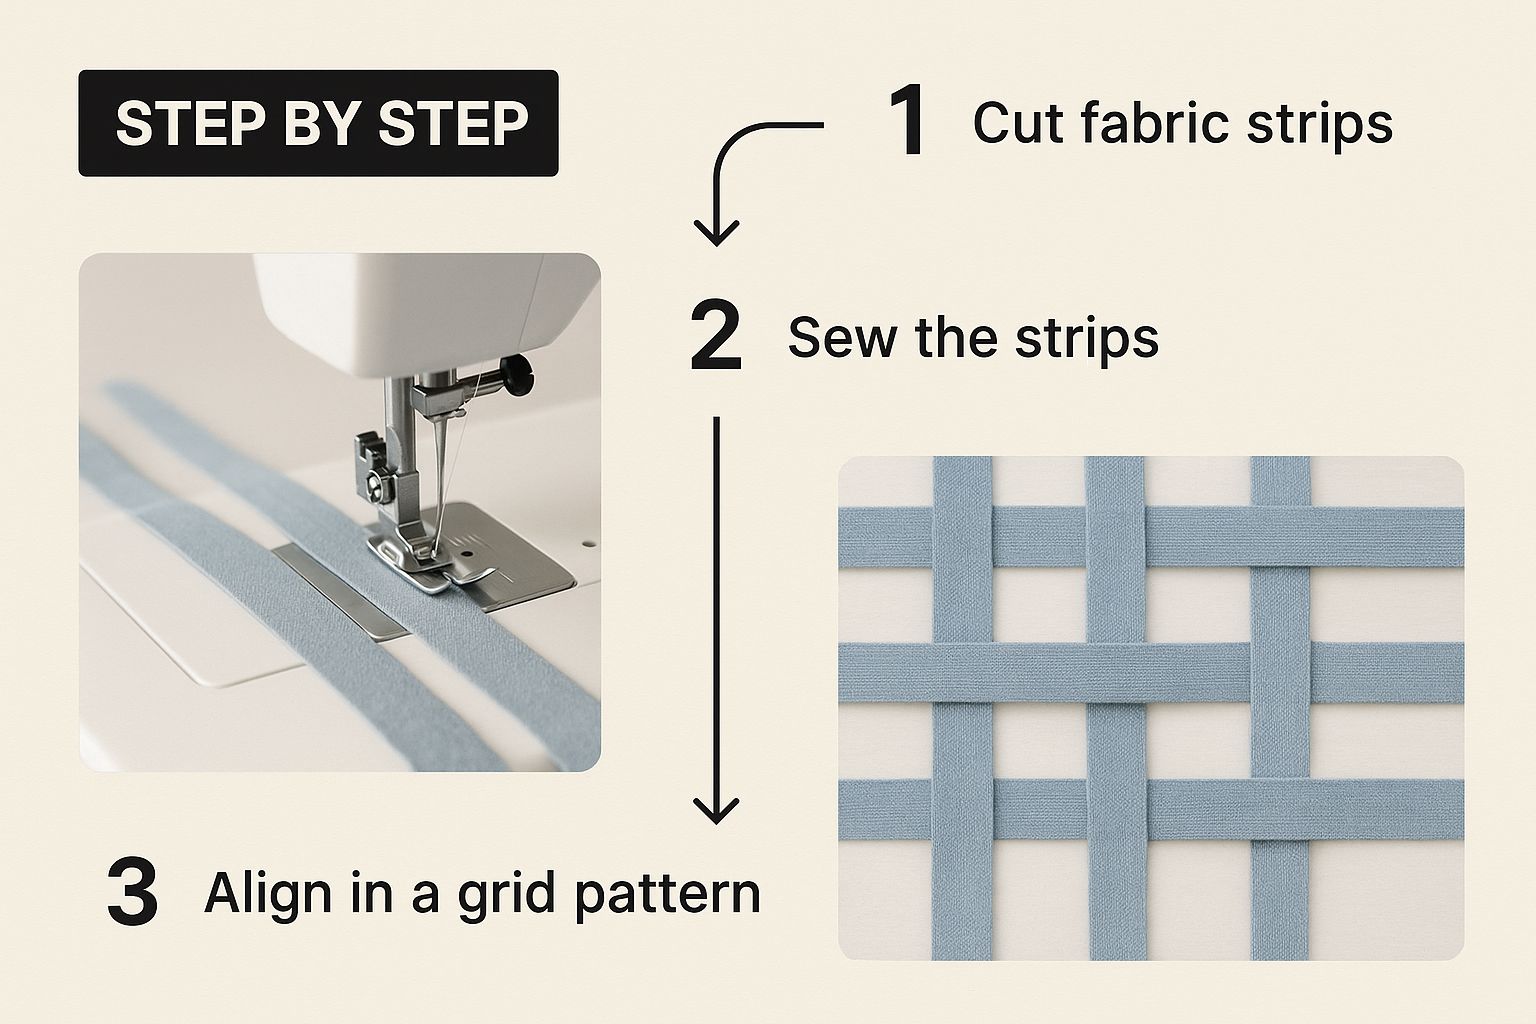
This brilliant technique, called strip piecing, is a game-changer for speeding up the creation of 9 patch quilt blocks because you're handling long strips instead of tiny individual squares.
Instead of painstakingly cutting nine individual squares one by one, most of us in the quilting world turn to a much faster method: strip piecing. This just means you cut long strips of fabric first, sew them together, and then sub-cut them into your block segments.
Why do it this way? It saves a massive amount of time, and honestly, it’s far more accurate. It's much simpler to cut a single, precise 3.5-inch wide strip and then chop it into 3.5-inch squares than it is to measure and rotary cut nine separate little pieces from a large piece of fabric.
To make things even easier, here's a handy chart that does the math for you. It lays out the exact cutting dimensions you'll need for each of the nine squares to create some of the most popular finished block sizes.
| Finished Block Size | Finished Square Size | Cut Square Size (with seam allowance) |
|---|---|---|
| 6 inches | 2 inches | 2.5 inches |
| 9 inches | 3 inches | 3.5 inches |
| 12 inches | 4 inches | 4.5 inches |
| 15 inches | 5 inches | 5.5 inches |
Just find the final block size you're going for in the first column, and the table will tell you exactly what size to cut your squares. Keep this chart nearby—it’s a real timesaver
Now that your squares are perfectly cut, the fun really begins. This is that magical moment where individual fabric squares start becoming a beautiful 9 patch quilt block. The first thing I always do is lay out all nine squares on my cutting mat, arranging them exactly how I want them to look in the final block.
Taking a minute to do this is a simple but crucial step. It's a quick visual check that saves a lot of headaches and seam-ripping later. I organize them into their three distinct rows: top, middle, and bottom. This way, I know my pattern is right before I've even touched the sewing machine.
Okay, let's build those rows. We're going to use a brilliant technique called chain piecing. Trust me, once you get the hang of this, you'll never go back. It saves a ton of time and thread, and it's just so satisfying to see your block come together in a long, neat chain.
Here’s the game plan for sewing your rows:
After you've stitched the first two squares of each row, you can snip the threads connecting the pairs. Now, you’ll just add the third square to each of your little two-patch units, chain piecing them in the exact same way.
My Go-To Tip: I always start chain piecing with a "leader cloth." It’s just a small, folded scrap of fabric that I sew on first. This little trick prevents the machine from chewing up the corner of your actual block and stops those frustrating thread nests from forming.
By breaking down the process into three tidy rows, you make the final assembly of the 9 patch quilt block so much simpler. You should now have three perfectly pieced rows, all ready for a good press before we join them together to create those crisp, perfectly matched corners.
https://www.youtube.com/embed/WSFviroNb1g
Getting those seams pressed just right is the secret weapon for a 9 patch quilt block that lays perfectly flat. It’s one of those little steps that might seem fussy, but trust me, it makes a world of difference in how your corners and points meet up later.
The first rule of thumb is to press, not iron. When you iron, you're sliding the hot plate back and forth, which can easily stretch your fabric and undo all your precise cutting. Pressing is a simple up-and-down motion that sets the seam without distorting the fabric.
For a 9-patch block, we want our seam allowances to do some of the work for us. The technique I swear by is called nesting seams, and it’s a brilliant little trick that helps the intersections of your block lock together almost like magic. It’s all about controlling which way you press the seams in each row.
Here's the pattern I always use:
By doing this, you're creating opposing seam directions. When you lay the top row on the middle row with the right sides together, you'll physically feel the seams from each row bump up against each other and nestle right into place. It’s a tactile guide that makes it so much easier to sew a straight line and get those crisp, perfectly matched points we all want.
When you join the rows, you're not just relying on pins; the nested seams act as a built-in guide. This simple step is what separates a good block from a great one, ensuring your finished 9 patch quilt block lays beautifully flat and crisp.
This method also gets rid of unnecessary bulk where the seams meet, giving your finished block a clean, polished look that will make you proud.
Even with a design as simple as the 9-patch quilt block, a few things can trip you up. It's totally normal to have questions, especially when you're chasing that perfect, crisp finish. Let's go over some of the most common hurdles I see quilters run into.
A question I get all the time is about block size. If your finished block isn't hitting the right measurement, the issue almost always comes down to two things.
First, take a hard look at your seam allowance. If it’s inconsistent—even by a tiny fraction—that small error multiplies across the block and can really mess up your final dimensions. This is precisely why a 1/4 inch presser foot is an absolute game-changer for quilters.
The second culprit is usually the cutting. The old saying "measure twice, cut once" exists for a reason, and it’s especially true in quilting.
It's a classic quilting frustration: the points where your squares meet just aren't lining up. This is where that pressing technique we talked about earlier, nesting seams, becomes your secret weapon.
When you press the seam allowances of your rows in opposite directions—say, rows one and three to the right, and row two to the left—you create a little ridge and valley. As you join the rows, those seams will just lock right into place. It’s a simple trick, but it’s the key to getting those sharp, professional-looking corners every time.
Nesting your seams does more than just help with alignment; it also strategically distributes the bulk of the fabric. This ensures your final 9 patch quilt block lays beautifully flat instead of having puffy, thick intersections.
You bet! Once you feel confident with the classic square-based 9-patch quilt block, it's fun to start experimenting. Swapping the squares for rectangles, for instance, creates what's called an "uneven" or "variable" 9-patch.
This is a fantastic way to put a modern spin on a traditional block. The construction process is exactly the same—you'll still piece three rows and then join them together. This simple change opens up a ton of creative doors, like featuring a large, showy rectangle in the center surrounded by smaller squares.
After all your hard work, you'll want to keep your quilt looking beautiful for years to come. For some great advice on how to wash and care for quilts, this guide has some solid tips.
Ready to find the perfect fabrics for your next quilting masterpiece? Famcut.com offers a curated selection of high-quality quilting cottons, tools, and inspiration to bring your vision to life. Explore our collection at https://famcut.com.
At High Country Quilts we care deeply about community. With our experiences in retail, we know that a store is not only a place to shop but also a place for the community to gather and share. During this busy...

Hi! We’re Adam and Renee Wheaton, the new owners of High Country Quilts! For more than 40 years, we’ve owned and operated vacuum and sewing businesses. Following in Renee’s father’s footsteps after he retired from All Discount Vacuum and Sewing in Colorado...


Leave a comment