

We Love Our Quilting Community
At High Country Quilts we care deeply about community. With our experiences in retail, we know that a store is not only a place to shop but also a place for the community to gather and share. During this busy...


Trying to use a dull rotary cutter is like trying to slice a ripe tomato with a butter knife. You know the feeling—it’s frustrating, you have to push way too hard, and you just end up with a squished mess. A fresh, sharp blade isn't a luxury; it's a must-have for clean cuts, accurate projects, and keeping your fingers safe.
We’ve all been there. You’re zipping along, cutting out quilt pieces, when suddenly the fabric starts to bunch and skip instead of slicing cleanly. Your first instinct is to bear down, adding more pressure. But all that gets you is a jagged, wobbly edge that completely throws off your seam allowance. That’s the tell-tale sign of a blade that’s given up.
Working with a blade that's past its prime is more than just annoying. It actively fights against you, putting your projects and even your tools at risk.
The fallout from a dull blade hits three main areas: your fabric, your body, and your cutting mat. When you put off swapping it out, you’re basically agreeing to a bunch of headaches you could easily avoid.
A sharp blade should feel like it's gliding through butter, even when cutting multiple layers of fabric. If you have to put your body weight into it, that’s your cue. Stop what you're doing and change the blade.
This isn't just a tip for hobbyists. In industrial settings, they know the value of a sharp edge. Some operations plan to replace blades after cutting just 10,000 to 15,000 linear feet of fabric. While you can read more about rotary cutter market trends, the lesson for home sewists is crystal clear: a sharp blade is a direct investment in your work's quality and your own safety.
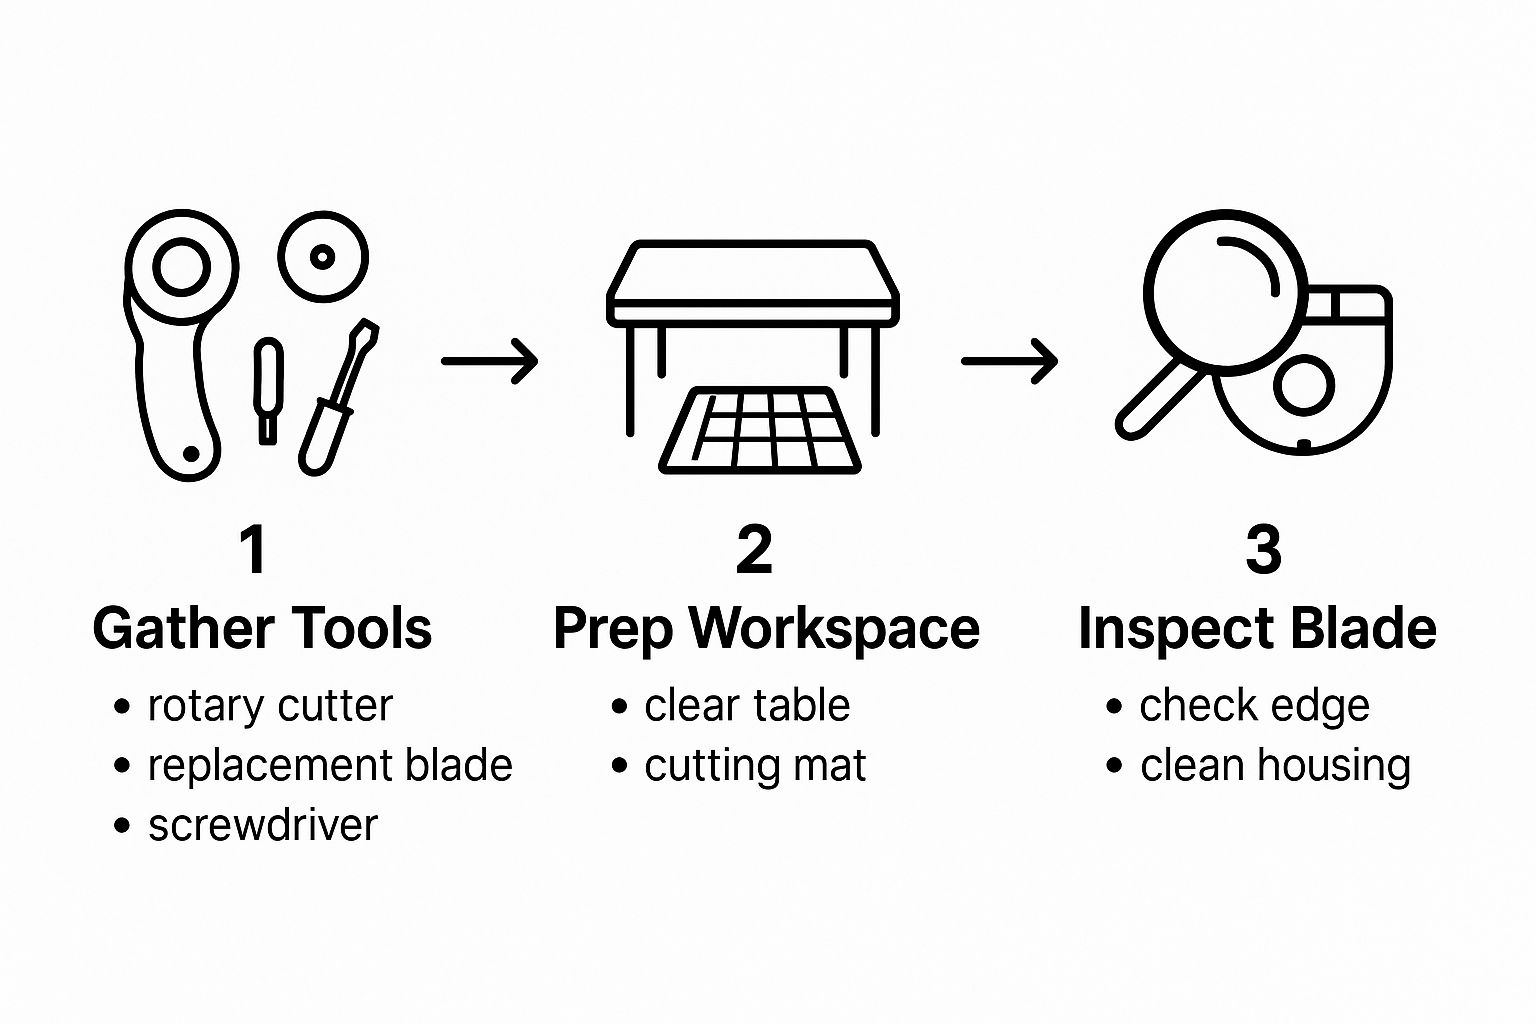
A smooth blade change starts well before you ever touch the nut on your rotary cutter. I like to think of it as my pre-flight checklist. Taking just a minute or two to get organized is what separates a frustrating, fiddly chore from a confident, two-minute task. It’s also how you avoid watching that tiny, essential washer roll off the table and into oblivion.
First things first, create a safe, stable station. I always start by laying my self-healing mat down on a well-lit surface, making sure it’s not too close to the edge of the table. This gives me a protected area to work on and prevents an accidental nudge from sending sharp tools flying.
Gathering your tools ahead of time makes all the difference. You really don't need much, but having these specific items handy turns the whole process into a breeze.
My number one rule for blade changes: Know where the old blade is going before you take it off. Having a puncture-proof container ready and waiting is the single best way to prevent an accident.
With everything laid out and ready to go, you’re set for a quick, stress-free swap. A little prep work transforms changing your blade from a dreaded task into a simple part of your routine, keeping you safe and your cuts perfectly precise.
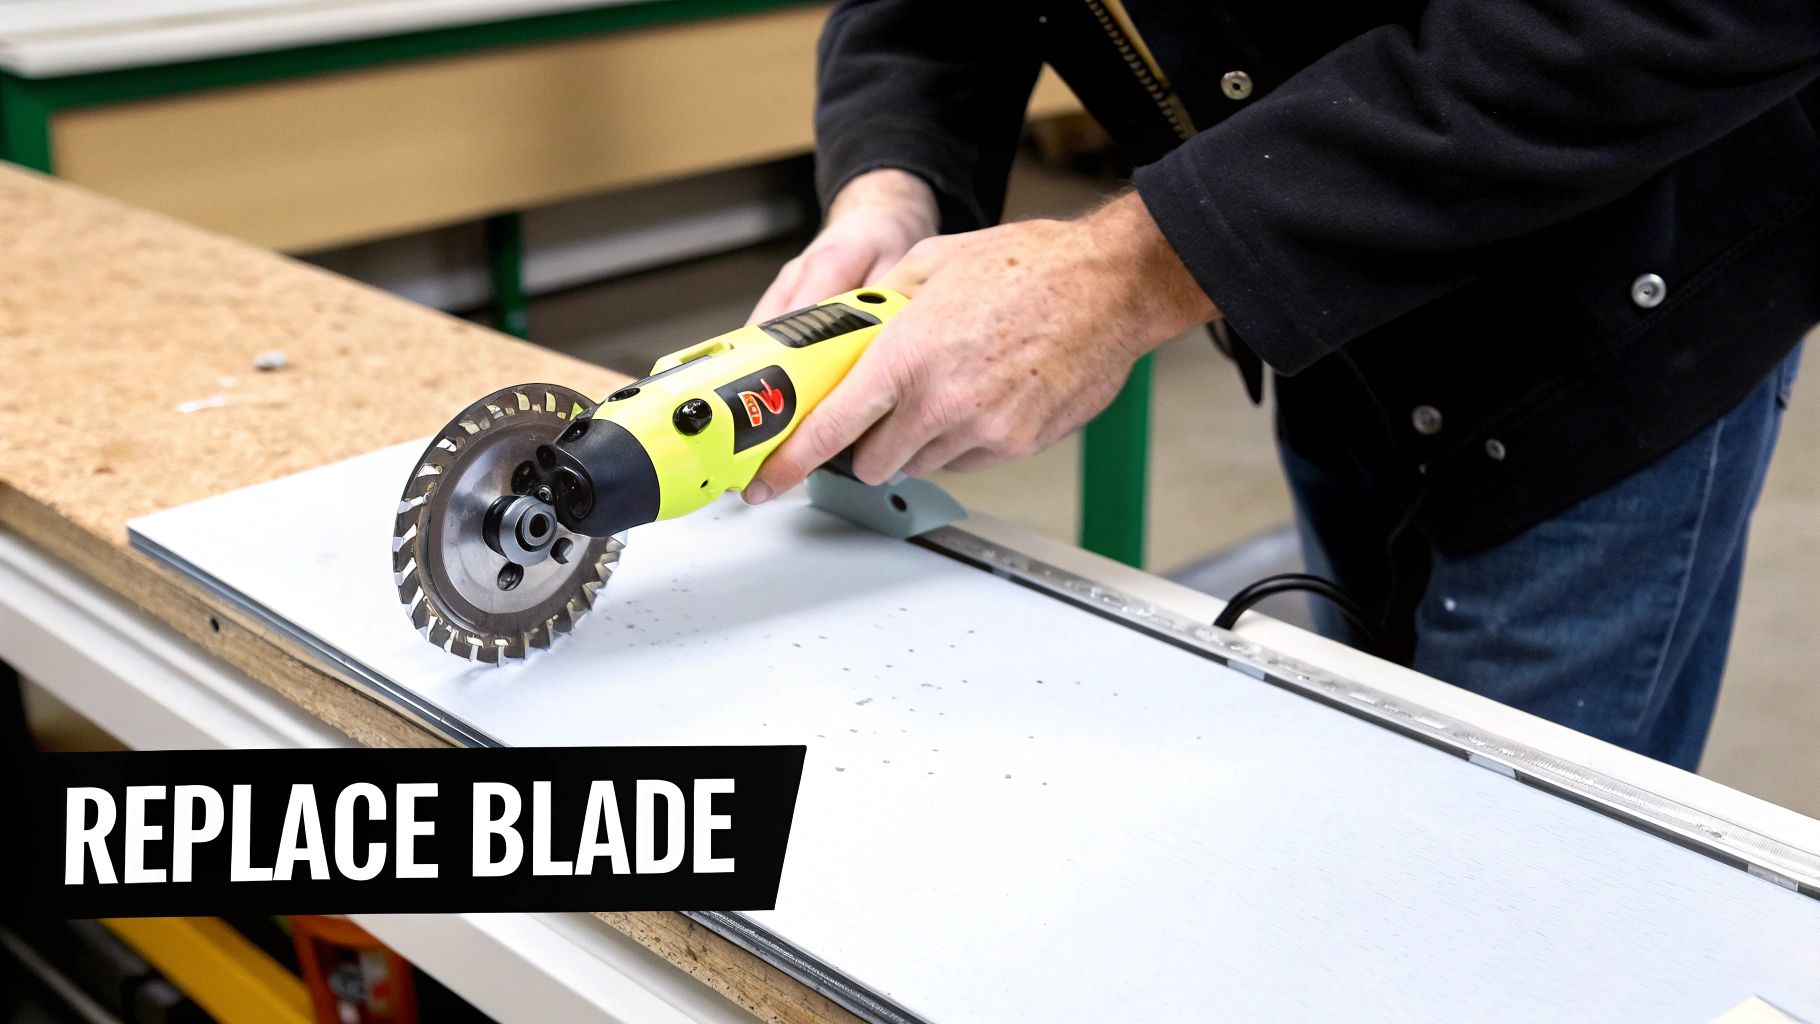
Alright, let's get our hands dirty and walk through the actual process. Swapping out a rotary cutter blade might seem intimidating at first, but once you get the hang of it, you'll be doing it in under a minute. It’s all about following a simple, logical sequence.
First things first, you need to get to the blade. Slide the blade guard all the way back to expose the assembly. Now, focus on the nut holding everything together. It's a classic case of "righty-tighty, lefty-loosey," so you’ll want to turn the nut counter-clockwise to loosen it up.
Once the nut is loose, it's time to carefully disassemble the cutter. My best advice here? Lay each piece out on your cutting mat in the exact order you remove it. This creates a simple visual map for putting it all back together later, saving you a major headache.
You’ll generally find the parts come off in this sequence:
With the old blade safely set aside for disposal, grab a soft brush or a bit of cloth. Take a moment to thoroughly clean out the cutter's housing. You’d be surprised how much lint and fiber dust can build up in there, and cleaning it out ensures your new blade will spin freely without any drag.
This infographic breaks down the prep work, which is just as important as the swap itself.
As the visual shows, getting your tools and workspace in order first makes the entire process safer and more efficient.
Now, we just work backward. Grab your new blade—always holding it by the center to avoid touching that razor-sharp edge—and place it onto the post. Make sure it's sitting completely flat.
Next, add the washer and then thread the nut back on, turning it clockwise to tighten.
This next part is the most critical step, and it's all about feel. You want the nut to be snug, but not cranked down so hard that the blade can't move. If it's too tight, the blade won't spin. If it's too loose, it will wobble, which is both dangerous and will ruin your cuts. The demand for better, more intuitive tools is a big reason why the growth of the rotary cutter market is projected to exceed USD 411 million by 2032.
Pro Tip: After tightening, give the blade a gentle flick with your finger. It should spin smoothly for a moment or two. If it stops dead, it’s too tight. If you can see or feel it wiggle, it’s too loose. A little adjustment is all it takes to find that sweet spot.
For a quick reference you can keep handy at your cutting table, here's a cheat sheet.
This table summarizes the key steps to make your next blade change a breeze.
| Phase | Action | Key Tip |
|---|---|---|
| Preparation | Gather your new blade, tools, and a disposal container. | A magnetic bowl is a game-changer for keeping small parts from getting lost. |
| Disassembly | Retract the guard and loosen the nut by turning it counter-clockwise. | Lay out all the pieces in the exact order you remove them. |
| Cleaning | Use a soft brush to clear lint and debris from the cutter's housing. | A clean housing is essential for a smoothly spinning new blade. |
| Reassembly | Install the new blade, washer, and nut in reverse order. | Always handle the new blade by its center, never the edge. |
| Tightening | Tighten the nut until snug, but not so tight that the blade can't spin. | Do the "flick test" to check for smooth rotation without any wobble. |
| Disposal | Place the old blade in a dedicated sharps container for safe disposal. | Never just toss a bare blade in the trash. |
Follow these steps, and you'll be back to making perfect, crisp cuts in no time.
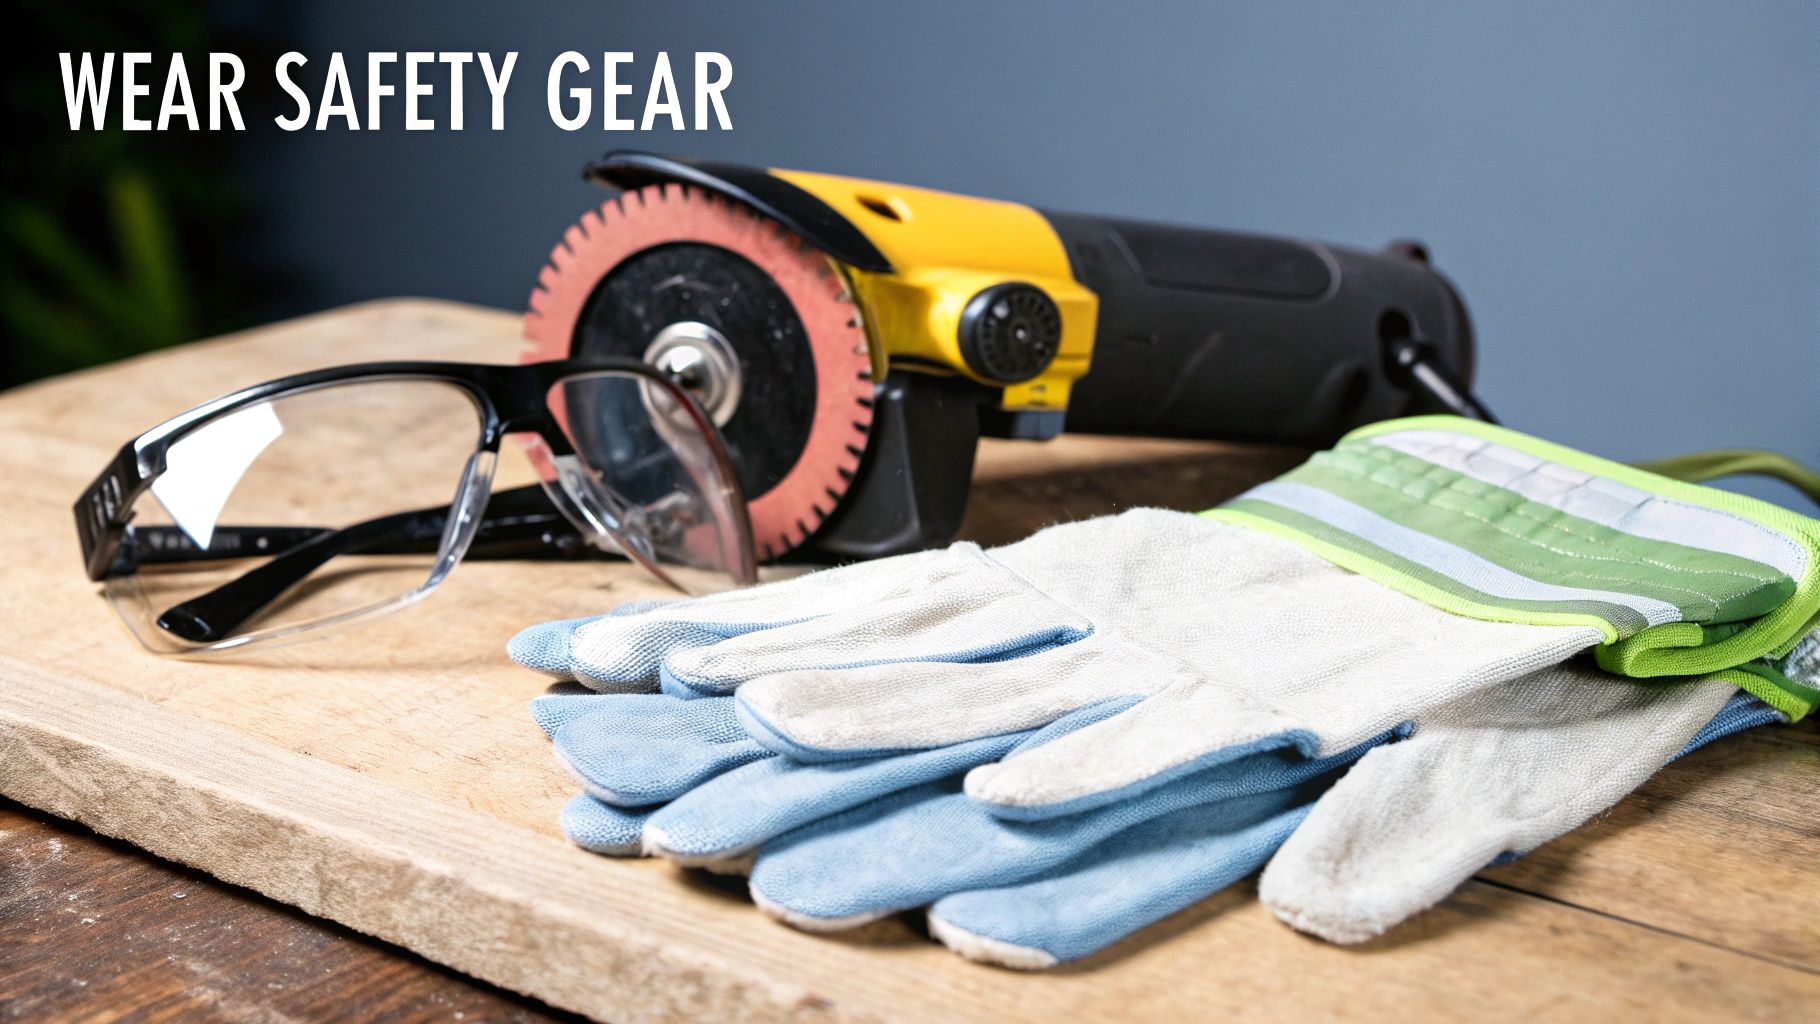
Let's be clear: a rotary cutter blade isn't just sharp, it's scalpel-sharp. The single most important part of using this tool is developing a healthy respect for it. It's the simple, consistent habits you build that will keep you safe in your craft room.
If there's one golden rule, it's this: Always retract the blade guard the moment you set the cutter down. This can't be an occasional thing; it has to become pure muscle memory. A quick flick of your thumb is all it takes to prevent a nasty accident.
Where you change your blade is just as important as how you change it. Find a stable, clutter-free surface with good lighting. Trying to do this in a dimly lit corner or on a cramped desk is just asking for trouble.
Make sure you have plenty of elbow room and work away from the edge of the table. A simple precaution like this can stop an accidental bump from sending a razor-sharp tool tumbling toward your feet.
Key Takeaway: Never, ever touch the sharp edge of a blade. Even a light brush against your skin can lead to a serious cut. Always handle blades by holding the center hub.
Feeling a bit nervous about handling the new blade? I get it. A great little trick is to use a magnetic wand or even one of those magnetic pin bowls to pick up and position the new blade. It keeps your fingers completely out of the danger zone.
A few final thoughts on staying safe:
Making these practices second nature means you can keep your focus where it belongs—on your creative project, not on a preventable injury. A safe crafter is a happy and productive one.
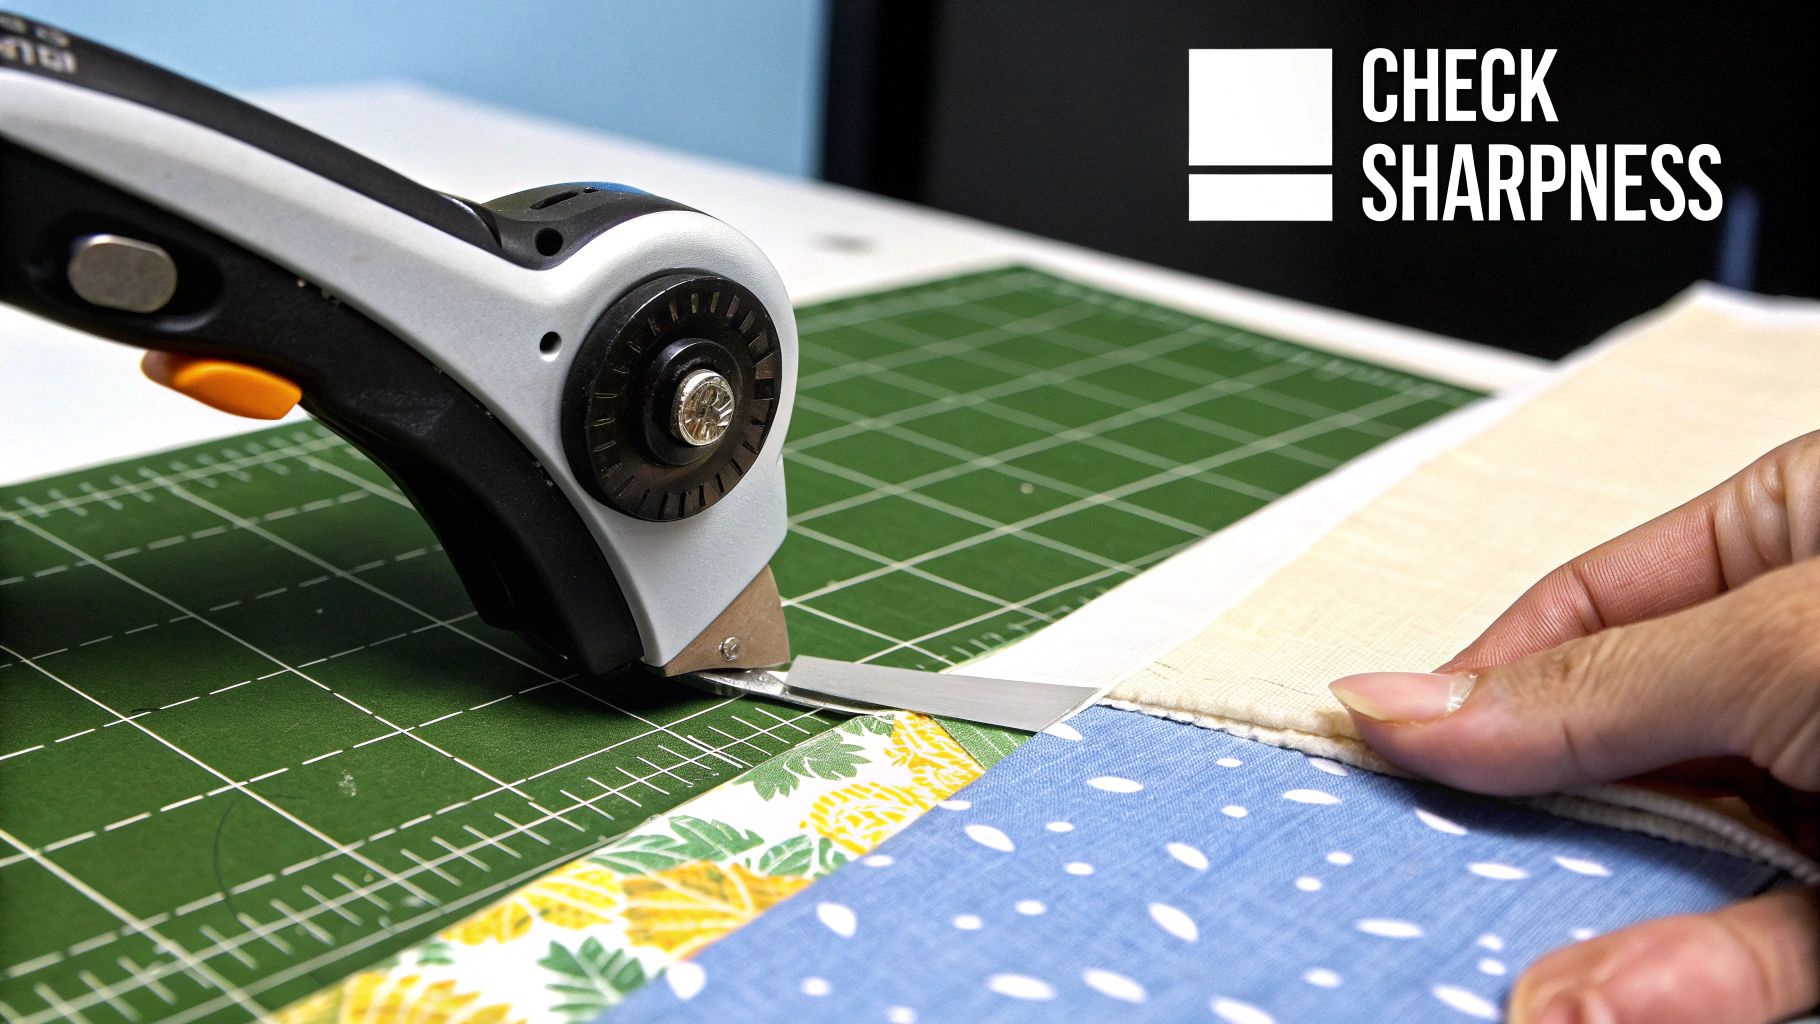
So, how can you tell it’s really time for a fresh blade? Long before a cut goes completely wrong and ruins a piece of your favorite fabric, your rotary cutter will give you some pretty clear hints. Spotting these early warnings is the best way to save your materials, your time, and your sanity.
The most glaring red flag is when your cutter starts skipping threads. You'll make a pass, feeling like you got it, only to lift the ruler and find little uncut spots or connecting threads holding the fabric together. That’s your blade telling you it's done.
Take a close look at the edge of your cut. A sharp blade leaves a pristine, clean line. A dull one, on the other hand, sort of chews its way through the fibers, leaving behind a jagged edge that looks a bit fuzzy or frayed. If your fabric looks worn out right after you’ve cut it, the blade is almost certainly the problem.
Sometimes, the clues are less about what you see and more about what you feel. Have you noticed you’re having to lean into the cutter, applying a lot more pressure than you used to? A sharp blade should feel like it's gliding through butter. If you’re forcing it, it's dull.
Here's a classic real-world test: your blade might seem to handle a single layer of quilting cotton without any issues. But the moment you try to cut through four layers at once, it starts skipping and bunching the fabric. That’s a telltale sign that the blade is on its last legs.
A dull blade doesn't just fail all at once. Its performance degrades over time, often so gradually you don't notice until it ruins a critical cut. When in doubt, swap it out.
This constant need for replacement isn't just a frustration in our sewing rooms; it drives a huge industry. The global rotary cutter blade market was valued at around USD 612 million in 2024, fueled by the wear and tear from sectors like textiles and even agriculture. You can dig into the full rotary cutter blade market growth research to see the bigger picture. For us crafters, the lesson is simple: sharp tools are essential for quality work.
Even when you know the steps, a few questions always seem to pop up. It's one thing to follow instructions, but it's another to really understand the why behind it all. Let's dig into some of the most common things people ask, so you can feel completely confident with your rotary cutter.
It’s the number one question I hear: "How long should my blade really last?" The honest answer? It depends.
There’s no hard-and-fast rule here. Think of it less like a date on the calendar and more about performance. A dedicated quilter cutting fabric for hours every day might swap out their blade monthly, while someone who only crafts on weekends could easily get a year of use from a single blade.
The best way to know is to let your fabric tell you. The moment you notice skipped stitches or ragged, frayed edges, it's time. If you feel like you have to really lean into the cutter to get through the material, that’s another dead giveaway.
The type of fabric you're cutting also makes a huge difference.
A wobbly blade is a classic sign that something isn't seated correctly. Don't worry, it's almost always a simple fix. The culprit is usually a nut that's a bit too loose or a blade that isn't sitting perfectly flat on the post.
Just take a breath and carefully disassemble it again. Make sure the blade is flush against the housing, with no gaps. When you put it back together, tighten the nut until it's snug—not cranked down, just snug—and then give it a final, tiny nudge. You want to get rid of that side-to-side play without making it too tight for the blade to spin.
Pro Tip: A perfectly installed blade feels secure with zero wobble, but it will still spin smoothly with a gentle flick of your finger. If it feels stiff or grinds to a halt, you've gone a little too far and need to loosen the nut ever so slightly.
You can, but I almost always advise against it. While rotary blade sharpeners are out there, they rarely bring a blade back to that perfect, factory-sharp edge. More often than not, you end up with an uneven edge that dulls quickly and, even worse, can snag and ruin your fabric.
When you weigh the risk against the relatively low cost of a fresh, high-quality blade, it's just not worth it. A new blade is a small investment that guarantees the clean, precise cuts your projects deserve.
Whatever you do, please don't just toss an old blade directly into the trash can. That's an accident waiting to happen. The best option is a dedicated blade disposal case, which you can find from most major brands.
If you don't have one, no problem. A small, sturdy container you have lying around the house will do the trick just fine. An old mint tin or a small, empty plastic spice jar is perfect. Just pop the used blade inside, tape it shut securely, and write "Used Blades" on it with a permanent marker. Another great tip is to simply use the plastic case the new blade came in—just put the old one back in there and snap it shut.
Ready for a perfect cut every time? At Famcut.com, we have the high-quality blades and tools you need to keep your projects looking sharp. Explore our collection of premium sewing and cosplay supplies today at https://famcut.com.
At High Country Quilts we care deeply about community. With our experiences in retail, we know that a store is not only a place to shop but also a place for the community to gather and share. During this busy...

Hi! We’re Adam and Renee Wheaton, the new owners of High Country Quilts! For more than 40 years, we’ve owned and operated vacuum and sewing businesses. Following in Renee’s father’s footsteps after he retired from All Discount Vacuum and Sewing in Colorado...


Leave a comment