
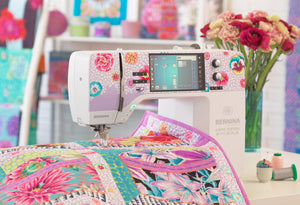

Free Fabric All Year: Our 2027 Fabric Punch Card
November 2–25 only: buy a $200 gift card in either store and get a free yard of fabric every month of 2027.

Why can a sewing machine stitch one fabric neatly, then skip stitches on another even though you haven't changed the settings? A shopping list alone doesn't answer that question. The needle, thread, fabric, stitch settings, and machine condition must work together.
Choosing materials for sewing machine projects is easier when you start with the fabric and the job the seam must do. Build a small kit, learn what each item changes, and make a scrap test part of every project. You don't need every accessory before you begin, but you do need compatible supplies.
A home sewing machine runs on a short list of consumables and supporting tools. When sewing goes wrong, check whether one item is unsuitable for the fabric before assuming the machine needs repair.
Essential sewing machine materials by job and beginner pick
| Material | Job | Beginner pick |
|---|---|---|
| Machine needles | Pierce fabric and help form each stitch | Sharp needle matched to woven cotton and the machine's needle system |
| Sewing thread | Forms the visible seam | Long-staple cotton or all-purpose polyester |
| Bobbin thread | Forms the underside of the stitch | Same type as the needle thread for general sewing |
| Bobbins | Hold the bottom thread | Bobbins labeled for your exact machine model, with spares |
| Stabilizer and interfacing | Support stitching or add body and structure | Sew-in interfacing for garment collars and waistbands |
| Presser feet | Hold and guide fabric for a particular task | Standard all-purpose foot first, then a zipper or quarter-inch foot |
| Fabric | Provides the project's base material | Pre-washed quilting cotton for first projects |
| Batting | Creates the middle layer of a quilt | Cotton or cotton blend |
| Machine oil and lint brush | Support cleaning and approved lubrication | Oil only where the manual names it |
Browse sewing supply categories at High Country Quilts with your machine model and project pattern beside you.
Project-dependent materials include fabric, batting, interfacing, and stabilizer. A pieced cotton cushion doesn't need the same support as an embroidered panel or a structured waistband. Buy these materials from the pattern's requirements rather than adding every kind to your basket.
Fabric-dependent materials include needles and thread, along with the presser foot and stitch settings. A needle suitable for cotton shirting may struggle at a bulky denim seam intersection. The needle-sizing and thread-fiber guidance below helps you make that match.
Use-dependent materials include replacement needles, cleaning supplies, and any approved oil. Bobbins and presser feet aren't disposable consumables, but they must fit your machine before they can work properly.
The top thread and bobbin thread describe positions, not necessarily different products. For ordinary sewing, you can wind the bobbin from the same spool you're using above the needle.
Likewise, batting isn't interfacing. Batting gives a quilt its padded middle, while interfacing changes the body of a garment section. A stabilizer supports fabric during a process such as embroidery.
Buying rule: Start with what your project uses, not everything your machine could possibly use.
Keep the machine manual within reach. It identifies the correct bobbin, needle system, attachment method, and maintenance procedure, details that a generic beginner kit can't settle for you.
What changes when a needle point meets a woven fabric instead of a knit? The point should suit the fabric structure before you select a size.
These fabric-to-point pairings follow South Dakota State University Extension's needle and thread guidance. Its serger recommendations apply to serger work, so use your sewing machine manual for household-machine requirements.
Needle size, stitch density and examples by fabric weight
| Fabric weight | Needle size | Stitches per inch | Example fabrics |
|---|---|---|---|
| Lightweight | Approximately 11–14, selecting the finer suitable needle | 18–20 | Chiffon, fine lace, organdy |
| Medium | Approximately 14–16, adjusted for the actual cloth and thread | 10–12 | Quilting cotton, cotton shirting |
| Heavyweight | 16 or heavier when the machine permits | 6–10 | Canvas, work denim, wide-wale corduroy |
| Layered quilt sandwich with batting | Select through a layered scrap test | Choose a setting that produces balanced stitches without puckering | Batting with patchwork tops |
The lightweight and medium needle sizes and stitch-density figures are broad reference ranges from the South Dakota State University Extension fabric selection chart. They are starting points, not fixed rules for every fabric.
A finer needle makes a smaller hole in thin cloth. Heavier fabric needs a needle suited to the full assembly, while longer stitches reduce closely spaced perforations.
Check paired size labels carefully. European and American needle numbers use different numbering systems. A label such as 80/11 pairs two system-specific numbers; it is not a universal size. Follow the package and your machine manual rather than relying on a remembered number.
The Janome JW8100 manual recommends 11/75 or 14/90 for general sewing, with finer combinations for lightweight fabric and a needle large enough to penetrate heavy layers without fraying the thread. That model-specific guidance shows why your own manual takes priority over a general chart.
For a quilt, test the batting and backing along with the patchwork top. Include a seam intersection if the finished project will have bulky crossings.
Change one setting at a time, sew another sample, and keep the combination that produces clean stitches.
Choose needle packs for your next fabric test, checking the needle system and package sizing against your machine manual before purchasing.
Cotton, polyester, core-spun thread, and nylon filament don't behave identically under sewing stress. Compare them by the work the seam must do, not just by color or the fiber content of the fabric.
Thread fiber behavior under sewing stress
| Thread fiber | Strength under sewing stress | Best use |
|---|---|---|
| Cotton | Greatest loss in several tensile properties among the tested types | Decorative and traditional quilting seams where the finish is a priority |
| Polyester | Generally retained more strength in the tested comparisons | Everyday sewing and seams under higher stress |
| Core-spun | Generally retained more strength in the tested comparisons | Strong seams, including cotton-wrapped options where a cotton surface is wanted |
| Nylon filament | Better abrasion resistance than polyester in one experiment | High-friction applications after checking project suitability |
The comparisons summarized in the Textile Research Journal study on sewing-thread performance describe tested constructions and conditions, not a guarantee that every polyester spool will outperform every cotton spool.
Thread encounters tension, bending, twisting, pressure, heat, and abrasion while passing through the machine. The same findings describe greater strength loss in needle thread than bobbin thread, largely associated with abrasion at the needle eye.
Cotton remains a reasonable choice for traditional quilting and a matte, natural appearance. Its performance in the tested comparisons doesn't mean cotton thread is unsuitable for a useful, washable quilt. It means you shouldn't assume that natural fiber automatically gives the strongest seam.
Polyester is worth considering when the project will experience repeated handling or seam strain. Core-spun describes construction rather than a single surface fiber, so read the label instead of assuming every core-spun thread has a cotton exterior.
Nylon filament's abrasion result doesn't make it the automatic choice for quilting. Check its intended use, handling, pressing requirements, and appearance before selecting it for a project.
Match thread to seam stress, fabric weight, sewing speed, and desired appearance, not tradition alone.
For general sewing, use the same thread type above and below unless the technique calls for a deliberate difference. If you're combining different threads for specialty work, pay particular attention to the thread passing through the needle because that path subjects it to repeated contact.
Choose long-staple cotton when buying cotton thread. Staple length describes the cotton fibers, so it isn't a label to apply indiscriminately to polyester thread.
Run the thread through a suitable needle and stitch a representative sample before starting a quilt top. If it shreds, don't immediately buy a stronger fiber. Inspect the needle eye, threading path, and thread compatibility first.
Compare thread options for your project, then buy a small quantity until you've tested the combination on your machine.
Buy the bobbin class specified for your machine model. Similar-looking bobbins can differ in height, shape, or construction, and visual resemblance isn't enough to establish compatibility.
Wind the bobbin through the machine's designated winding path. Let the winder control the process rather than pulling on the thread with your fingers, which can create uneven winding.
Keep two to four compatible spare bobbins as a practical starter supply. Label stored bobbins if you use different thread fibers, and don't mix bobbins from different machines in an unmarked container.
Before inserting one, check the unwinding direction shown in the manual. A correctly chosen bobbin can still cause trouble if it's seated or threaded incorrectly.
The standard all-purpose foot handles most early practice seams. Learn how the fabric feeds under that foot before adding attachments.
| Foot | When you need it | What to check |
|---|---|---|
| Zipper foot | Sewing close to a zipper or similar raised edge | Needle position and clearance |
| Quarter-inch foot | Piecing with the seam allowance specified by the pattern | Actual seam allowance on a sample |
| Walking or even-feed foot | Feeding stacked layers such as a quilt sandwich | Machine compatibility and installation |
An attachment won't correct inaccurate cutting or an unsuitable needle. After fitting a foot, check clearance according to the manual before sewing under power.
Sew-in interfacing adds structure to collars, cuffs, and waistbands without requiring an adhesive bond. Choose a weight that supports the fabric without making it unexpectedly stiff.
Fusible web bonds fabric layers for applications such as appliqué or suitable hems. It isn't interchangeable with every fusible interfacing, so follow the pattern's terminology and the product's pressing instructions.
Batting creates a quilt's middle layer. Cotton or a cotton blend is a useful starting point for machine quilting, but the finished thickness and handling still need a sandwich test.
Buy a stabilizer when the pattern or technique calls for it, then test it on the fabric. For a garment, handle and drape the sample after application. For appliqué, inspect the bond and stitched edge.
Sample separately: Bobbins affect lower-thread delivery, feet affect feeding, and support materials affect stiffness. A successful test of one doesn't confirm the others.
Secure the machine before your hands approach the needle, bobbin, or feed mechanism. Preventing an accidental start comes before fixing a threading problem or retrieving a jammed scrap.
The Boston University sewing-machine basics guide instructs users to raise the needle to its highest position before threading and engage the machine's safety button to prevent accidental operation. Your machine may use a different control, so identify its safe-access procedure before you begin.
Bobbin access puts your fingers close to moving mechanisms.
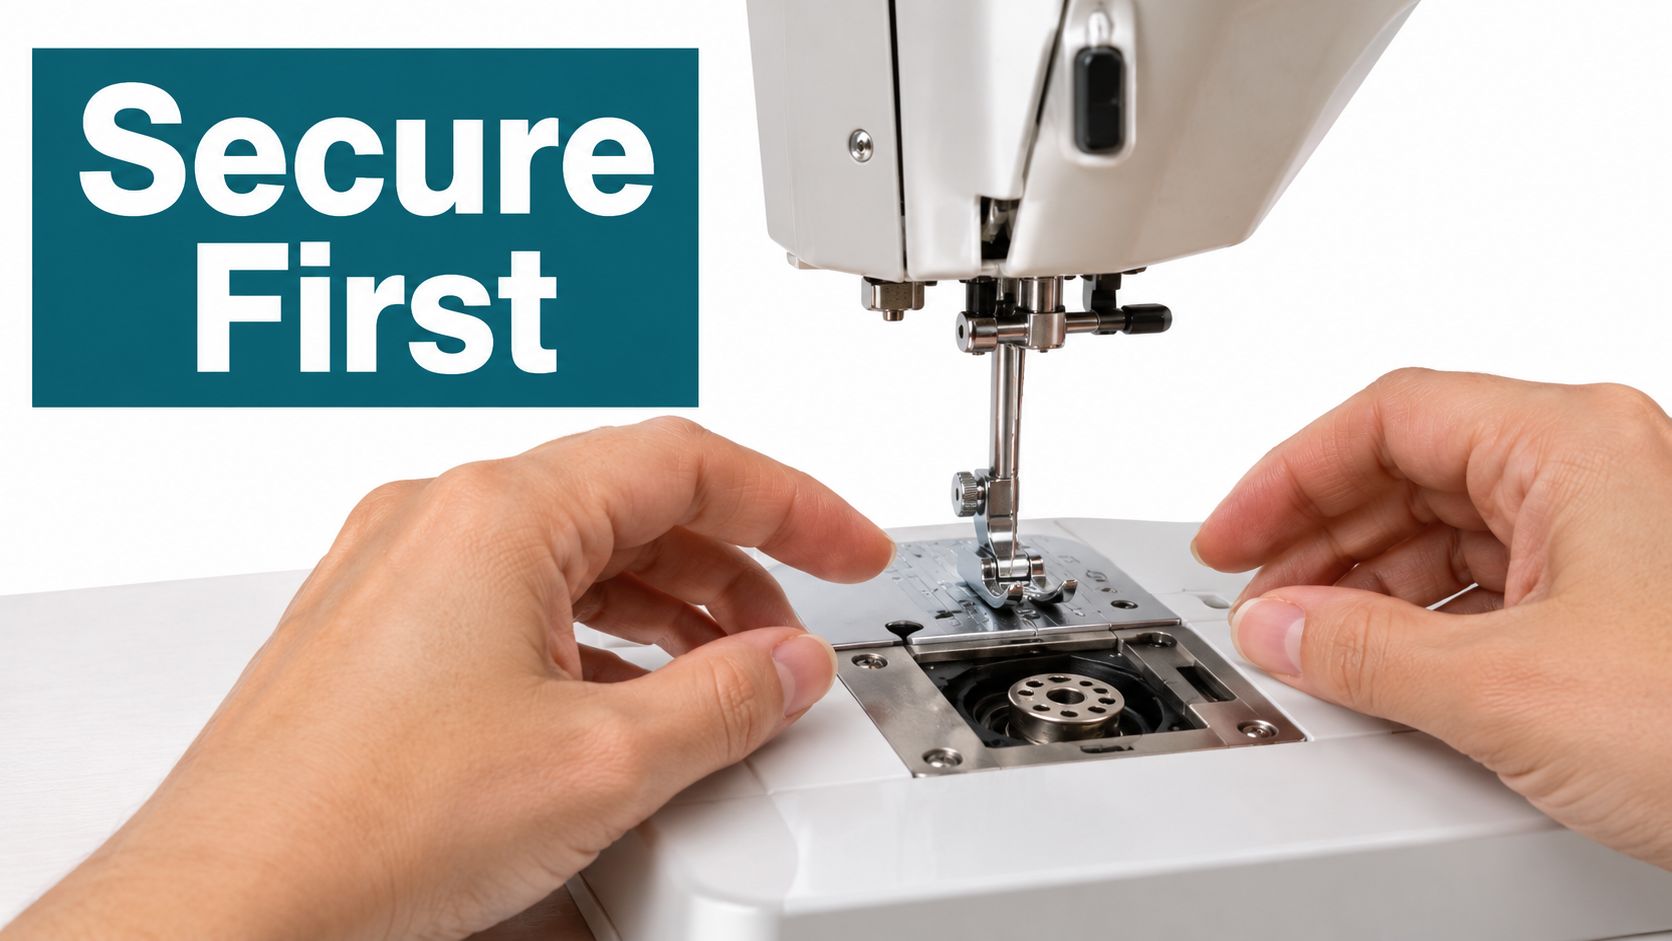
Don't pull hard on fabric trapped under the foot. Isolate the machine, consult the manual, and release the trapped threads without forcing the mechanism.
A damaged guard, faulty control, or damaged power cord is a reason to stop. Have the defect repaired before returning to the project, even if the machine still appears to stitch.
Keep these hazards out of your working path:
Never clean or repair a running machine. In a workplace using lockout procedures, the power switch must remain locked out until the work is finished. At home, keep the machine isolated from accidental operation throughout the task.
Use this visual checklist beside the machine, with your model's manual as the authority for access and lubrication.
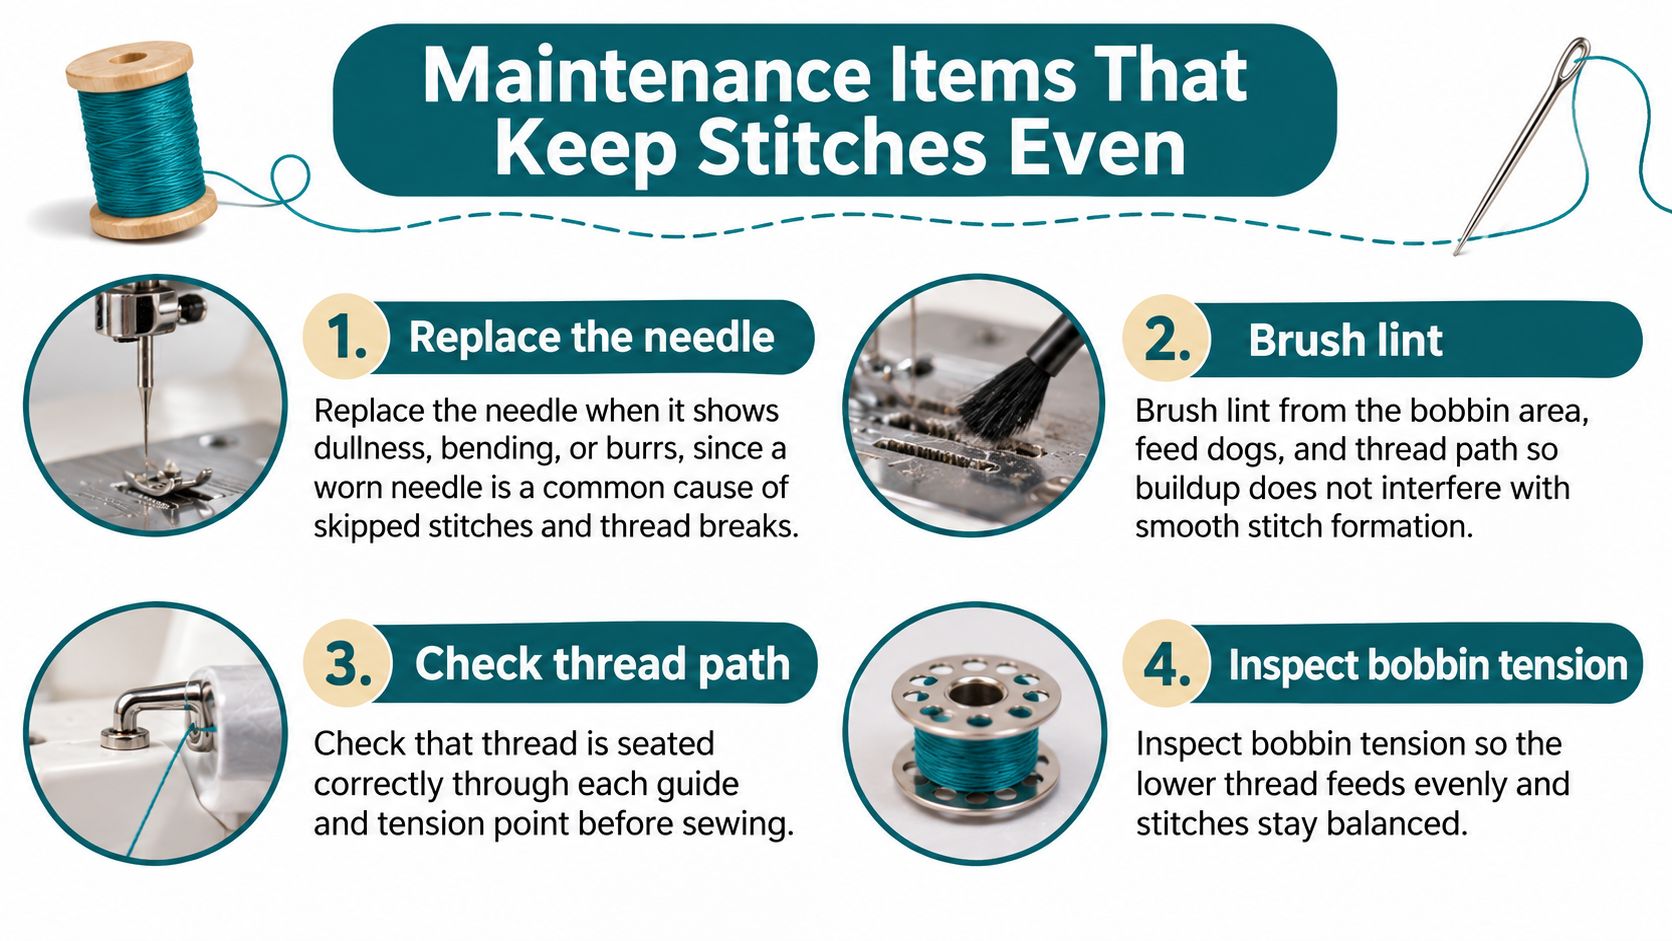
The New York State industrial sewing-machine operator outline identifies needle replacement, cleaning, and lubrication among routine maintenance skills. For a home machine, apply those tasks only within the owner-maintenance procedures specified by its manufacturer.
Keep these items together:
A clean machine, correctly installed needle, compatible thread, and properly threaded bobbin operate as a system. Changing the spool won't fix an upper thread that missed the take-up lever, and tightening tension won't correct a bobbin installed backward.
The infographic's bobbin-tension reminder means checking lower-thread delivery and stitch balance. It doesn't mean turning the bobbin-case tension screw whenever a seam looks wrong.
First verify threading, winding, seating, and cleanliness. Make tension adjustments only according to the manual, and use a sample to judge the result.
Use the demonstration below alongside your manual, not as a substitute for model-specific instructions.
Find maintenance supplies for your sewing setup, taking the oil specification and needle system from your manual.
Check the needle at the start of each project and clear lint after each sewing session.
Prioritize a fresh, correctly sized needle pack and dependable thread. Choose a sharp needle suitable for your woven cotton, with a finer and a heavier option available for testing.
For cotton thread, look for long-staple construction. For polyester, choose an all-purpose sewing thread appropriate to the project rather than assuming embroidery, decorative, and construction threads are interchangeable.
Read both the fiber and thread-weight information. Don't judge compatibility from the spool's color or size.
Buy bobbins labeled for your exact model before buying optional attachments. Keeping a modest supply ready is more useful than owning a large assortment of unverified bobbins.
Check needle packages for the machine's required needle system as well as size. A suitable point and diameter won't help if the needle itself doesn't fit the machine correctly.
Use this purchase order:
Delay a zipper foot until you're sewing a zipper, a quarter-inch foot until you're piecing, and a walking foot until layered feeding makes it useful. Some machines include these accessories, so inspect the accessory box before buying duplicates.
Buy stabilizer or interfacing for a named technique, not as an unspecified cure for difficult fabric. An unnecessarily stiff support can change the result more than you intended.
Keep inexpensive working aids available: a lint brush, labeled scrap samples, and a notebook. Record the successful setup, then buy larger quantities only when you know the combination works.
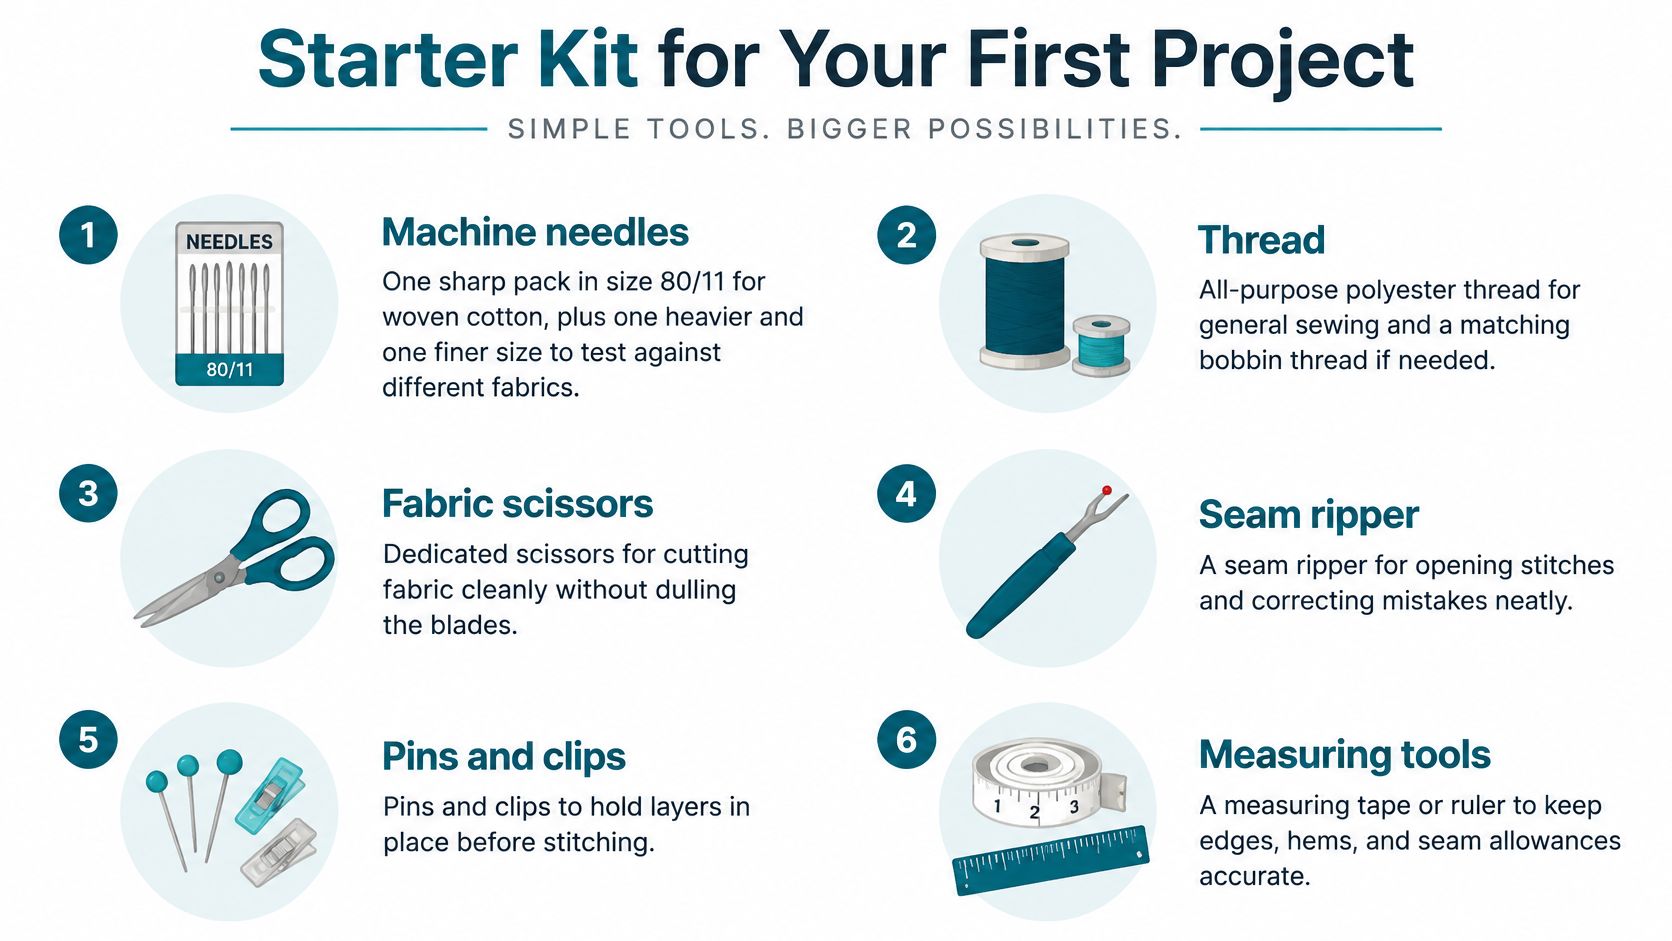
Don't confuse the machine kit with the whole sewing kit. You'll also need tools for cutting accurately, holding pieces together, measuring, and removing mistakes.
The visual checklist includes those supporting hand tools.
Quilt: Use quilting cotton, cotton or cotton-blend batting, and an appropriate piecing foot. Before committing to the full project, test the piecing seam on top-fabric scraps and make a separate quilt sandwich to evaluate the quilting setup.
Garment: Add sew-in interfacing where the pattern specifies structure, such as collars and waistbands. Match a sharp needle to woven garment fabric, but switch to the appropriate knit needle when the garment fabric stretches.
Denim or canvas: Select a heavyweight needle appropriate to the machine and thread. Use the heavyweight guidance in the needle table, then test through the thickest seam allowance rather than only through a flat area.
Record the fabric, layer count, needle type and size, thread, presser foot, stitch setting, and any tension adjustment. Attach the sample or label it so you can connect the written setup with the actual result.
A useful entry describes an observable result, such as flat seams with no skipped stitches. A note that merely says good settings won't tell you what to repeat later.
Keep the unsuccessful sample too if it helps show what changed. Mark the adjustment directly on the scrap so you don't mix it up with the final test.
Use the needle and fiber tables to narrow the choices, then browse the starter-kit categories with your pattern and machine model ready.
Start the project when every check passes, and re-test whenever the fabric or layer count changes.
If you can't confirm bobbin compatibility, bring the machine model rather than a bobbin that looks similar. If a seam fails, keep the sample and record the needle, thread, and settings so the problem is easier to describe.
We're an authorized BERNINA dealer in Colorado Springs, with training and support for BERNINA machines. Our shop carries BERNINA and Bernette machines, including embroidery and serger/overlocker options, presser feet, and previously loved machines, along with Aurifil and Isacord threads and Pellon interfacing.
For a heavyweight bonding task, Pellon 725 Heavy-Duty Wonder-Under is a paper-backed fusible web designed to provide extra-strong adhesion for heavyweight fabrics. It serves a different purpose from sew-in interfacing, so choose it for the intended bond rather than treating all support materials as substitutes.
You don't need to settle every future sewing purchase today. Confirm the materials for the project on your table, keep the successful sample, and add tools when a specific task requires them.
For uncertain fabrics, use Matching Needle Size and Type to Your Fabric to choose a starting combination. For a seam that will carry higher stress, use Choosing Thread Fiber for Strength and Longevity to compare the thread options before testing.
High Country Quilts offers fabrics, needles, thread, sewing accessories, and BERNINA machine support to help you build a compatible project kit. Visit High Country Quilts with your pattern and machine model to shop your supplies or ask about machine service, then confirm your choices with a scrap test before sewing the final pieces.
November 2–25 only: buy a $200 gift card in either store and get a free yard of fabric every month of 2027.

Serger and BERNINA Mastery classes, longarm training, bag-of-the-month, Kids Sewing Club and a Highlands Ranch retreat. Here's what's on the calendar in November.

Free gifts, included packages and special pricing on the BERNINA 790 ULTRA, 990, Liberty Editions, L 890 serger and Q Series longarms, now through December 31.


Leave a comment