

Free Fabric All Year: Our 2027 Fabric Punch Card
November 2–25 only: buy a $200 gift card in either store and get a free yard of fabric every month of 2027.

You've got one rolled bundle on the table, a free Saturday, and a sofa that could use a throw. You don't want to cut yardage into strips before you can start, and you don't want to guess whether one roll is enough. That's exactly where learning how to sew a jelly roll quilt as a size-and-seam system helps. Pick your finished size first, prove your seam on scrap, then sew with checkpoints so a small drift doesn't turn into a crooked top.
You're standing in front of that coordinated roll because the color work is already done for you. What you need now isn't inspiration. You need inches you can trust.
A typical jelly roll contains 40 strips, each 2.5 inches wide and about 42 to 44 inches long, and after a conventional quarter-inch seam each strip finishes at approximately 2 inches wide, according to the Threadworks jelly roll buying guide. That same guide puts one 40-strip roll at roughly 3,200 finished square inches and a common strip-only layout at approximately 50 by 64 inches. Treat that throw as your default plan for one roll.
One roll isn't one fixed quilt. A pattern that sews strips whole keeps more length in play. A pattern that cross-cuts strips into squares, triangles, or short segments spends more fabric inside seams, so the top finishes smaller even though you started with the same bundle.
Borders change the math in the other direction. Add a wide border and your throw grows, but that border fabric usually isn't in the roll. Directional prints also cost you usable length because you may flip or trim strips to keep a motif upright.
Use this table to choose a row before you buy anything else.
Jelly roll counts and planning sizes
| Project | Rolls to plan | Size to expect | What changes it |
|---|---|---|---|
| Lap or throw, strip layout | 1 | About 50 by 64 inches | Borders, waste, and seam error |
| Quick square from one roll | 1 | 48.5 by 48.5 inches | Strips cut into units |
| Long strip rows | 1 | About 50 inches wide, 32 rows | Whole strips versus cross-cuts |
| Twin | 2 | Planning benchmark only | Shrinkage and added borders |
| Queen | 3 | Planning benchmark only | Same variables as the twin |
| King | 4 | Planning benchmark only | Same variables as the twin |
Those twin, queen, and king counts are planning benchmarks, not guarantees. Shrinkage, imperfect cutting, and a seam that's a thread too wide all steal usable fabric. If your seam runs fat across dozens of joins, you lose width you were counting on for the border to sit flat.
Practical rule: Choose your finished size from the table first, then buy the roll count that fits it. Don't buy one pretty roll and hope it stretches to a bed.
Pick your row, then choose your bundle to match it. Start by selecting a 40-strip jelly roll at High Country Quilts in the colors you want for that 50 by 64 inch throw, and add border or binding fabric now while the collection is in front of you. This size decision is the hub everything else hangs on. Supplies, layout, seam checks, and finishing all get easier once the roll count is settled.
Set out only what your first strip quilt will use. Every tool below earns its place by preventing a specific mistake.
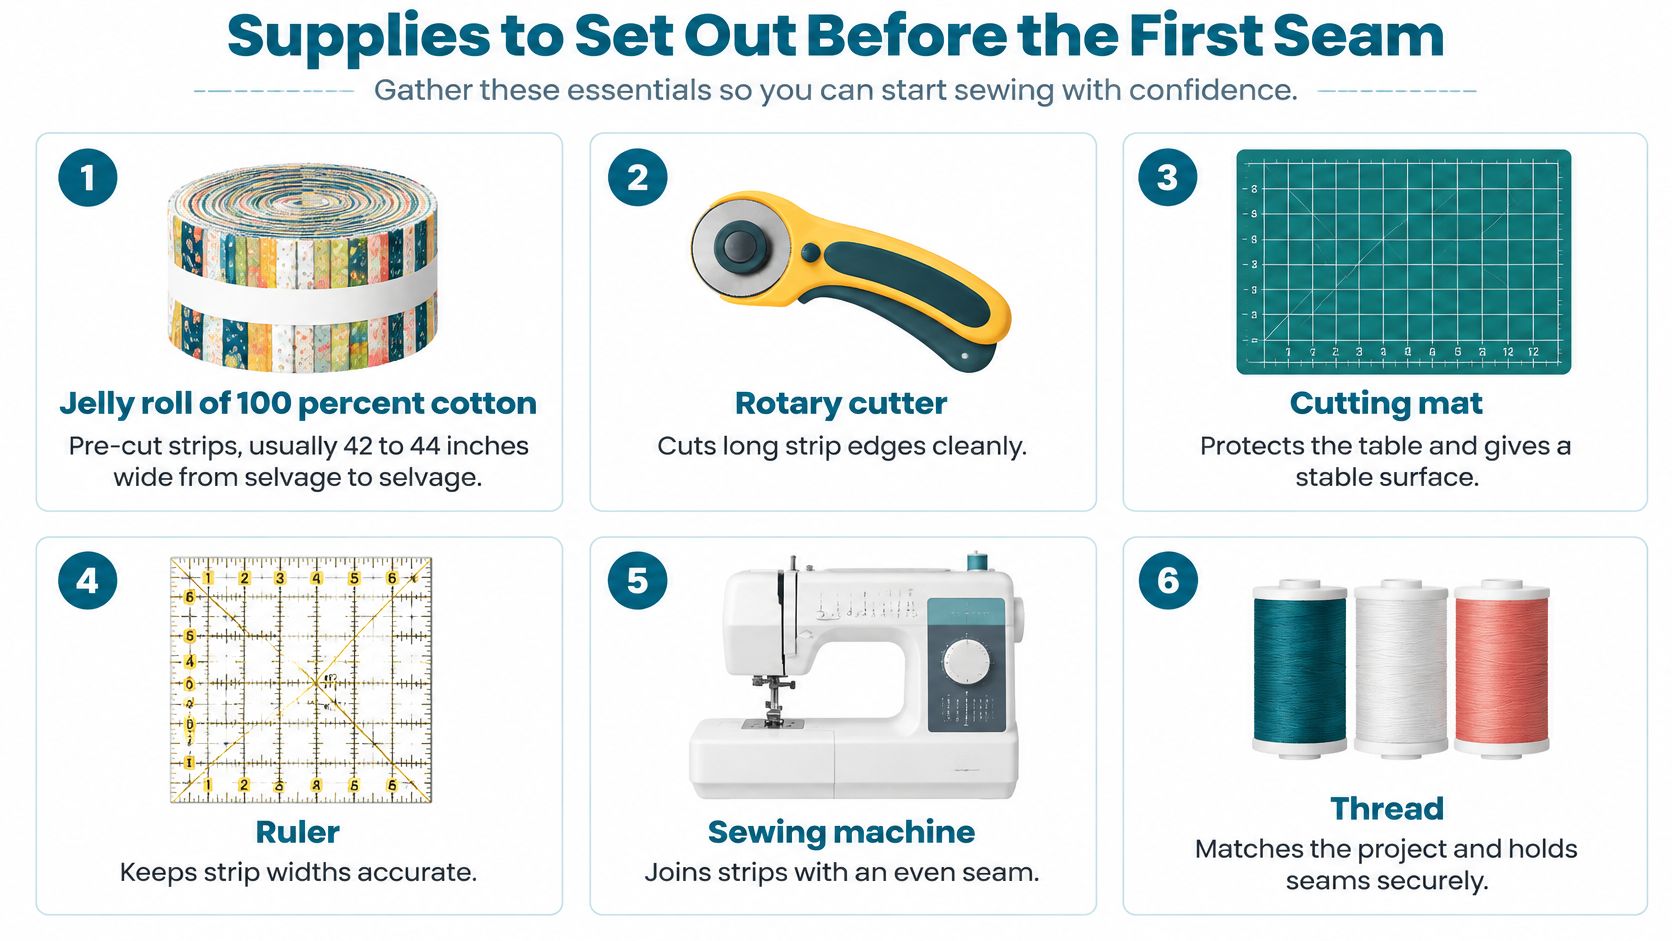
A standard roll is generally made from 40 coordinating fabric strips, each measuring 2.5 inches wide and approximately 42 to 44 inches long, cut from selvage to selvage, as shown on the Missouri Star Quilt Co. jelly roll collection page. That page also notes that length can vary by manufacturer and some specialty rolls contain fewer than 40 strips, so read your package before you plan cuts.
Save the walking foot for quilting the layered sandwich later. You don't need it for piecing strips. Skip fusible web too unless your pattern adds applique. It has no job in a plain strip top.
Measure accurately from the first cut. Order a quilting ruler from High Country Quilts before you open the roll, so you can check width at the pinked points instead of guessing. Pair it with cotton piecing thread from High Country Quilts in a neutral that blends across light and dark strips.
Don't prewash a jelly roll. Pinked edges fray in water, and wet narrow strips twist and distort. You'd lose the precise width your pattern assumes, and you'd spend your sewing time trying to press strips back into shape.
Prep dry instead. Lint-roll the bundle to lift loose fibers. Press creases flat with an up-and-down iron motion, never by dragging the iron along the strip. Add steam only after a strip already lies flat. If one dark strip worries you, press it against a white scrap and check for color transfer before it touches your lightest fabrics.
Set short or skewed strips aside in a binding or practice pile. They aren't trash. They're perfect for your seam test and, later, for binding strips.
Choose your layout while the strips are still whole. Once you cross-cut, you've committed to a size and a look, and you can't sew length back on.
Beginner jelly roll layouts compared
| Layout | How it is sewn | Size signal from one roll | Choose it when |
|---|---|---|---|
| Strip rows | Join long edges into rows | About 50 inches wide and near 32 rows | You want a fast, readable throw |
| Rail fence sets | Four-strip sets, cross-cut, rotate | Set height near 8.5 inches unfinished; throw often near 50 by 64 | You want simple blocks and contrast |
| Jelly square | Cut strips into squares, then piece a grid | Often smaller than a whole-strip throw | You want a scrappy grid and accept more seams |
| Race-style strip | Join ends, fold, and sew repeatedly | Size shifts with every fold and seam | Speed matters more than print placement |
| Roll plus background | Same strips plus extra yardage | Larger than the roll alone | One roll must cover a bed |
Strip rows are the clearest first project. You join long edges into bands, so color order reads exactly as you laid it out on the table. In 2025, wikiHow's jelly roll method stated that its method produces a quilt top with 32 rows and an approximate width of 50 inches. That tells you the scale to expect when strips stay mostly whole.
Rail fence gives you blocks without difficult piecing. You sew about four strips into a set, cross-cut the set into units, then rotate every other unit so seams change direction. Contrast does the visual work. Dark, medium, and light strips in a repeatable order matter more here than any single print.
A jelly square grid cuts strips into squares first. You gain a scrappy, shuffled look, but you pay for it in seams. Every extra seam takes fabric, so don't be surprised when the finished top measures smaller than a whole-strip throw from the same roll.
A race-style layout joins strips end to end into one very long strip, then folds and sews it in half again and again. It's fast and fun to watch grow. It's also the layout where you give up control. Two identical prints can land side by side, a directional motif can end up sideways, and you won't know your exact finished size until the folding stops.
Adding background yardage is different. It isn't cheating, and it isn't stretching a roll. It's the honest way to turn one roll into a larger quilt, because the background supplies the extra area the roll never contained. If you need bed coverage, plan that yardage up front instead of sewing a throw and hoping borders will rescue it.
For your first throw, pick strip rows or rail fence. Both let you check your seam, read your color order, and fix a mistake while it's still small. Save race sewing until your quarter-inch seam is already proven, because speed hides drift until the top is too big to correct easily.
Don't treat the roll as a race to join every strip as fast as you can. Treat it as precision strip piecing, where the same small seam repeats until it decides your finished size.
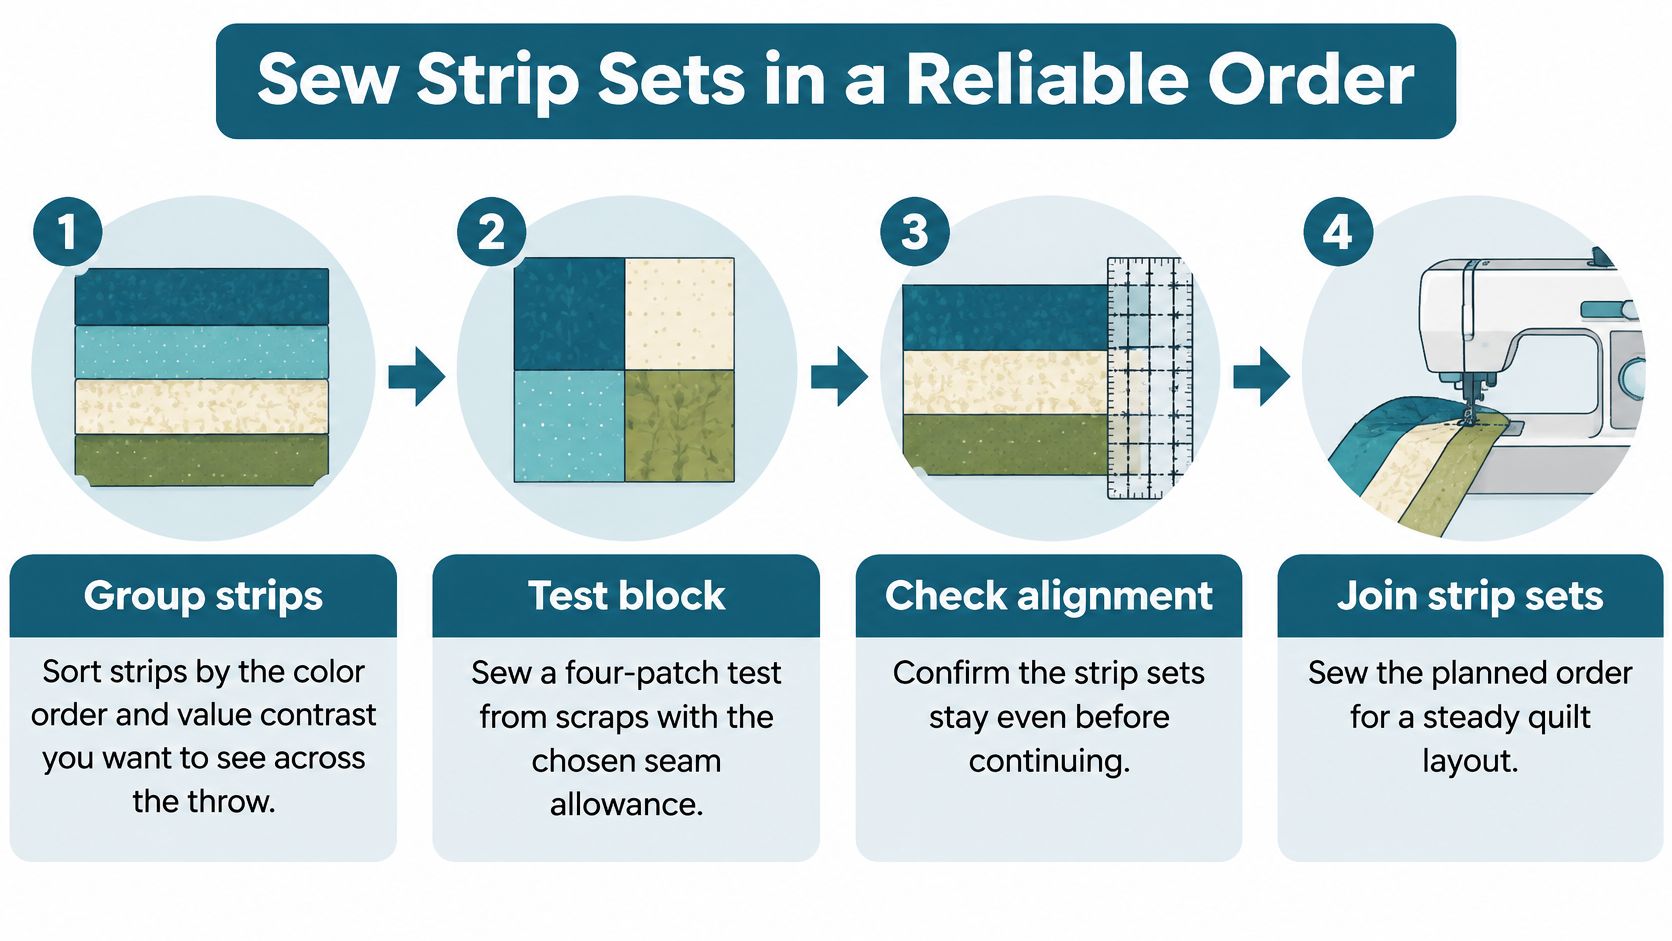
Standard rolls contain about 40 strips measuring 2.5 inches wide by approximately 42 to 44 inches long, commonly producing a lap quilt near 50 by 64 inches, according to the Missouri Star Quilt Co. jelly roll patterns collection. That size only holds if your seam holds. Follow this order and don't skip the test.
That third step is where beginners get impatient. Don't. Two minutes moving a needle saves you from unpicking a whole set later.
A test block that measures wrong is good news. It just told you the truth while you were still sewing scrap.
Pressing direction isn't fussy detail. It determines whether your seams nest or fight you in the next step.
Say it plainly to yourself before you start. A slightly wide seam repeated across dozens of joins is enough to shrink your quilt and make rows miss at the corners. That's cumulative seam drift, and it's the most consequential beginner error in strip piecing because no single seam looks wrong on its own. The test block, the set measurement, and the squaring check exist to catch it while it's still one seam deep.
Can you save a wavy, short, or mismatched top without starting over? Usually, yes, if you diagnose before you trim. Start by measuring, not by staring at the whole quilt and feeling discouraged.
Measure one unfinished unit against the pattern specification first. That single number tells you whether your seam drifted, your pressing distorted the strips, or one row was sewn under tension. Then match your symptom to its fix.
When a jelly roll top goes wrong
| Symptom | Likely cause | Fix |
|---|---|---|
| Strip sets measure narrow | Seam wider than 1/4 inch | Reset needle or quarter-inch foot and resew from the last good seam |
| Long edges wave or bow | Fabric pulled, or iron slid along the seam | Alternate sew direction and press straight down |
| Intersections will not nest | Adjacent seams pressed the same way | Repress so neighboring seams face opposite sides |
| Quilt is slightly and evenly short | Small, consistent seam loss | Trim to one width and add an even border |
| Corners miss by more than a seam | Cumulative drift or a bowed center | Unpick the worst rows; do not rely on a border |
Narrow sets point to a seam wider than a quarter inch. Reset your needle position or foot, prove the correction on scrap, and resew from the last seam that measured right. You don't need to redo sets that already measure correctly.
Intersections that won't nest are usually a pressing problem, not a cutting problem. If neighboring rows were pressed to the same side, the allowances collide. Repress one row so its seams face the opposite direction, then pin and sew again. The corners should butt together without forcing.
Bowed edges usually come from pulling the strip through the machine or sliding the iron lengthwise. On the rows you resew, alternate your sewing direction from row to row so any slight pull cancels out instead of adding up in one curve. Press straight down and let the iron's weight do the work.
If the whole top is short by an even amount and the rows are straight, trim to the narrowest consistent width and add a calm, even border. The border restores size because the center is already square. Measure width at the top, middle, and bottom before you cut border strips, and cut to the middle measurement so edges don't flare.
If corners miss by more than a seam allowance, or the center bows while the edges look fine, unpick the worst rows. A border will not square a warped middle. It will only frame the warp and make quilting harder, because the excess fabric has nowhere to go and turns into tucks.
A tiny seam error, repeated across narrow 2.5-inch strips, can erase the width of a whole strip. Measure early, in the middle of the quilt, not only after the last seam.
Check square at several interior points as you assemble, not just at the corners. Diagonal measurements that agree tell you the top is square. Diagonals that disagree tell you which corner to investigate before you sew another row onto a problem.
Your top is squared, pressed, and measured. Now turn it into a finished throw in an order that keeps the layers from shifting under you.
The photo below shows the layering stage, where backing, batting, and top become one sandwich you can baste and quilt.
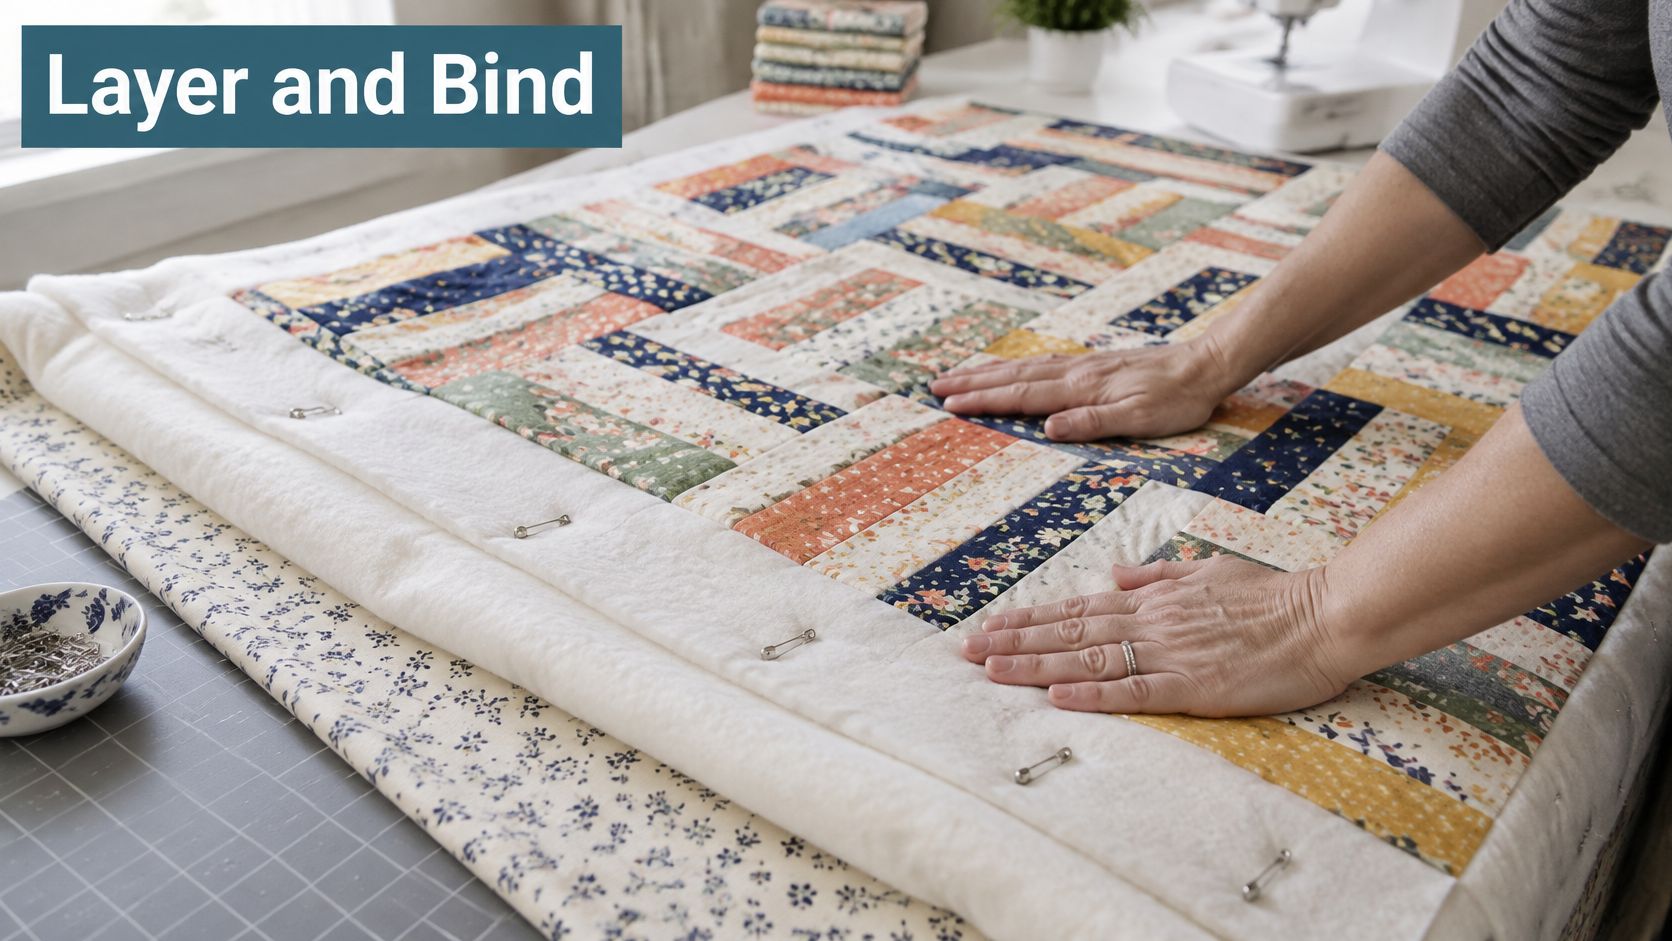
For finishing, layer backing wrong side up, batting, and the top right side up, smooth from the center outward, and baste at approximately 4-inch intervals when pin-basting, following the method in the Missouri Star Quilt Co. jelly roll quilt tutorial. That tutorial also notes that four-strip sets finish at roughly 8.5 inches in height, which is a useful final check that your sets were consistent before layering.
Quilt with a walking foot so the top, batting, and backing feed together instead of creeping at different speeds. Keep your first quilting simple. Stitch lines about a half inch from the seams, or sew one set of gentle diagonals. Start near the center and work outward so any fullness moves toward the edges instead of pooling in the middle.
Pause if the outer edges start to grow waves. Smooth and re-pin the unquilted area rather than sewing faster to get it over with. Trim the sandwich only after quilting is complete, because quilting can draw the layers in slightly.
Watch the walking-foot quilting stage here before you sew your own first lines.
Quilt your sandwich evenly with a walking foot or quilting thread from the High Country Quilts notions selection, chosen for this stage rather than borrowed from your piecing setup. The right foot here prevents the puckers that beginners often blame on their batting.
Cut binding 2.5 inches wide, often from leftover jelly roll strips. Join binding strips on the diagonal so the seam bulk spreads out instead of stacking in one spot. Sew the binding to the trimmed edge, miter each corner by folding a neat triangle at the turn, then fold the binding over and stitch it down.
Those short or skewed strips you set aside during prep earn their keep now. Use them for binding or sew them into a small practice block. Using the precut up beats buying extra fabric for a job your leftovers can do.
Make your first project one 40-strip roll, a throw near 50 by 64 inches, in strip rows or rail fence, with a scrap four-patch sewn and measured before you cut the roll. That's a size you can baste on a table, quilt on a home machine, and finish.
If you want a bed quilt, go back to the roll-count table and plan two, three, or four rolls, or add background yardage on purpose. Don't stretch one roll with hope and a wide border. The math you did at the start is what makes the finished quilt fit the bed.
You don't have to work out the next step alone. We provide classes year-round covering sewing, quilting, maintenance, and machine software, which is useful when you want a teacher beside you while you set that quarter-inch foot. If your pieced top is done and the sandwich is the hard part, we offer on-site quilting services where you can finish a project with the help of our experts.
Need a coordinated set instead of hunting strip by strip? We accept special orders for fabric kits by email or phone, and for kits we label the fabrics or make a swatch sheet when it isn't obvious which fabric is the background.
Book a beginner quilting class or on-site quilting help at High Country Quilts in Colorado Springs, and bring your measured test block, not a finished top, to your first session. That little scrap block tells your teacher more about your seam than any finished quilt could. Use the earlier product choices as your shopping checklist too. You'll want the jelly roll sized to your table row, a reliable ruler, cotton piecing thread, and a walking foot or quilting thread for finishing.
Bring your roll count, your chosen layout, and your measured test block to High Country Quilts, and we'll help you match fabric, thread, and tools to the throw you planned. Whether you want a class seat beside a teacher or expert help quilting a finished top on site, start your first jelly roll quilt with the seam already proven.
November 2–25 only: buy a $200 gift card in either store and get a free yard of fabric every month of 2027.

Serger and BERNINA Mastery classes, longarm training, bag-of-the-month, Kids Sewing Club and a Highlands Ranch retreat. Here's what's on the calendar in November.

Free gifts, included packages and special pricing on the BERNINA 790 ULTRA, 990, Liberty Editions, L 890 serger and Q Series longarms, now through December 31.


Leave a comment