

Free Fabric All Year: Our 2027 Fabric Punch Card
November 2–25 only: buy a $200 gift card in either store and get a free yard of fabric every month of 2027.

A serger trims the seam allowance, stitches the layers together, and wraps thread around the raw edge in one pass, so go straight to the use table below and find the row that matches your fabric. That single pass is the whole point, and it's also where most beginners get tripped up.
You've probably been there. You cut a jersey tee, the edge curls before you even reach the machine, and your regular sewing machine either stretches it wavy or leaves a raw edge that'll fray in the wash. Or you finish a pretty woven top, look inside, and the allowances look chewed up compared with store bought clothes. A serger solves those specific problems, but it doesn't replace the machine you already own. The trick is knowing which serger uses earn their time, and which jobs get slower once a knife and four threads enter the picture.
Say you've just cut that jersey tee. The cut edge is already curling toward the right side, and a straight stitch will hold the two layers together while leaving the raw edge exposed. Sew it, stretch it over your head a few times, and that rigid stitch line can pop because the thread can't move as far as the knit does.
A serger, also called an overlocker, handles all three jobs at once. As the BERNINA overlocker guide describes it, the machine combines seam construction, edge trimming, and raw edge overcasting in one operation. A small knife trims the excess allowance, needles stitch the layers, and loopers wrap thread around the fresh cut so the edge can't unravel. You feed fabric in once and pull out a finished seam.
| Job | Usual stitch | Best fabrics | Replaces |
|---|---|---|---|
| Seam a stretch garment | Four-thread overlock | Jersey, rib knit, leggings | Straight stitch that can pop |
| Finish a seam allowance | Three-thread overlock | Quilting cotton, linen, fleece | Zigzag overcast or pinking |
| Wrap a light edge | Two-thread overedge | Lightweight wovens | Pinked or loosely zigzagged edge |
| Make a narrow hem | Rolled hem | Chiffon, knits, napkins, scarves | Tiny turned hem |
| Sew a visible decorative seam | Flatlock | Fleece, jersey, blanket layers | Topstitched seam |
| Make a wavy lettuce edge | Stretched rolled hem | Stable stretch knits | Gathered hem on a sewing machine |
Start at the top row. A four-thread overlock uses two needle threads plus upper and lower looper threads, giving you two rows of needle stitching with interlocking loops around the edge. That second needle line is the reinforcement, and the loops supply the give. It's the practical default for jersey, rib knit, and leggings, anything that gets stretched and laundered again and again.
Drop to three-thread overlock when you're finishing rather than building. One needle line plus the wrapped edge is plenty for the seam allowances inside a woven garment, for fleece that doesn't fray but looks ragged, and for quilting cotton edges you want clean before they go into a project. You're trading a little construction strength for a lighter, less bulky finish, and on an allowance that's already sewn, that's the right trade.
The two-thread overedge is the lightest wrap of all, suited to a delicate woven edge that would look heavy under three or four threads. Below that, the table shifts from construction to decoration. A rolled hem encloses a narrow edge on napkins, scarves, and lightweight knits. Flatlock and decorative thread sit on the outside of blankets and visible seams, where you want the stitching seen. They're not what you reach for when a seam carries real load.
Scrap test first: Sew 6 inches on a leftover piece of the same fabric. If the knife cut too wide, your allowance is narrower than planned. If loops peek onto the face of the fabric, your looper tension is unbalanced. Both show up on a scrap for free.
Garment factories adopted this combined motion because knits unravel and stretch in ways a straight stitch handles poorly, and doing three steps in one pass saved handling on every seam. At home the logic is identical, just smaller. Circle the one row that matches the fabric in your hand right now, set up for that stitch, and ignore the rest until the next project asks for it.
A serger stitch can look complicated because several threads meet at the fabric edge. Start with the needles: they sew through the fabric in straight lines. The upper and lower loopers carry thread over and under the cut edge, wrapping it to form the finished seam.
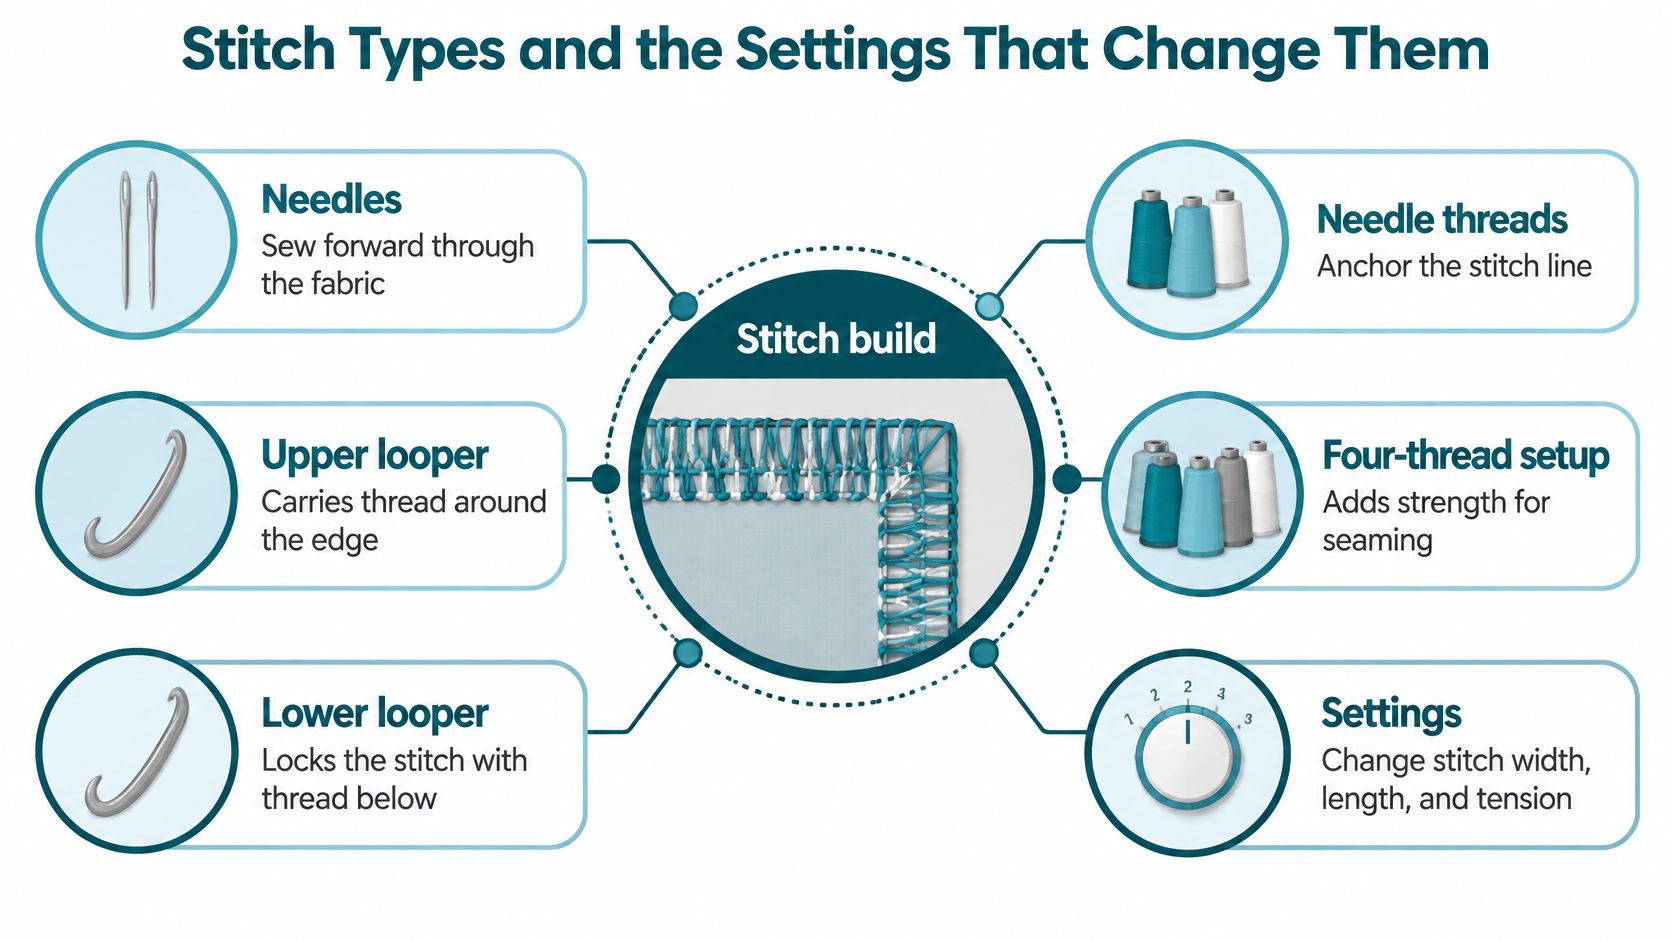
A four-thread overlock uses two needles and both loopers. Remove one needle and you have a three-thread overlock. The needle you keep determines the seam width: the left needle makes a wider stitch than the right. Test on a scrap to see how the width suits your fabric and project.
| Setup | Threads in use | Typical width | Use it for |
|---|---|---|---|
| Four-thread overlock | Two needles and two loopers | Wider seam | Stressed knit and woven seams |
| Three-thread, left needle | Left needle and two loopers | Wider seam | Seams and standard finishing |
| Three-thread, right needle | Right needle and two loopers | Narrower seam | Narrower edge finish |
| Regular length | Same stitch, length dial only | Shorter to longer stitches | Everyday seams; use longer stitches on bulk |
| Rolled hem | Usually one needle and tightened lower looper | Narrow rolled edge | Sheers, knits, napkins |
Stitch length controls how closely the stitches sit together. Shorter stitches pack more thread along the edge, which can give lightweight cotton a dense finish. Longer stitches use less thread and can sit flatter on thick fleece, where dense stitching may look crowded.
On knits, puckering or wavy edges may call for a change to differential feed rather than stitch length. The front and rear feed teeth can move at different rates. Increasing the front feed helps ease fabric in as it sews, which can reduce waves. Decreasing it stretches fabric slightly, creating a ripple that can suit a lettuce edge.
Change one setting at a time. Sew a scrap, then mark the needle, length, and width on it with a fabric marker. A labeled sample makes it easier to repeat the result on your project.
When comparing machines, watch how the needle choice and dials change the seam on the same jersey scrap. A wider or narrower stitch may suit different fabrics and finishes. That hands-on comparison helps you judge whether the adjustments are clear and comfortable to use.
Most serger trouble isn't a broken machine. It's a skipped step before the first stitch. The Howard County Library serger guide points to the knife, multiple loopers, and set threading sequence as the reasons serger problems look different from sewing machine problems, so a short pre-sew routine prevents most of them.
| What you see | Likely cause | First fix |
|---|---|---|
| Skipped stitches | Bent needle or missed thread path | Replace the needle and rethread in order |
| Thread nest under the fabric | Presser foot down while threading | Raise the foot, rethread, test on a scrap |
| Loops on the edge | Looper tension too loose | Balance looper tension on a scrap |
| Wavy seam on a knit | Differential feed too low or fabric pulled | Raise differential feed and let the machine feed |
| Seam unravels at the end | Stitches cut off without a chain tail | Leave a thread chain and secure the end |
| Seam allowance too narrow | Knife cut too wide | Recut the next piece and reduce cutting width |
| Grinding or a pin hit | Knife or needle contact | Stop and take the machine to a technician |
Read the table by symptom, not by setting. Loopy edges mean the loopers aren't pulling their share, so balance them against each other on scrap instead of cranking every dial. A thread nest almost always means thread never entered the tension discs, which circles back to that raised presser foot. A seam that unravels after you snip the tail wasn't finished, because serged stitches need a short thread chain sewn off the fabric and secured, since there's no backstitch. And over-trimming has no stitch fix at all. The knife removed that fabric permanently, so the correction is a narrower cutting width on the next piece.
Know where your fixes end. Rethreading, swapping a needle, and retesting on scraps are beginner jobs you should own. Grinding noise, a needle strike, a pin through the knife, or a machine that won't chain off means stop immediately and unplug. Timing and knife damage don't improve with another test seam. If you're in Colorado Springs, bring that stubborn machine in during regular shop hours for an authorized look rather than guessing at internal adjustments, and consider a hands-on class if threading order is what keeps defeating you.
The question behind most serger shopping isn't really what the machine does. It's whether your actual projects need it. A serger isn't a faster sewing machine, and treating it like one leads to cut allowances you wanted to keep and seams that needed more strength than loops provide. The University of Kentucky extension guide makes the useful point that overlocked seams can stretch but may not be strong enough alone for every construction task, so some seams still need additional stitching. Sorting jobs into three groups clears this up fast.
Here's the side by side most beginners picture when they're deciding whether a second machine earns table space.
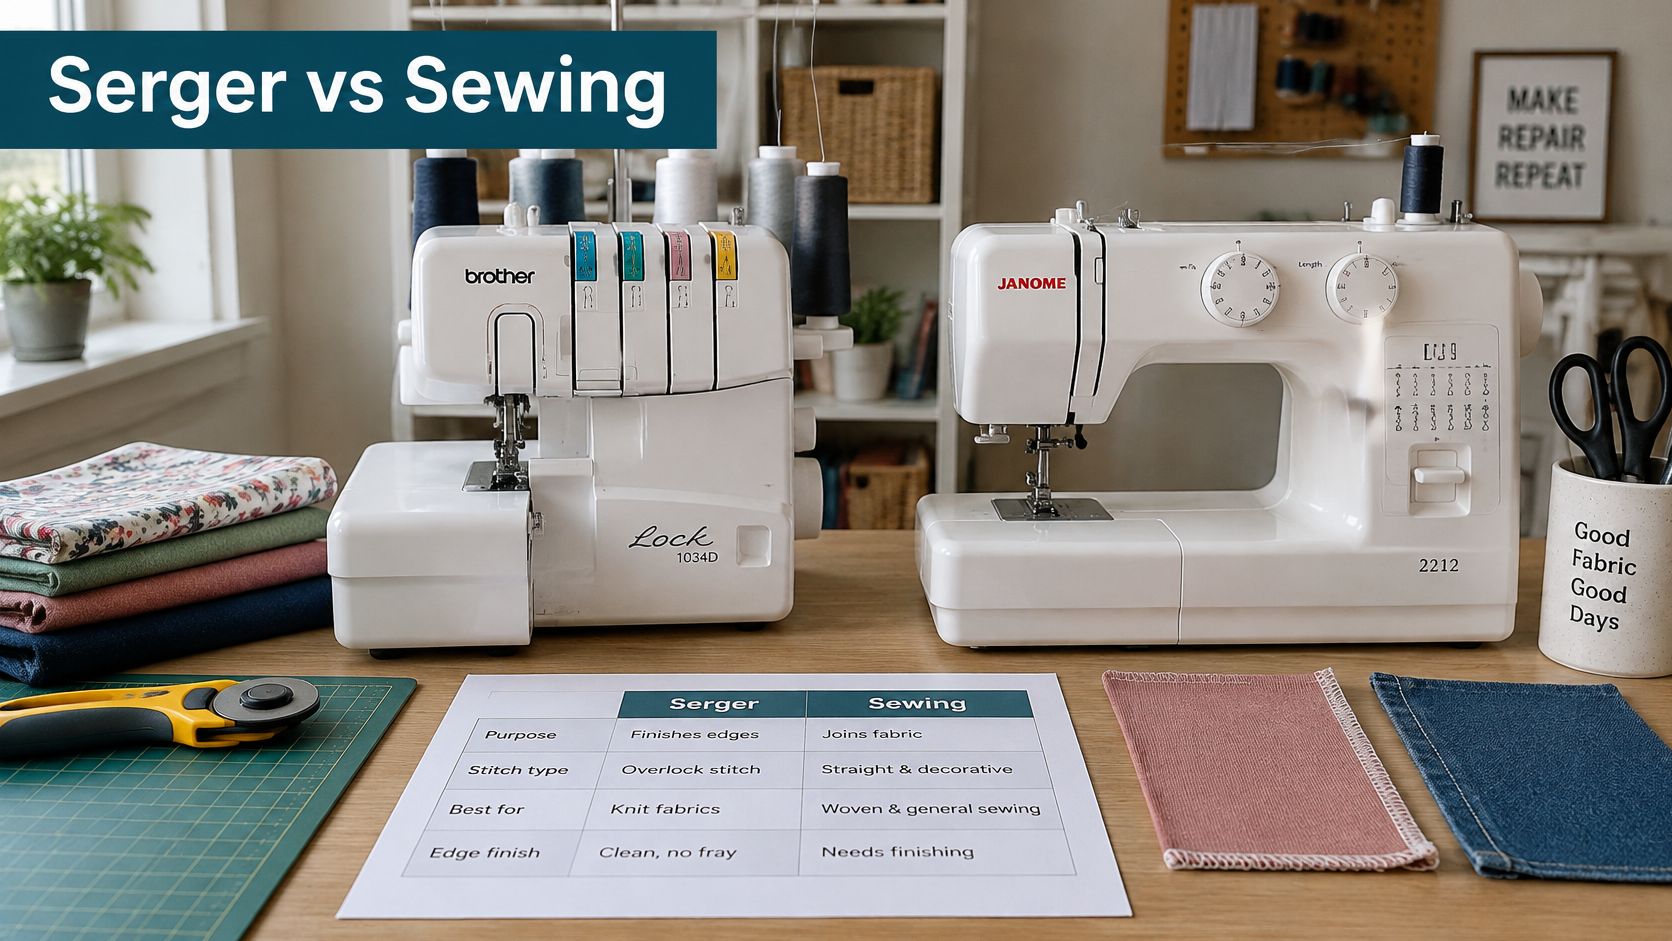
| Job | Best tool | Why |
|---|---|---|
| Jersey or legging seam | Serger | Four-thread seam stretches and finishes together |
| Rolled or lettuce hem | Serger | Narrow edge is rolled and enclosed by loopers |
| Clean a fraying allowance | Serger | Knife and overlock replace a separate overcast pass |
| Quilt piecing | Sewing machine | Accurate scant seams and no trimming of the allowance |
| Zipper, buttonhole, topstitch | Sewing machine | Knife and loopers cannot do precise closures |
| Woven garment seam that may be altered | Sewing machine, then serger | Wide seam first; serger only finishes the edge |
| Bag strap or stressed jean seam | Sewing machine, serger optional | Strength first; overlock is only a clean edge |
| Fleece blanket edge | Serger | Overlock or flatlock finishes a bulky edge quickly |
Serger-only jobs share one trait: the edge itself is the problem. A four-thread seam on jersey, rib knit, or leggings needs to stretch, hold, and resist unraveling at the same time, and the serger delivers all three in a single pass. Rolled and lettuce hems belong here too, along with quick overcasting on fleece and allowances that shed threads every time you handle them. That same extension guide lists quieter wins in this group, including pucker-free seams, sheer fabrics, decorative flatlock, custom trims, fabric splicing, and recycling or remaking garments. None of those show up in most beginner lists, yet they're often what keeps a serger busy after the first tee.
Sewing-machine-only jobs need precision the knife would destroy. Quilt piecing depends on an accurate, consistent seam allowance across dozens of pieces, and a blade trimming as you go makes that allowance a moving target. Zippers, buttonholes, topstitching, and patch pockets all require stitching in the middle of fabric or in exact shapes, and loopers can't do that work. If a job involves stopping, pivoting, and placing stitches to the millimeter, it stays on the sewing machine.
Best-together jobs are where experienced sewists live. On a woven garment, you sew the structural seam on the sewing machine at the full pattern allowance, press it, check the fit, and then serge the raw edges so the inside stays clean through years of washing. A bag strap or the stressed seam on jeans works the same way. The sewing machine provides the strength, and the serger's only assignment is a tidy edge. Neither machine is demoted. Each does the half it's built for.
Watching the same seam handled both ways makes the trade-offs concrete, so here's a short demonstration worth viewing before you test your own samples.
A knit tee is mostly serger work. Shoulders, side seams, and sleeves go together with four-thread overlock, and you'll move to the sewing machine only if your pattern wants a topstitched neckband or hem. A fleece throw also leans serger, since an overlocked or flatlocked edge finishes that bulk quickly, while a quilting cotton top flips the ratio. You piece it entirely on the sewing machine, and the serger might only clean up a quilt label edge or a backing seam. A woven dress splits the difference, with machine sewn seams and serged facings, armholes, and hem allowances.
The knife makes every serger decision permanent. A narrow serged seam can't be let out next season, so any garment you might alter gets a wide machine seam first.
One last practical point decides many workdays. Batch your serger work. Rethreading, swapping a needle, and resetting tension for one 8 inch seam can take longer than zigzagging that edge on the machine that's already threaded. Serge all your allowances in one session, finish every fleece edge before you change setup, and the serger saves real time. Use it for one seam at a time and it becomes the slowest tool you own. If you're weighing a purchase, try the same fabric sample sewn three ways at a shop demo and compare stretch, edge appearance, and how much fabric the knife took.
Construction seams hide inside a garment, but edges are what people notice across a table. A rolled hem pulls the cut edge into a narrow cord of stitching, so a chiffon scarf or a set of cloth napkins looks finished without the bulk of turning fabric under twice. It's the serger use that most often makes a beginner say the machine paid for itself.
This close view shows how little fabric that finished edge contains.
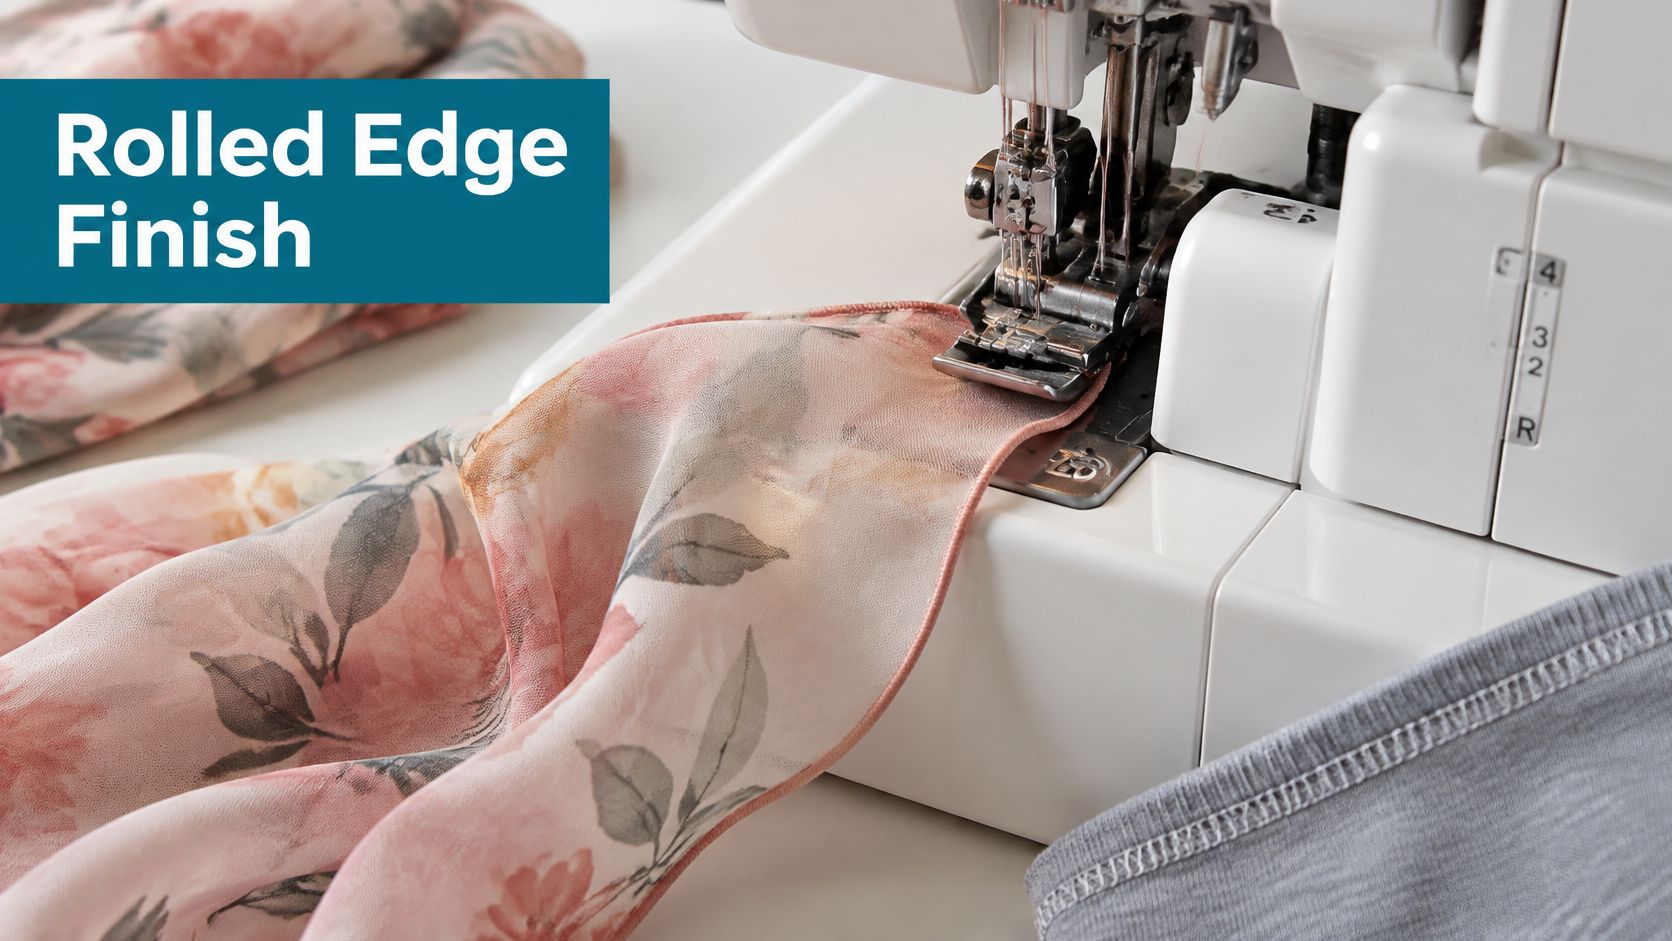
Setup matters more here than speed. Utah State University Extension advises following the machine manual when preparing a rolled hem, which usually means switching the throat plate or stitch finger, removing one needle, and tightening the lower looper so the edge curls into the stitch. Test on a long scrap, not a 2 inch square. The first few inches often look loose while the roll forms, and you need enough length to judge the steady result.
That same guidance names the fabrics to refuse. Don't roll a hem on thick fabrics, loosely woven fabrics, dotted Swiss, or fabrics with paint. Thick cloth won't curl, loose weaves pull apart at the roll, and painted surfaces snag. If your test scrap fights the stitch, believe it and choose a different finish rather than forcing tension tighter.
A lettuce hem is the playful variation. You sew the same narrow roll while gently stretching a knit as it feeds, and when the fabric relaxes, the edge ripples into waves. It suits the leg openings of stretch shorts, casual cuffs, and lightweight knit hems where a flat edge looks dull. Stretch evenly as you go, because uneven hands produce uneven waves, and skip it entirely on stable wovens. Without stretch in the fabric, there's nothing to ripple.
Flatlock opens the next set of options. You loosen the needle tension so the loops pull flat when you tug the seam open, leaving a ladder of stitching on one side and flat loops on the other. Put the decorative side out on fleece, a reversible blanket, or a sport seam that would chafe if allowances stacked up inside. Run a thicker decorative thread or yarn through a looper and that flat seam becomes custom trim, which is a satisfying way to use specialty thread in small, visible doses.
Scraps get a second life here too. Fabric splicing joins two remnants edge to edge into a longer strip for a ruffle, a binding, or a patchwork accessory, and a quick overlocked edge cleans up a thrifted garment before you recut it into something new. Serge the edges of pieces destined for a scrap bin project and they stop shedding threads all over your storage box.
Keep the duty rating honest, though. Decorative stitches are for show and light work. A flatlocked blanket seam is lovely, but it isn't the seam for a heavy coat or a strap that carries weight, and a sewing machine still handles finishes like French seams when you want raw edges fully enclosed in woven cloth. Before you buy specialty yarns, test a decorative edge on your own fabric at a shop demo. Five minutes of stitching tells you whether that thread and your fabric get along.
A serger earns its place when your projects regularly include knit garments, rolled hems, fleece edges, or fraying seam allowances. If you mostly piece quilts, sew zippers, or make an occasional woven project, a serger may sit unused. Match the machine to the work you expect to do.
Compare stitch options before focusing on speed. The Bernette Funlock 44 offers four-thread, three-thread and two-thread overlock, plus rolled hem stitching. The Bernette B64 Airlock Serger has an automatic air threader with color-coded threading paths, a feature that can make threading less fiddly.
Local support can help you learn and keep a machine in service. High Country Quilts offers classes and full service on BERNINA sewing machines and sergers through a local authorized BERNINA repair service. You can drop off machines during regular shop hours. Bernina service picks up machines every Tuesday afternoon and usually has a one-week turnaround.
If you are deciding whether a serger fits your projects, start with the kinds of fabric and seams you sew most often. At High Country Quilts, you can explore serger models and classes, and find authorized service for BERNINA machines.
November 2–25 only: buy a $200 gift card in either store and get a free yard of fabric every month of 2027.

Serger and BERNINA Mastery classes, longarm training, bag-of-the-month, Kids Sewing Club and a Highlands Ranch retreat. Here's what's on the calendar in November.

Free gifts, included packages and special pricing on the BERNINA 790 ULTRA, 990, Liberty Editions, L 890 serger and Q Series longarms, now through December 31.


Leave a comment