

We Love Our Quilting Community
At High Country Quilts we care deeply about community. With our experiences in retail, we know that a store is not only a place to shop but also a place for the community to gather and share. During this busy...


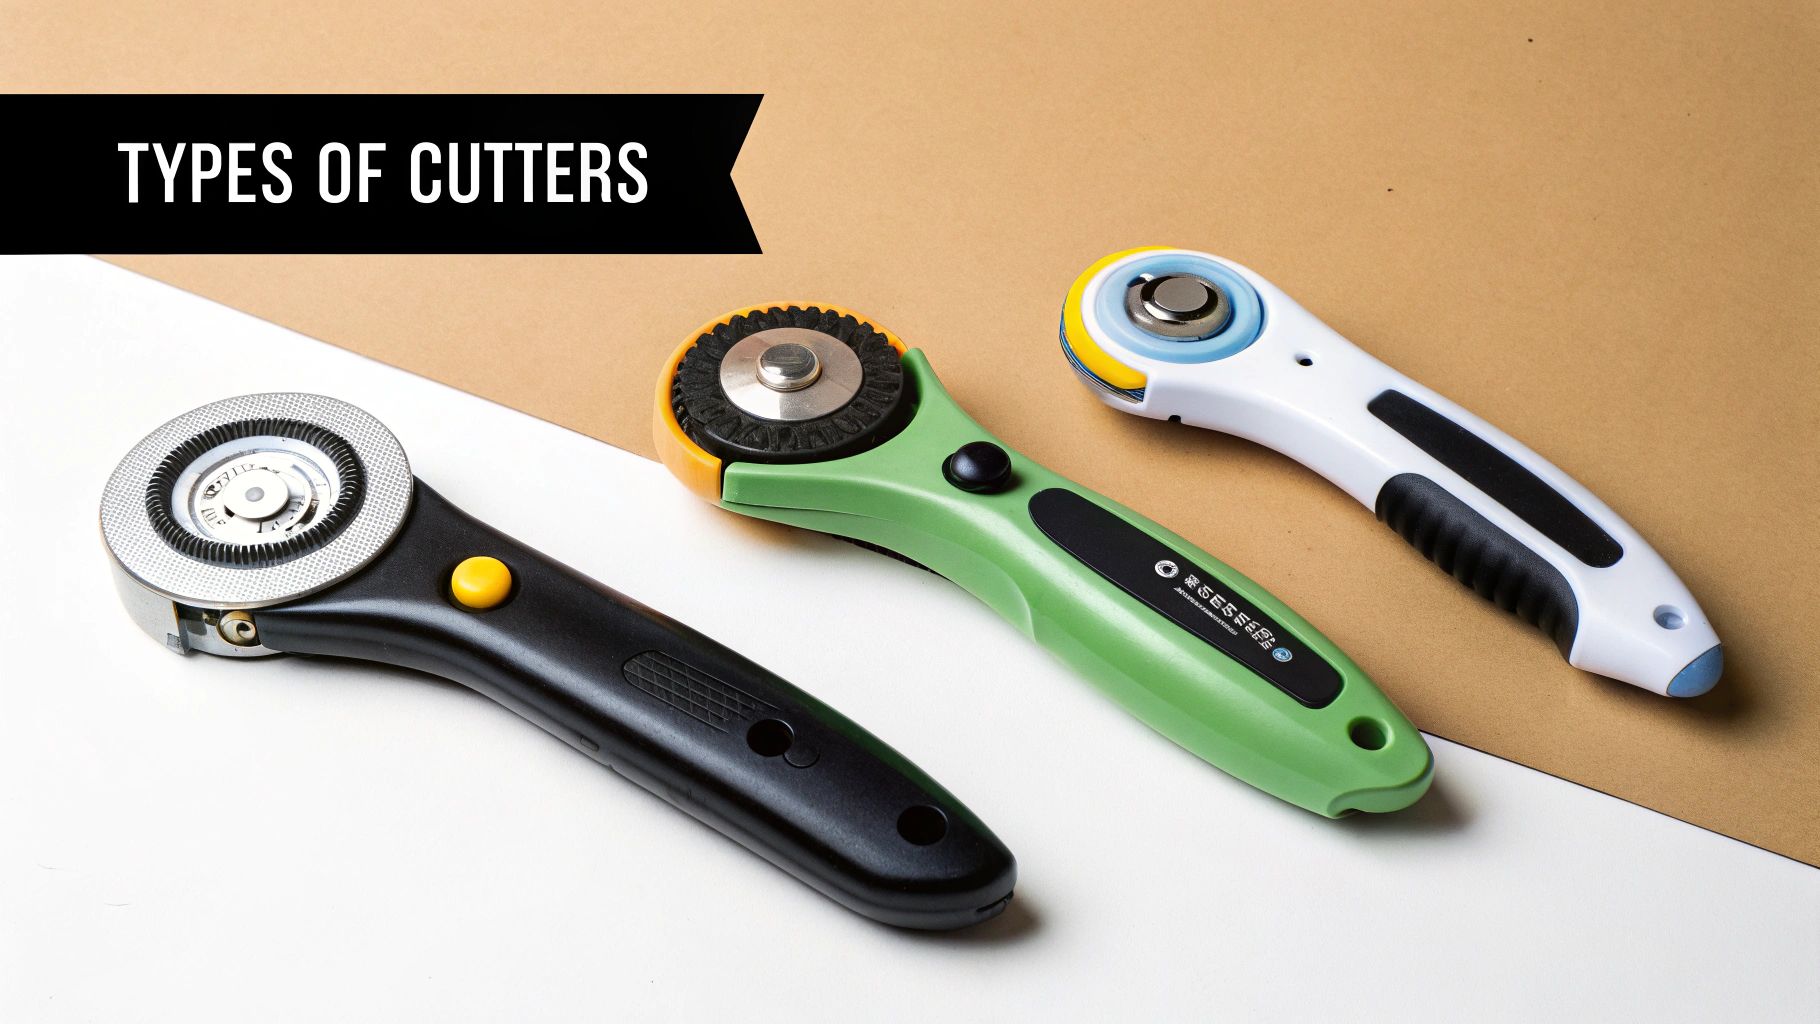
A rotary cutter for fabric is one of those tools that, once you use it, you'll wonder how you ever lived without it. It's a handheld slicer with a razor-sharp, circular blade that rolls through fabric, kind of like a pizza cutter built for your craft room. This design is what makes it so incredibly fast and accurate compared to old-school scissors, especially when you're tackling big quilting or sewing projects.
If you've spent hours hunched over a project, painstakingly snipping with scissors, you know the drill: the hand cramps, the jagged edges, and the way the fabric seems to move with every single cut. It’s slow and can be really frustrating.
Switching to a rotary cutter is like upgrading from a butter knife to a chef’s knife. It's not just a minor improvement; it's a completely different and better way to work. This simple tool completely overhauls how you prep your materials, turning a tedious task into a quick, satisfying part of your creative flow. The magic is all in its design—a rolling blade that glides through the fabric instead of lifting and chopping it.
The real genius of a rotary cutter is its smooth, continuous rolling action. Scissors open and close, which can lift and distort your fabric. A rotary cutter’s blade, however, presses down with consistent, even pressure as it rolls forward. This allows it to slice cleanly through several layers at once without making them bunch up or shift out of place.
This single design feature delivers three massive wins:
The biggest advantage is the accuracy. When you use a rotary cutter alongside a quilting ruler, the two tools work together as one solid unit. This guarantees that a 3-inch strip is exactly 3 inches from one end to the other, giving you the kind of consistency that makes a final project look truly professional.
Think about cutting out all the squares for a quilt. With scissors, you’d be cutting each piece one by one, a slow and careful process. With a rotary cutter, you can stack your fabric, make a few long, clean passes, and have a whole stack of perfectly uniform squares in just a few minutes. This isn't just about saving time—it boosts your confidence and makes you feel ready to take on more ambitious projects.
To see just how different the experience is, it helps to compare the two tools side-by-side.
This table breaks down the key differences you'll notice when you choose a rotary cutter for fabric over a traditional pair of scissors.
| Feature | Rotary Cutter | Fabric Scissors |
|---|---|---|
| Speed | Excellent; cuts multiple layers in a single pass. | Slow; cuts one or two layers at a time. |
| Accuracy | High; guided by a ruler for perfectly straight lines. | Moderate; relies on hand-eye coordination. |
| Fabric Distortion | Minimal; fabric remains flat on the cutting mat. | High; fabric is lifted and can shift during cutting. |
| Ergonomics | Good; less strain on hands and wrists. | Poor; can cause significant hand fatigue and cramping. |
| Versatility | Excellent for straight lines, long cuts, and curves. | Good for intricate details and tight corners. |
Ultimately, bringing a rotary cutter for fabric into your workflow is about so much more than just cutting. It’s about gaining control, achieving precision, and working more efficiently. It’s the tool that helps you bring your creative vision to life with the clean, professional finish it deserves.
To really get the most out of your rotary cutter for fabric, you need to see it as more than just a single tool. Think of it as a small, precision-engineered machine where every part has a job. When you understand how these components work together, you can make smarter buying decisions, maintain your tool properly, and truly appreciate the design that goes into every clean cut.
It’s a bit like a chef's knife—it's not just about the blade. The handle's balance, the steel's quality, and the safety features all come together to create a tool that feels like an extension of your hand. Let's pull it apart and look at each piece.
The handle is your primary point of contact, and its design is everything when it comes to control and comfort. This is what you grip, what you use to apply pressure, and what guides the blade across your fabric. You'll generally find two main styles out there.
An ergonomic handle isn't just a fancy extra; it's a feature that helps you work longer and with more accuracy. When your hand isn’t cramping up, you can focus on nailing that perfect line instead of just getting through the next cut.
This is where the magic happens. The blade is the heart and soul of your rotary cutter, and its quality is the single biggest factor in getting a clean, crisp cut. These super-sharp discs are almost always made from high-grade steel, but not all steel is created equal. A premium blade made from tungsten or high-carbon steel will hold its edge much longer, saving you the frustration of skipped threads and raggedy cuts.
The blade does all the hard work, slicing through everything from whisper-thin silk to multiple layers of heavy denim. The better the steel, the longer it stays sharp, meaning you get more precise cuts before needing a replacement. A sharp blade glides through fabric with very little force, which is not only easier on your hands but also much safer, as it's less likely to slip.
Think of the blade as the engine of your cutter. Investing in a high-quality steel blade is like choosing a well-tuned engine—it delivers consistent power and reliability, ensuring a smooth, effortless performance every time you put it to work.
Any rotary cutter worth its salt has a safety guard. This simple mechanism is a shield that covers the blade when it’s not actively cutting. Some guards are manual—you slide a button to engage them—while others are automatic, retracting when you squeeze the handle and popping back into place when you let go.
This little piece of plastic is your first line of defense against nasty cuts. Getting into the habit of always engaging the safety guard the second you put the cutter down is probably the most important safety rule in any sewing space. It protects you, your project, and any curious kids or pets that might find their way to your cutting mat.
The tiny screw and nut assembly holds the whole operation together. It’s a small part, but it has a huge job: securing the blade to the handle while still allowing it to spin smoothly. A well-designed assembly makes changing blades quick and painless, and it ensures the blade doesn't wobble as you cut.
That stability is critical for accuracy. If the blade is loose, it can drift and ruin your cut. When you're swapping in a new blade, tighten the screw so it's secure, but not so tight that the blade can't rotate freely. Finding that sweet spot ensures your cutter is both safe and effective for your next project.
Think of picking a rotary cutter blade like an artist choosing a paintbrush. You wouldn't try to paint a tiny, detailed portrait with a massive house-painting roller, right? The same logic applies here. The size of your rotary blade directly affects your precision, how quickly you work, and the final quality of your cuts.
Matching the blade to the job is the secret to avoiding frustration. It ensures you have the right tool for the task, whether you're slicing through thick stacks of denim or carefully navigating the tight curves of a delicate appliqué pattern. The four most common sizes you'll encounter are 18mm, 28mm, 45mm, and 60mm, and each one shines in different situations.
If you’re only going to buy one rotary cutter, make it a 45mm. This is the industry standard for a good reason. It hits that sweet spot between cutting power and nimble control, making it incredibly versatile for just about any project you can throw at it.
It’s strong enough to glide through 4-6 layers of quilting cotton without a problem, yet it’s still agile enough for most general sewing. This is the blade I grab for cutting out apparel patterns, squaring up fabric, and trimming down quilt blocks. Its popularity also means replacement blades are available everywhere, making it a super reliable and convenient choice for beginners and seasoned pros alike.
The image below gives a great visual of how different blade sizes and materials line up with various fabric weights, helping you choose at a glance.
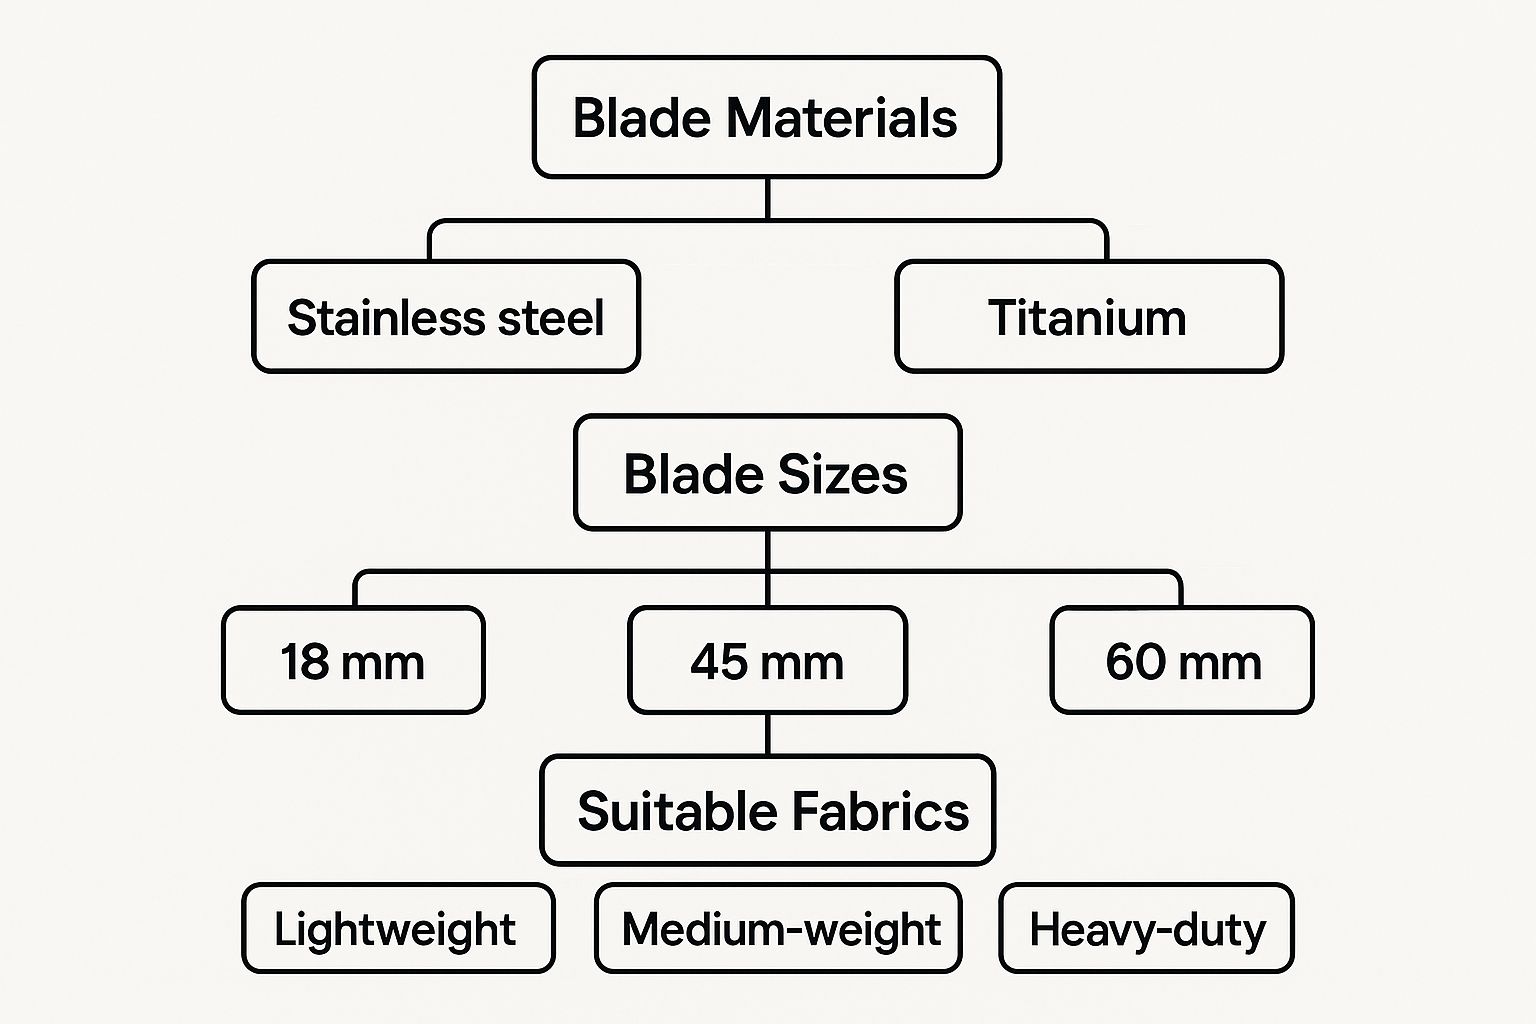
As you can see, there’s a clear connection between blade size and its best use, taking the guesswork out of your decision.
When you need some serious cutting muscle, the 60mm blade is what you reach for. This is the biggest and baddest blade on the block, built to make short work of thick materials or many layers of fabric at once. It can cleanly slice through up to 10-12 layers of quilting cotton in a single pass—a massive time-saver on big projects.
But its power isn't just for cotton. The 60mm blade is a champion when it comes to dense materials that would make smaller blades struggle, such as:
A neat side benefit is that its larger circumference means the blade doesn't have to rotate as many times to cover the same distance, which helps it stay sharper longer. If you’re a serious quilter or someone who works with heavy-duty textiles, this blade is an absolute game-changer.
While the bigger blades are all about power and efficiency, the smaller 18mm and 28mm blades are masters of precision and detail. Think of them as the scalpels of the rotary cutting world, perfect for any task that demands meticulous control.
You wouldn't use a sledgehammer to hang a picture frame. In the same way, you don't use a 60mm blade for miniature appliqué. For fine detail work, the small blades are your specialists.
The 28mm blade is fantastic for trimming up smaller quilting units, like flying geese, or for cutting smooth curves on bags and garment pieces. It gives you way more control than a 45mm blade when you need to navigate a tight turn.
The tiny 18mm blade is the specialist of the group, designed for the most intricate cutting. It’s the go-to for tiny pieces in miniature quilts, complex appliqué shapes, or fussy cutting a specific little motif from your fabric with almost no waste. It lets you get into tight corners and follow complicated pattern lines with incredible accuracy. It might not be a tool you use every day, but when you need it, you'll be glad you have it.
Still not sure which blade is right for you? This table breaks it all down, connecting each size to its ideal projects so you can find the perfect match for your needs.
| Blade Size | Best For | Common Projects | Pros | Cons |
|---|---|---|---|---|
| 18mm | Intricate details & tight curves | Miniature quilts, appliqué, paper piecing, fussy cutting | Unmatched precision, minimal fabric waste | Too small for long cuts, can't handle thick layers |
| 28mm | Small pieces & gentle curves | Small quilt blocks, trimming templates, garment curves | More control than a 45mm, great for detailed work | Not ideal for multiple layers or straight, long cuts |
| 45mm | General purpose, all-around cutting | Quilting, apparel sewing, bag making, cutting strips | Versatile, widely available, good balance of power | Can be clumsy on very tight curves or tiny pieces |
| 60mm | Thick materials & multiple layers | Cutting batting, denim, leather, canvas, long fabric strips | Cuts many layers at once, stays sharp longer | Lacks precision for small details, can be hard to control |
Ultimately, having a couple of different sizes in your toolbox is the best approach. You'll quickly find that starting with a 45mm and adding a 60mm or a 28mm later on will set you up for success on almost any project that comes your way.
Using a rotary cutter for fabric is all about finesse, not brute force. Think of it as a system. You have three tools that need to work in perfect harmony: the cutter itself, a self-healing mat, and a quilting ruler. When you get the hang of using them together, you’ll unlock a level of precision that can completely change your projects for the better.
It helps to see these tools as a team. The mat is there to protect your table and your blade. The ruler is your unshakeable guide for accuracy. And the cutter? It delivers that swift, clean slice. Learning to make them work as one cohesive unit is your first step toward getting those flawless results every single time.
Before you even think about cutting, you need to get your setup right. Your self-healing mat is the foundation for everything. It gives you a safe surface that won't immediately dull your blade, and it magically "heals" over the cuts, keeping the surface smooth for your next project. Here's a pro tip: while the grid lines on the mat are handy for quick alignment, they should not be used for precise measuring.
For true accuracy, you need to rely on your quilting ruler. These thick, clear rulers are workhorses that do three critical jobs:
To get a stable anchor, spread your fingers wide on the ruler. This prevents it from slipping halfway through a cut. A firm hold is non-negotiable for both safety and precision.
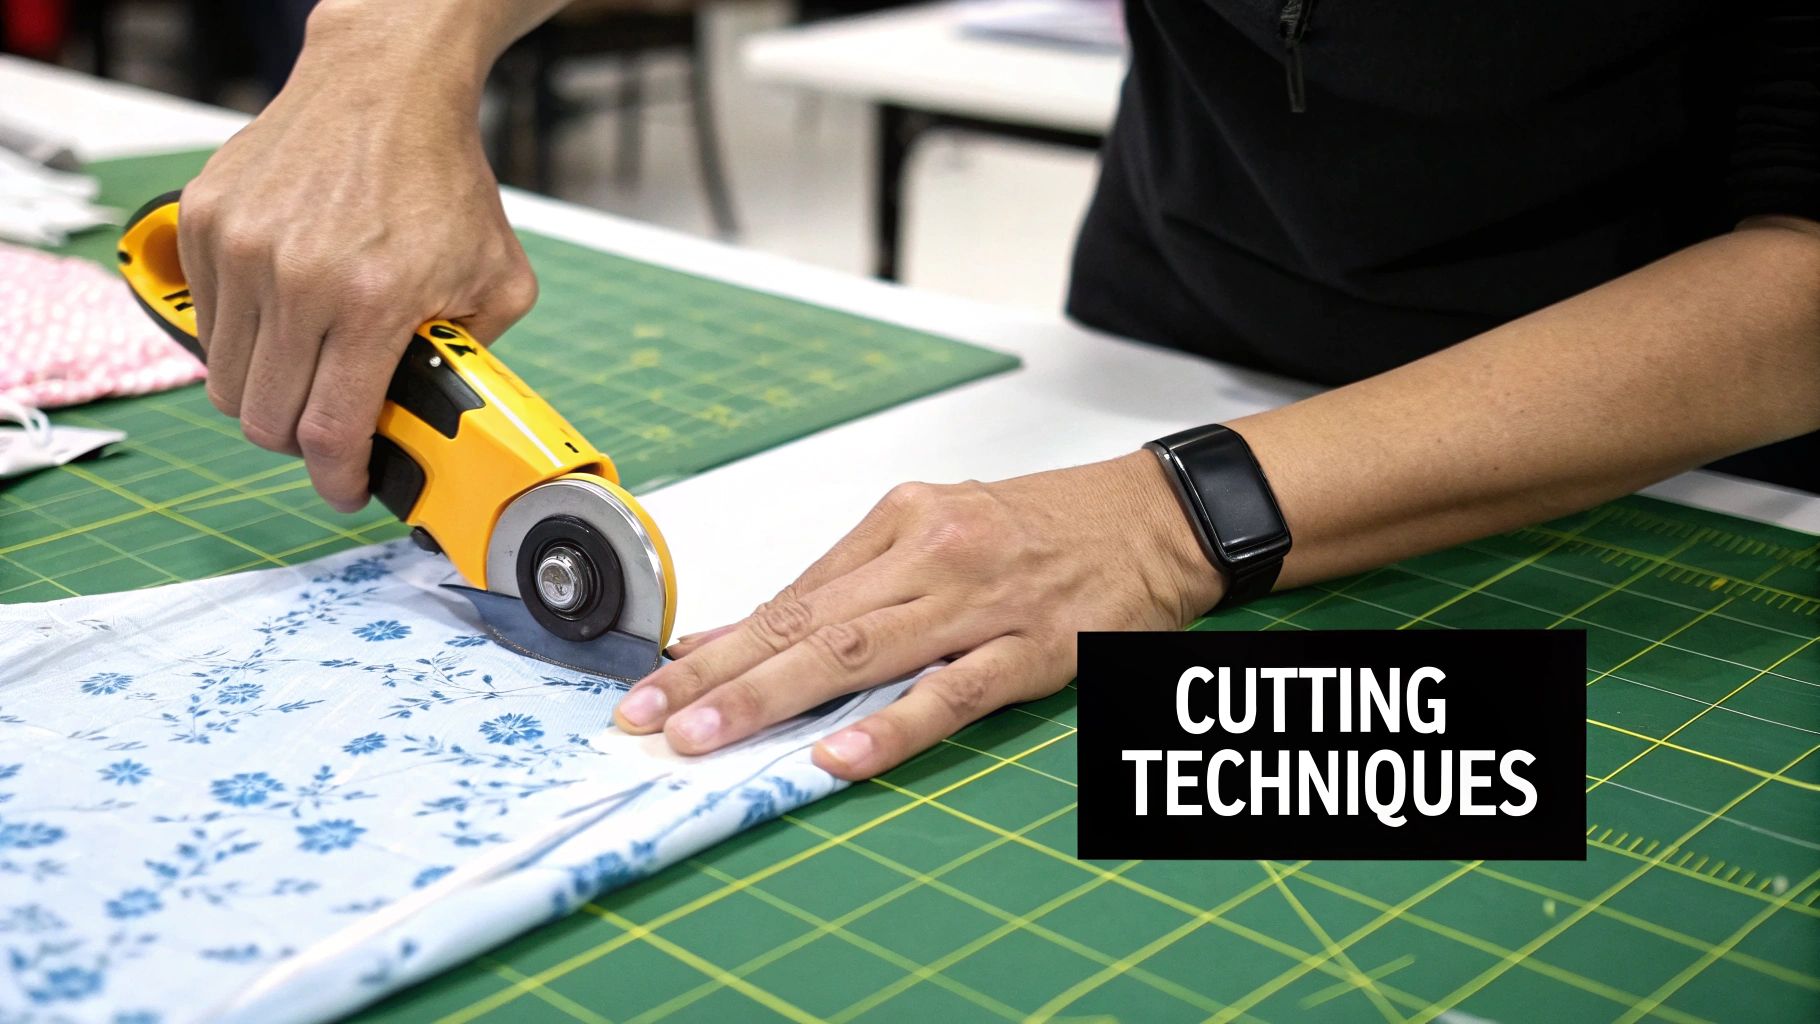
How you stand and hold the cutter makes a huge difference. Try to stand up straight, with your body positioned over your cutting mat. This posture lets you use your shoulder and arm to apply gentle, even pressure. If you just use your wrist, you'll get tired quickly, and your lines might start to wobble.
Hold the rotary cutter firmly, making sure the blade is perpendicular to the fabric. As you cut, just apply consistent, downward pressure. The whole point is that a sharp blade should glide through the fabric with minimal effort. If you find yourself sawing back and forth or pressing down with all your might, that’s a dead giveaway your blade is dull and needs to be changed.
Your body, the ruler, and the cutter should move as a single, coordinated unit. The movement is a smooth, confident push away from your body, coming from your shoulder—not just a flick of the wrist.
Let's be clear: a rotary cutter is an incredibly sharp tool that demands respect. Building safe habits from your very first cut is the only way to prevent a nasty injury. These rules are absolute and need to become second nature.
By making these techniques and safety rules a core part of your process, using a rotary cutter for fabric becomes a safe, enjoyable, and incredibly satisfying part of making things you love.

The rotary cutter is so much more than just another gadget in a sewing basket. It’s the unsung hero behind a huge, creative global movement. From the stunning cosplay that steals the show at a convention to the treasured quilts that become family heirlooms, this tool has become essential. This explosion in hands-on hobbies has pushed the rotary cutter for fabric from a nice-to-have item into a must-have for any serious crafter.
Think about the DIY culture we see everywhere today. More and more people are picking up crafting, not just for fun, but to create one-of-a-kind pieces for their homes and closets. This is where the rotary cutter comes in, giving makers of all skill levels the power to get clean, precise cuts—the very foundation of any project worth doing. It bridges the gap between a hobbyist's vision and a professional-looking result.
This wave of interest in sewing, quilting, and crafting is more than a passing trend; it's a real economic driver. As people flock to these hobbies, the market for tools, fabrics, and patterns grows right alongside them. The rotary cutter is a key player here, making bigger, more ambitious projects feel manageable and far less intimidating.
The numbers back this up. The global market for rotary cutters is expected to grow by about 5% each year between 2025 and 2033, mostly thanks to demand from garment makers and the home textile industry. You can dig into the specifics of this growth on Market Report Analytics. This isn't just a random statistic; it shows a direct line between the passion for DIY projects and the need for better, more efficient tools.
When you realize this, you see that the tool in your hand is part of a much bigger story about how crafting is changing and growing.
In this booming craft world, choosing a quality rotary cutter is one of the smartest moves you can make. It’s not just about buying a tool. It's an investment in your own efficiency, accuracy, and ultimately, your enjoyment of the creative process. A good cutter means less frustration, less wasted fabric, and a final product that looks clean and polished.
When you understand the rotary cutter's place in the wider world of textiles, you can see it for what it truly is: a cornerstone of modern making. It's an indispensable ally for anyone participating in today's vibrant and expanding craft culture.
A sharp, well-maintained rotary cutter for fabric is a joy to use. A dull one? That’s just asking for frustration, wasted fabric, and even a potential trip to the emergency room. Keeping your cutter in top shape isn't a chore; a few simple habits will protect your investment, extend the life of your blades, and guarantee that every cut is as clean as the first.
Think of your cutter's blade like a chef's knife. It’s designed for a specific, tough job, and it’s going to wear out with use. The real trick is knowing when it’s time for a change.
You don't need a special gadget to know your blade is on its last legs. Your fabric will tell you everything you need to know. A dull blade just can't slice cleanly through fibers anymore. It will start snagging, skipping threads, and leaving behind annoying uncut spots—I call them little "postage stamps" of fabric that you have to go back and snip.
Another dead giveaway is when you feel like you have to put your whole body weight into a cut. A fresh, sharp blade should glide through several layers of cotton with almost no effort. If you find yourself bearing down or sawing back and forth, stop. It’s time for a new blade.
Pro Tip: Pushing hard on a dull blade is not only ineffective, it's dangerous. The extra force makes it much more likely for the cutter to slip off your ruler, and that can lead to a serious injury. A sharp blade is always a safe blade.
Swapping out a blade takes less than a minute, but it requires your undivided attention. Even a "dull" blade is still incredibly sharp, so handle it with respect.
After a big project, you'd be surprised how much lint and fiber gunk can build up in the blade assembly. This can cause the blade to drag or spin unevenly. Just take a moment to unscrew it and use a soft brush to clean out any debris from around the screw and guard.
And don't forget about storage. This is simple: always, always retract the safety guard when you set your cutter down, even for a second. When you're done for the day, keep it somewhere dry to prevent any rust. Tossing it into a cluttered drawer is a sure way to get nicks in the blade. A little bit of care goes a very long way, and your cutter will serve you well for years to come.
No matter how much you prepare, diving in with a new tool always brings up questions. That’s perfectly normal! Getting good answers is the fastest way to get comfortable and start cutting like a pro. Let’s walk through some of the most common questions I hear from fellow crafters.
Think of this as your personal troubleshooting session. We'll tackle the real-world hiccups you might run into at your cutting table, from picking the right gear to taming tricky fabrics.
Yes. 100%. Don't even think about using a rotary cutter without one. Your rotary cutter and self-healing mat are a team; one just doesn't work without the other. The mat does more than just protect your table from getting gouged—it's what keeps your blade from dying a quick death.
Try cutting on cardboard, a wooden board, or a regular plastic craft mat, and you'll ruin a brand-new blade in a single pass. A proper self-healing mat has a unique surface that gives way just enough for the blade to slice through the fabric, and then it magically closes back up. It’s not an optional accessory; it’s a critical part of the system.
I'd bet my favorite fabric shears that your blade is dull. When that razor-sharp edge wears down, the blade stops slicing cleanly through the fibers. Instead, it starts catching and dragging them, which is why you see those frustrating little uncut threads or a messy, chewed-up line.
Every once in a while, inconsistent pressure could be the problem. If you’re not pressing down firmly and evenly all the way through the cut, the blade can lift and miss a spot. But let’s be real: if you feel like you're doing everything right, a dull blade is the culprit 99% of the time. As soon as it happens, stop what you're doing and swap it out for a fresh one.
A sharp blade is a safe blade. You have to push down so much harder with a dull one, and that’s when the cutter is most likely to jump the ruler and cause a nasty accident.
Ah, the dreaded slinky fabrics. They're a pain because they want to slide all over the place. The good news is that a rotary cutter is your best friend here, since it lets you cut without lifting the fabric off the mat like scissors do. To get those perfect, clean cuts, give these tricks a try:
Tackling these common snags will help you work faster, safer, and get way more enjoyment out of your rotary cutter.
Ready to achieve perfect cuts every time? Explore the premium selection of rotary cutters and crafting supplies at Famcut.com and find the ideal tools to bring your creative vision to life. Shop our collection today!
At High Country Quilts we care deeply about community. With our experiences in retail, we know that a store is not only a place to shop but also a place for the community to gather and share. During this busy...

Hi! We’re Adam and Renee Wheaton, the new owners of High Country Quilts! For more than 40 years, we’ve owned and operated vacuum and sewing businesses. Following in Renee’s father’s footsteps after he retired from All Discount Vacuum and Sewing in Colorado...


Leave a comment