

Free Fabric All Year: Our 2027 Fabric Punch Card
November 2–25 only: buy a $200 gift card in either store and get a free yard of fabric every month of 2027.

You've got the quilt quilted and the edges trimmed, and the folded strip is sitting on the table. You sew it on, flip it to the back, and a corner bunches. A ridge shows where the ends meet. Thread peeks through on the front. That's the usual place finishing a quilt binding goes wrong, and it almost always shows up on the back.
Binding is a folded strip that wraps the raw edge of the top, batting, and backing. The front can look tidy while the back tells the truth: a seam left uncovered, a corner that was never tacked, a join that wasn't pressed open. The same steps work by machine or by hand, and they can be slowed, clipped, and lit so they stay doable when your hands tire or small stitches are hard to see.
Pick which side gets the machine stitch before you start. Every later step follows from that choice.
You sew the strip to the front, wrap it, and the back comes out lumpy. The choice you skipped is which side gets the machine stitch and which side gets the hand stitch.
Utah State University Extension recommends sewing the binding to the quilt's front first, then pulling it over the edge to the back and securing it with hand stitches hidden inside the fold. Match the thread to the binding, and keep that hand stitching going around the entire quilt. Corners are miters, folded the same way each time so you get a crisp 45-degree turn instead of a bulky gathered corner.
That sequence splits the job. One line of stitching anchors the strip. A blind-style stitch closes the other side. Wrapped to the back, the binding should cover the original attachment stitches. Final stitches stay inside the fold. Pull them too tight and the quilt edge ripples.
| Method | Where stitching shows | Best for | Hand effort |
|---|---|---|---|
| Machine to front, hand to back | Hidden on the back | Most quilts, neat front | Moderate |
| Machine to back, hand to front | Hand stitching on the front | Quilts where the back matters less | Moderate |
| Machine to front and back | Top-stitching on the back | Large quilts, fast finishes | Low |
| Hand-only attachment | Hidden throughout | Heirloom work, short sessions | High |
Front-first construction hides small irregularities on the less visible back. Back-first construction puts the hand stitches on the face people see, so you control that line directly. All-machine finishing trades a visible top-stitch for speed on a large quilt. Hand-only attachment hides every stitch, and it suits short sessions more than a single long sitting.
Practical rule: If the front pattern matters most, hand-stitch the back. If the quilt is large or time is short, machine-stitch both sides.
I would start with machine to the front and hand to the back on almost every bed quilt. Save hand-only work for an heirloom you can pick up for twenty minutes at a time. Our year-round sewing and quilting classes are the place to try that choice on a practice edge before you commit a whole quilt.
Trim first. A strip can only sit flat on a straight edge, and a wavy perimeter will show up as ripples no matter how careful the stitching is.
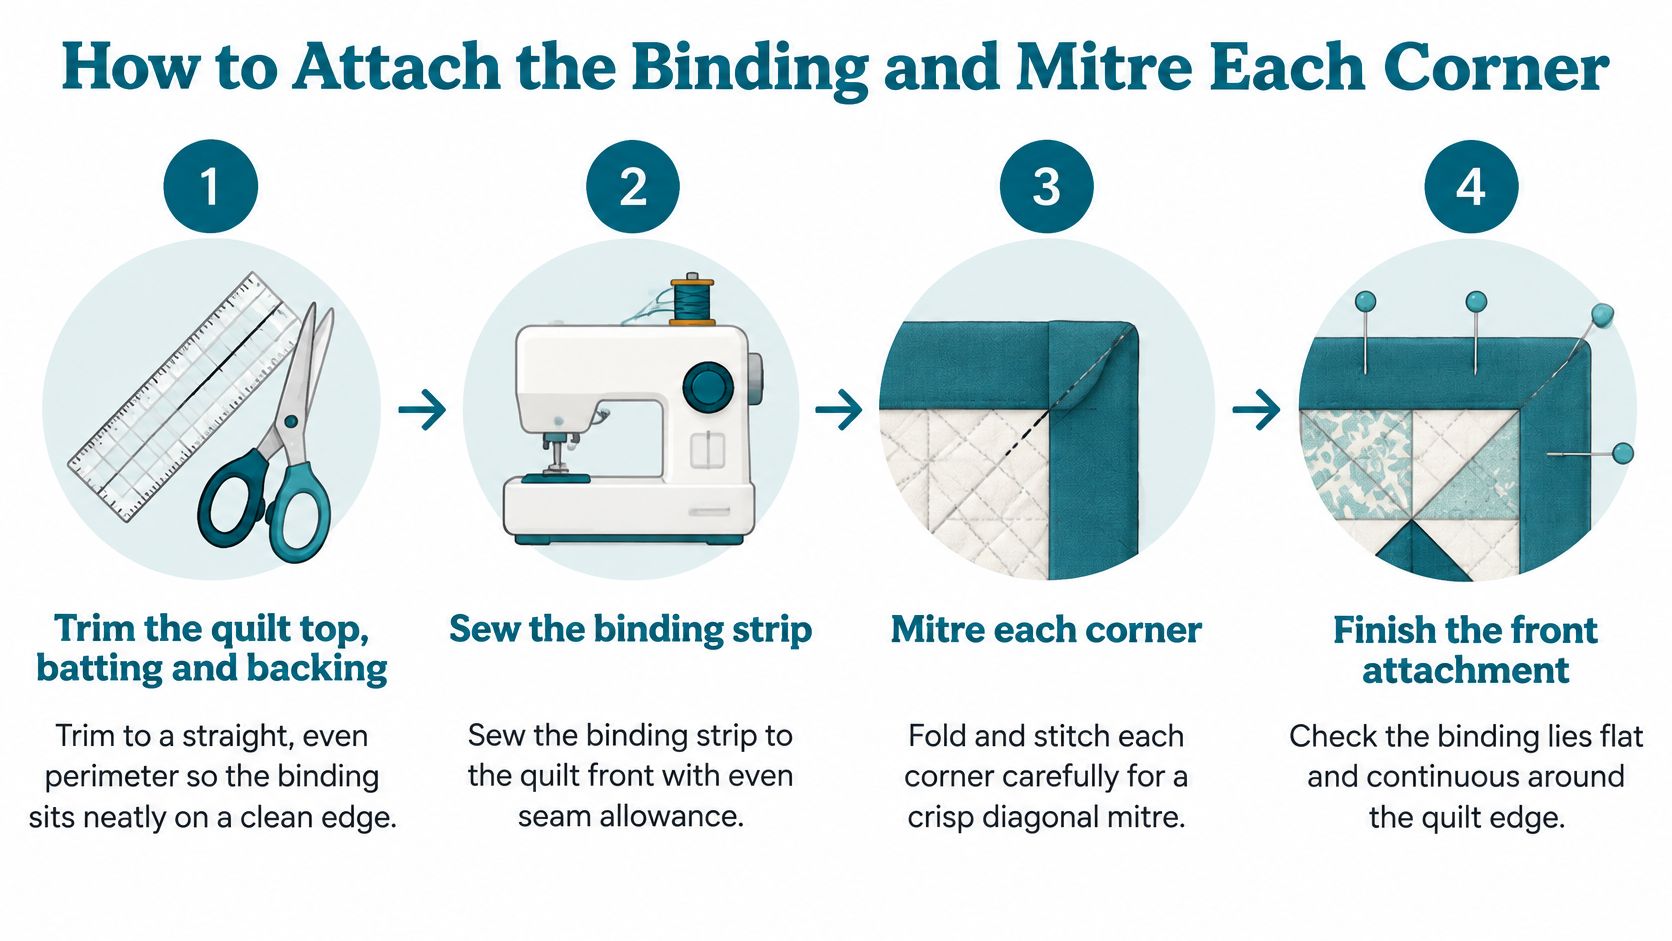
The American Quilter's Society and the American Sewing Guild both treat a 1/4-inch stop and a 45-degree fold as the core of a clean miter. Work in this order.
Three slips cause most lumpy fronts. You stop too close to the corner, so there is no fabric left to fold. The seam allowance wanders toward 3/8 inch, so one side of the binding ends up wider. Or you turn the corner without lifting the foot, and the layers shift under the needle.
Before you move on, lay the front flat. No corner should ripple, and the stitching line should sit the same distance from the edge on every side. If a corner buckles, unpick back to the stop point and refold it. Don't press the buckle flat and hope the back will hide it.
A 1/4-inch presser foot and pre-folded binding strips take the guesswork out of that seam. If your machine foot is wider than the allowance you want, mark the 1/4-inch line on the throat plate with a piece of tape and follow the tape, not the edge of the foot.
The join is the most common bump people notice after the quilt is finished. A straight seam stacks every layer in one spot. A diagonal seam spreads that bulk along the edge so it doesn't read as a lump once the strip is folded.
Utah State University Extension's double crosswise-grain method leaves approximately a 6-inch tail before you begin and sews the binding on with a 1/4-inch seam allowance. When the remaining ends meet, overlap and join them diagonally, trim the seam to a 1/4-inch allowance, press it open, refold the strip, and finish the attachment. Those two numbers, 1/4 inch and 45 degrees, are the practical benchmark for avoiding uneven widths, excess bulk, and distorted corners.
The fit check comes before that last seam. The loop should lie flat on the quilt with no pull and no pucker. If it draws the edge in, the join is too short. Unpick a few inches and resew the diagonal rather than stretching the binding into place. Stretching here is what ripples the quilt later.
Put the join on a straight side, never on a corner. A straight-edge join is easy to hide once the binding is turned to the back.
The back is where the finish is won or lost. A neat front still fails if the fold doesn't cover the machine seam, or if the thread bites through to the face.
Clips hold the fold without the stretch that pins and tugging invite.
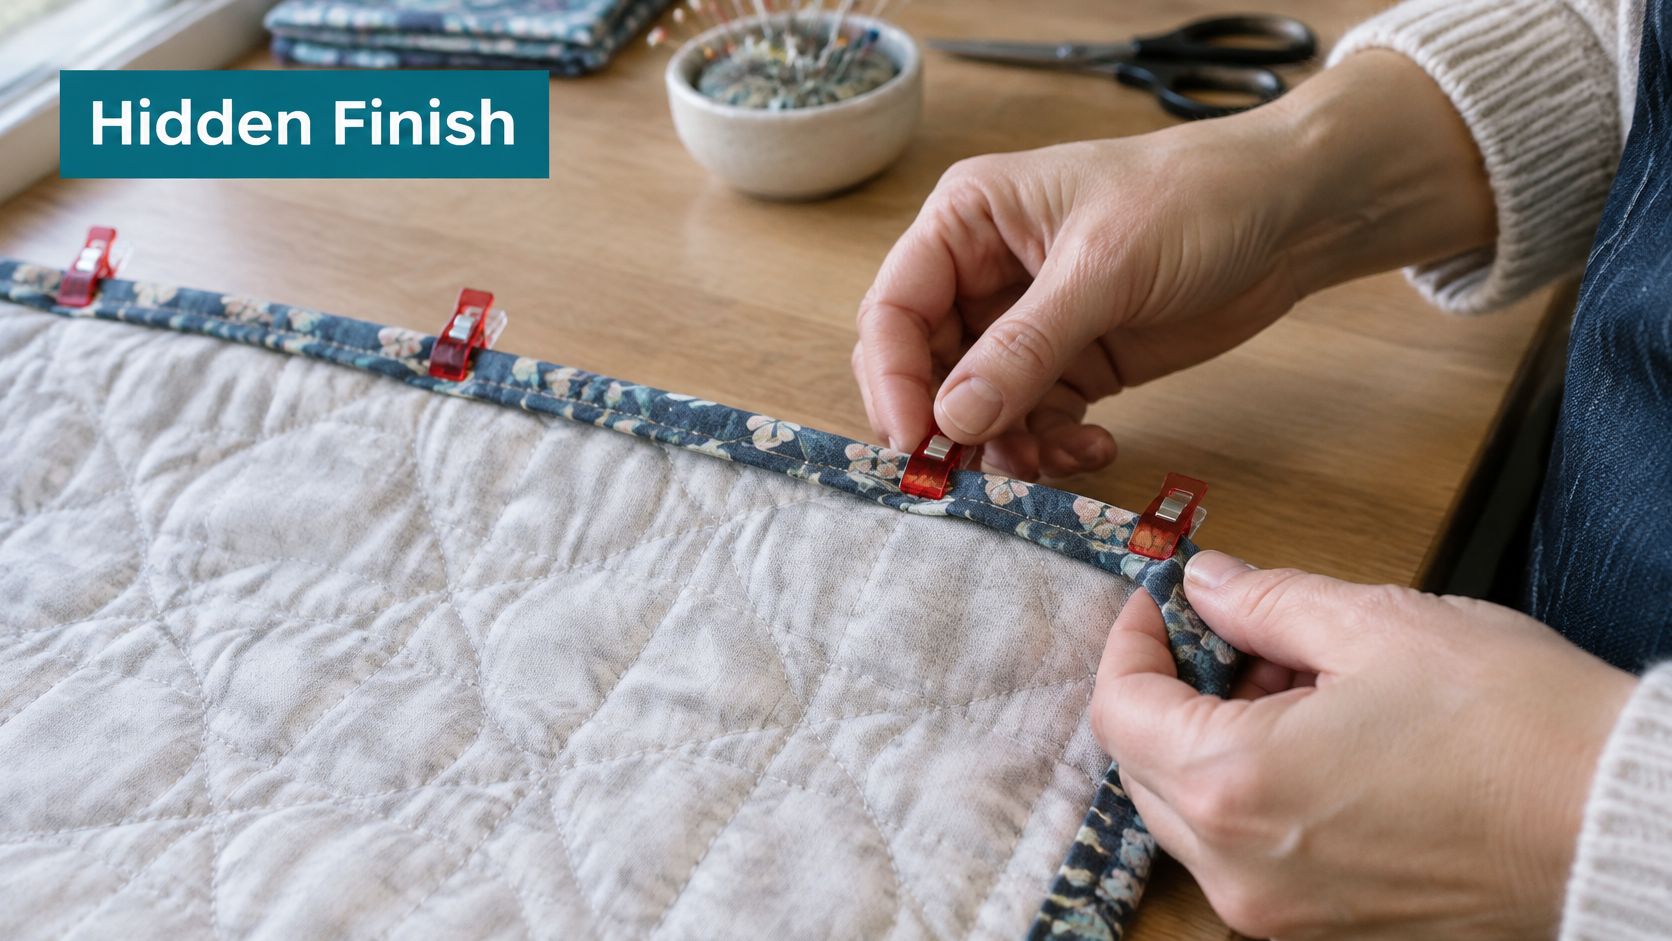
Farm and Folk describes this close as a controlled blind stitch, not a decorative pass. Corner tacking is what improves durability. The faults that show up most often are visible thread on the quilt face, loose corner folds, uneven coverage of the attachment seam, and thread pulled so tight that it dimples the edge.
A finished back is an even band, with the attachment seam fully covered and no thread showing on the front. Corners lie flat, and the miter on the back mirrors the front without a knob of fabric in the middle.
If a stitch pops through to the face, stop. Unpick back to the last clean stitch and redo that short run with a shallower bite. Matching the thread to the binding before you buy saves you from a line that reads as a dash even when the stitches are tiny.
A short walk-through of the wrap and the hidden stitch helps if you'd rather see the needle path than read it.
Visible thread on the quilt face is the fault most makers notice first. The needle caught the top layer, so the "hidden" stitch isn't hidden. Unpick that short run and re-stitch with a blind stitch that catches only the binding and a little backing.
The rest of the usual faults pair the same way. Repair a short section. Don't rip the whole edge because one corner failed. Let the binding relax before you judge the new stitches.
| Symptom | Likely cause | Fix |
|---|---|---|
| Visible thread on the quilt face | Stitch catches the quilt top | Re-stitch with a blind stitch catching only the binding and a little backing |
| Loose or bulky corners | Fold not creased at 45 degrees, corner not tacked | Crease the 45-degree fold, reverse the bulk, tack the corner |
| Attachment seam not covered | Binding not wrapped far enough to the back | Re-wrap and clip so the fold covers the seam |
| Dimpling along the edge | Thread pulled too tight | Re-stitch with looser tension and gentle thread pulls |
| Ripples in the quilt edge | Binding stretched while sewing | Clip instead of pulling and let the binding relax |
| Lump where the ends meet | Join not trimmed or pressed open | Trim the seam to 1/4 inch, press open, refold |
| Binding wider on one side | Seam drifted off 1/4 inch | Unpick and sew a consistent 1/4-inch seam |
Visible thread, a dimpled run, an uncovered seam, and a single loose corner are one-session repairs. You open a few inches, reset the fold or the stitch, and close it again.
Ripples from a stretched strip, a lumpy join, and a binding that changed width need the attachment opened. Unpick back to sound stitching, let the fabric rest, then resew that side. Pressing a ripple flat doesn't remove the stretch that caused it.
If a large quilt is already bound and the repair means handling the whole edge at once, bring it in. Our on-site quilting service is set up for exactly that kind of finish and repair, with the quilt supported on a table instead of in your lap.
A neat edge and a comfortable session are the same job. Fatigue is what makes the seam drift and the thread get yanked tight.
A sitting workflow suits a lap quilt or a wall quilt you can turn in your lap. A table-supported workflow suits a large bed quilt: the weight stays on the table, you clip a short run, stitch it, and slide the quilt rather than lifting it. Short sessions with a thimble, clips, and an ergonomic needle beat one long push that leaves the last side rushed.
Run this list on the finished quilt before you call it done.
If any item fails, unpick that section and re-stitch it. Sewing over a bad spot locks the fault in.
A large quilt that is still open, or a repair that feels like too much quilt to manage, doesn't have to stay on your machine. We offer on-site quilting so you can finish a project with help in the shop, and Valerie, our in-house quilting artisan, works on those quilts. Classes run year-round in sewing, quilting, maintenance, and machine software, which is the simplest way to practise the corner and the join with someone watching the back of the quilt.
Bring the unfinished edge, or the whole quilt, to High Country Quilts in Colorado Springs and finish it with the binding method that fits your hands and your timeline. We teach the corner, the join, and the hidden back stitch in year-round classes, and our on-site quilting can close a project that has gotten too large to manage at home. Visit High Country Quilts to book a class or ask about on-site quilting.
November 2–25 only: buy a $200 gift card in either store and get a free yard of fabric every month of 2027.

Serger and BERNINA Mastery classes, longarm training, bag-of-the-month, Kids Sewing Club and a Highlands Ranch retreat. Here's what's on the calendar in November.

Free gifts, included packages and special pricing on the BERNINA 790 ULTRA, 990, Liberty Editions, L 890 serger and Q Series longarms, now through December 31.


Leave a comment