

We Love Our Quilting Community
At High Country Quilts we care deeply about community. With our experiences in retail, we know that a store is not only a place to shop but also a place for the community to gather and share. During this busy...


You've pieced the quilt top, layered it, and quilted it. Now you're staring at a raw edge that frays a little more every time you handle it, and the whole project still looks unfinished. That last edge is where binding tape for sewing earns its place. Choose it well and the finish looks calm and intentional. Choose by package width alone and you can end up with ripples, bulk, or an edge that won't cover your layers.
A beginner in a Saturday class once described this moment perfectly. Her table runner was done except for the edge, and she said it looked like a sentence without a period. She'd bought the first pretty tape she saw, stitched it on, and watched one side pull tight while the other side bubbled.
Her problem wasn't effort. It was a mismatch. The tape was too light for her layered edge, and it couldn't hold its fold over the batting. Binding is the final layer that encloses or stabilizes an edge, so it has a structural job, not just a decorative one.
Think about what your edge must do before you think about color. A straight runner edge mostly needs stability. A scalloped quilt edge needs controlled flexibility. A baby quilt that'll be washed often needs a finish that holds up to laundering.
Those are different jobs, and they point to different tapes. Once you frame the choice around curve, bulk, stretch, and care, the options stop feeling random. You can browse the notions that support that first decision at High Country Quilts sewing and quilting supplies, then return to your project with a clearer question. You're not asking which tape is best in general. You're asking which tape fits this edge.
Binding tape is a narrow strip of fabric that finishes an edge. In its simplest form, it wraps over a raw edge so the cut fibers are enclosed, the layers are controlled, and the project gets a clean outline. Binding behaves like the last seam in a garment: it has to hold the layers together under stress, not only look tidy from the outside.
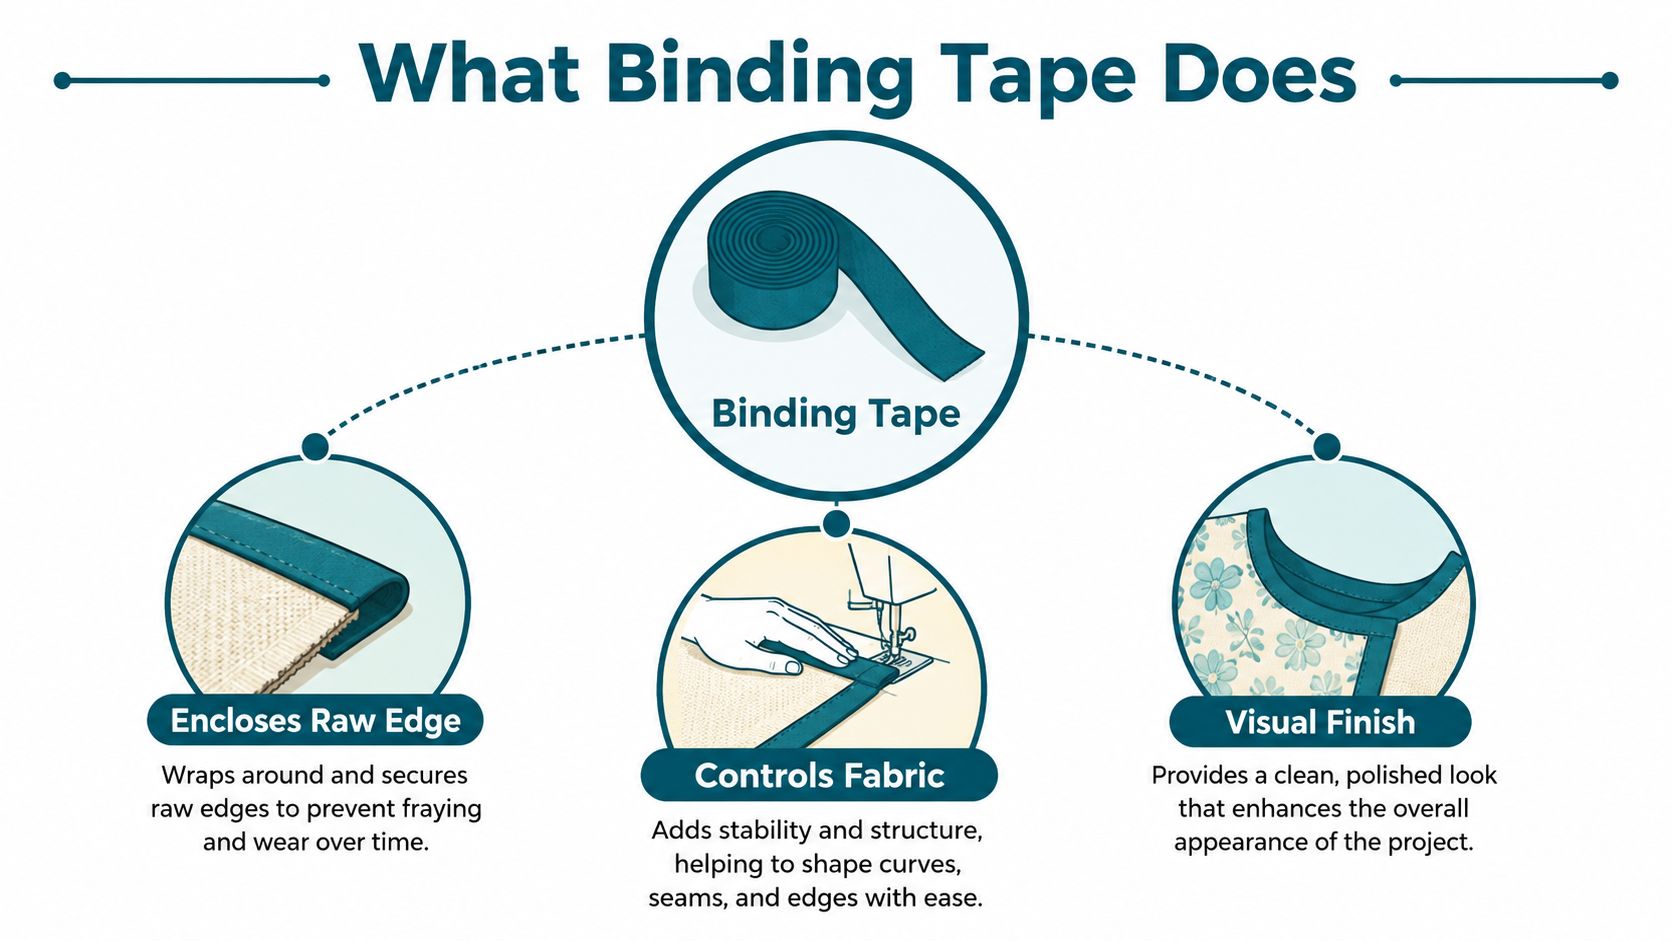
The wrapping job is only one version. Some tapes follow a seam to stabilize it. Some add stretch. Some sit on top as decoration. That is why tape, binding, and trim are not perfect synonyms, even when shops shelve them together.
A quick test keeps the choice honest. Fold the tape over your actual layers and pinch the edge: if it will not stay closed over the bulk, it is too narrow or too stiff. Pull a short length gently: if it keeps stretching after you stop, it may wave on a straight edge. Rub it once against the raw edge: if fibers poke through, the wrap is not enclosing enough. Compare seam stabilizers and wrap-over tapes by function first, before color.
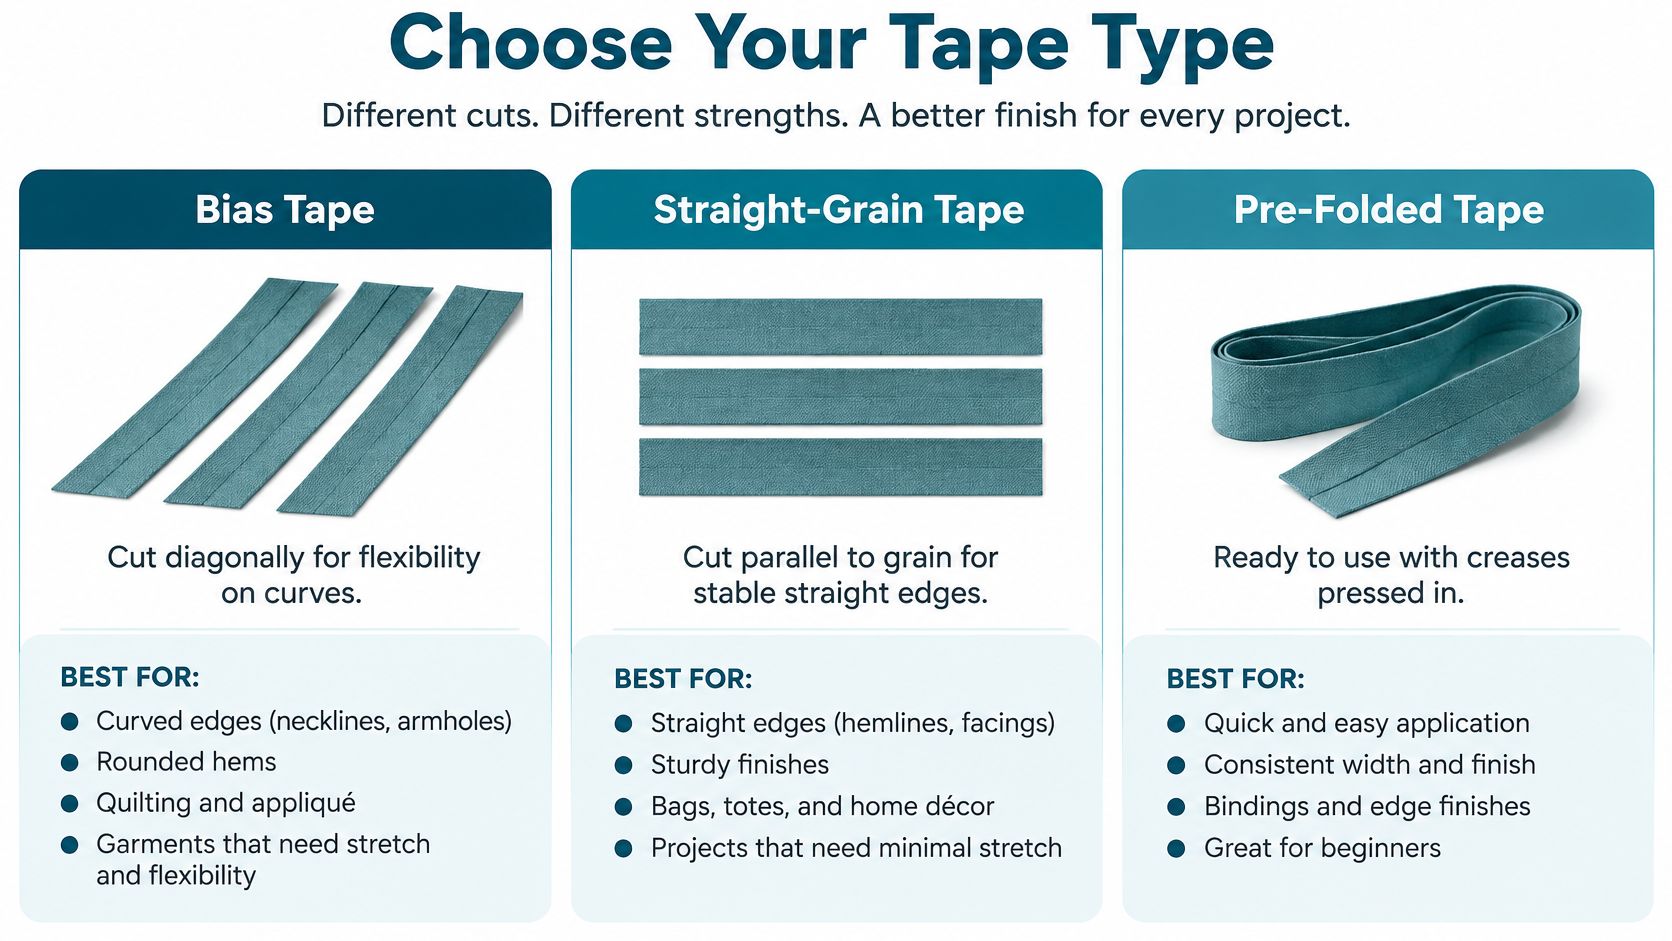
Two tapes can share a width, a color, and a price, then behave nothing alike at the edge of your project. Grain is the reason, so start there. Bias tape is cut at approximately 45° to the fabric grain, and that diagonal yarn structure permits controlled extension so it can follow convex and concave curves with less puckering than straight-grain tape, according to Sewing Trip guidance on making bias tape. A bias strip works like the ribbed cuff on a sleeve: pulled corner to corner it gives, pulled along its length it resists. Straight-grain tape runs parallel to the grain, so it stays put. Pre-folded tape describes preparation rather than grain; its long edges arrive creased, which saves pressing time.
The comparison below shows the three forms side by side.
| Tape Type | Construction | Best-Fit Uses | Beginner Consideration |
|---|---|---|---|
| Bias tape | Cut diagonally across the grain | Curved quilt edges, armholes, necklines | Flexible, but easy to overstretch |
| Straight-grain tape | Cut parallel to the grain | Straight quilt edges, straps, seam reinforcement | Stable, but resists tight curves |
| Pre-folded tape | Long edges pressed in before use | Edges you want to enclose quickly | Less prep, but check fold over your layers |
Practical rule: Bias is not automatically the best choice for every edge. On a straight edge, stability can matter more than flexibility.
A quilter who pulls bias tape taut along a straight border often gets a wavy edge that pressing will not flatten. The University of Kentucky recommends bias strips for curved seams, while straight-grain strips are suitable for straight seams, as set out in University of Kentucky guidance on bias binding for curved and straight seams. Width alone never predicts that result. Curve, bulk, stretch, and how the finished piece will be washed all shape the right choice.
Pre-folded options sit across both categories, since you can buy pre-folded bias for a curve or press a straight strip yourself for a table runner. Commercial bias binding commonly comes in ½-inch and 1-inch widths, with ready-pressed seam allowances measuring ¼ inch on both long edges, as noted in Purdue Extension guidance on commercial bias binding widths.
When you're ready to compare physical options, lay a bias strip and a straight-grain strip over the same curved scrap and watch which one puckers, then check the card for fiber and care instructions if the piece will be washed often. Shops that carry binding, High Country Quilts included, stock tape in both grains, so this small test tells you which package to take home.
A common surprise at the cutting table: the number on a binding package usually describes the finished, folded width. The flat strip you start with is much wider. If you're cutting your own, work backward from the width you want to see on the finished project.
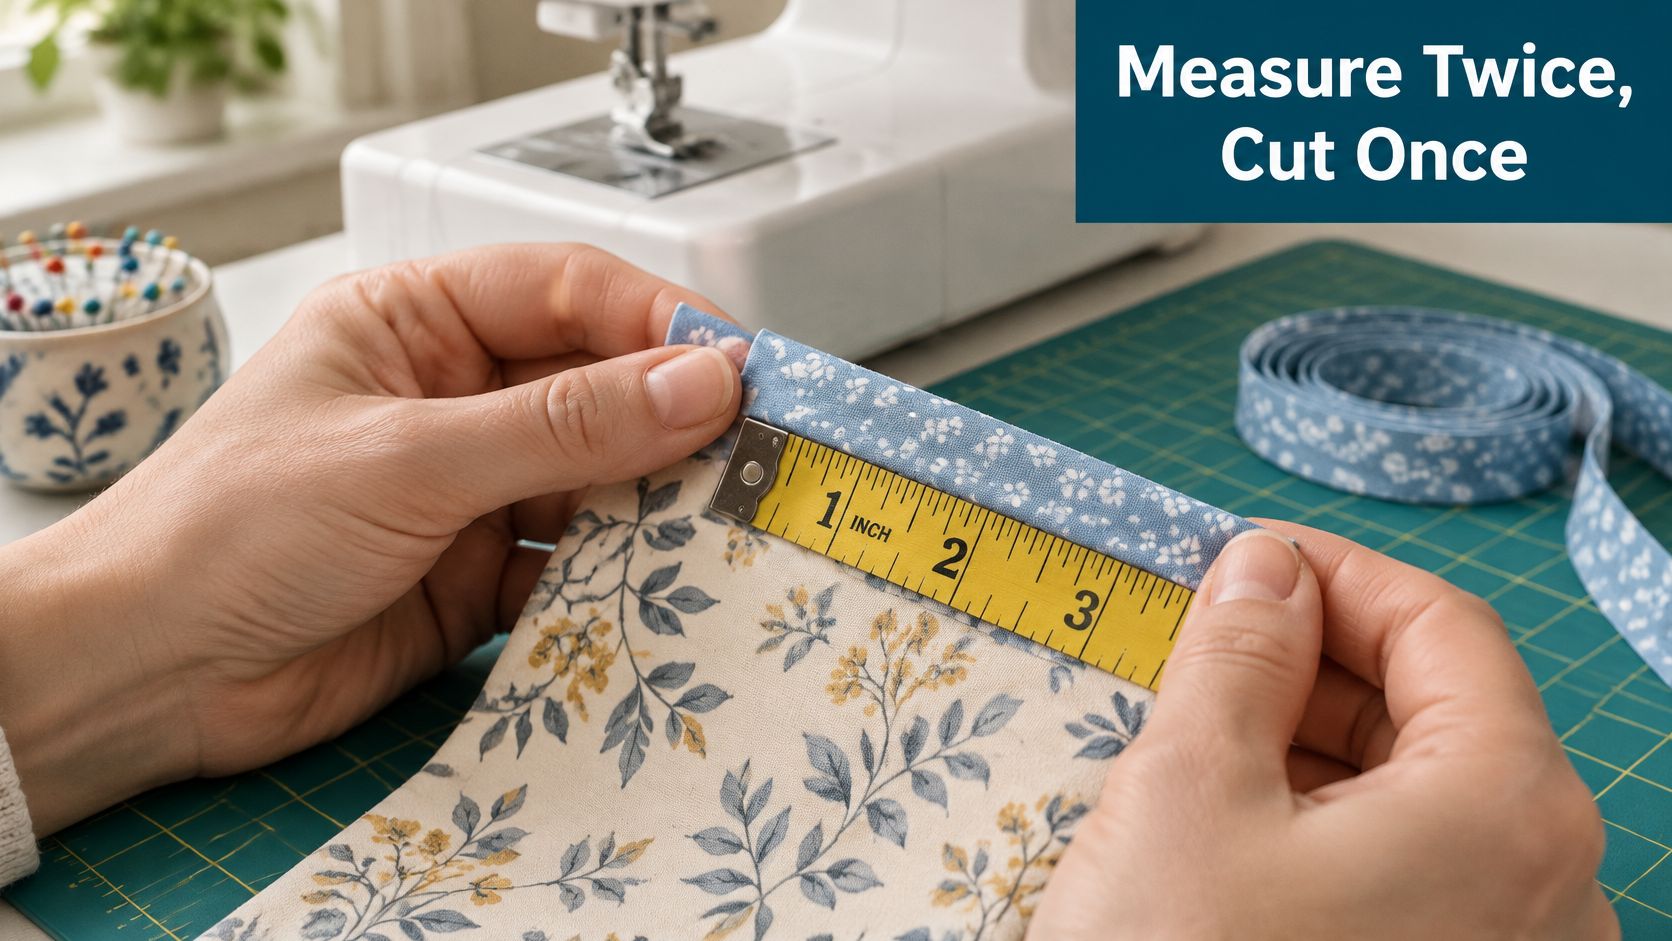
The photo below shows the simple habit that prevents most sizing mistakes. Measure the actual edge and layers before you cut.
Use these starting relationships, then test them on scrap.
Treat these ratios as a first estimate and adjust for seam allowance, fold structure, and layer thickness. A strip cut too narrow fails to cover the raw edge. One cut too wide stacks extra layers under the presser foot and makes edge-stitching wander.
Fabric weight matters just as much. Technical guidance identifies cotton binding in approximately the 120 to 160 g/m² range as a compromise between drape, fold retention, and resistance to tearing during normal sewing, according to MH technical guidance on cotton bias binding weight. Lighter tape is easier to manipulate but can collapse over bulky quilt layers. Heavier tape holds a fold, yet it can resist tight curves and add bulk.
Shops that carry binding, High Country Quilts among them, stock several weights, so bring a project scrap when you shop. Match the tape to your project weight, then confirm the pairing on a scrap sandwich before you cut the final strip.
A binding can look perfect on the table and still twist once it meets the needle. Sew a short test first through the same machine, needle, thread, presser foot, and layer stack you plan to use. Treat that sample as a rehearsal: skipped stitches, uneven feeding, and edge ripple show up while fixes are still cheap.
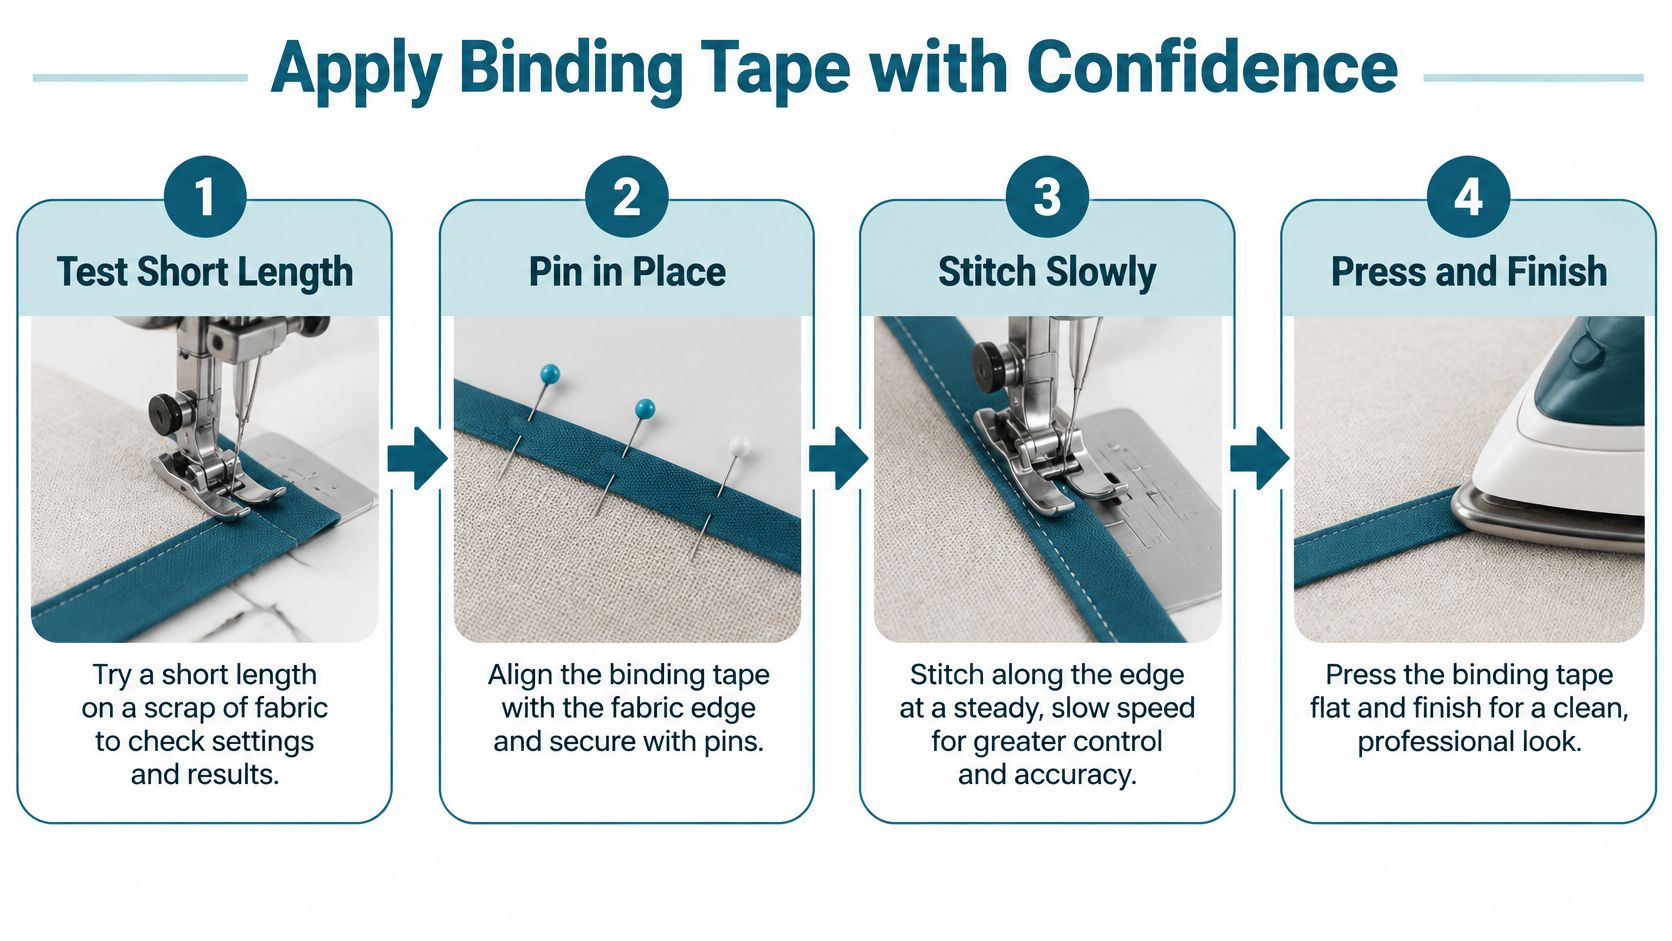
Align the tape with the seam or raw edge, then stitch slowly enough that your hands can correct small drift before it becomes a wave. Press after each stage so the fold learns where to sit. Trim only after the layers are secure, because early trimming removes your margin for adjusting a corner or easing a curve.
One defined method for a bias-bound seam is to stitch the strip ⅛ inch (3 mm) from the edge, turn it to the underside, press, and stitch from the right side in the fold crevice, following Oregon State University Extension steps for a bias-bound seam. The last pass must catch the underside edge. A top line can look clean while the back edge escapes, so check both sides before you call it finished.
For premade tape, open one folded edge, place that crease on the seam line, and stitch in the existing fold. Wrap the tape over, then secure the second side. The crease works like a lane marker, which is why pre-folded tape feels friendly while you are still learning pace.
Join short strips with a diagonal seam when one piece will not reach. A bias join spreads thickness over a longer path, so the seam passes under the foot with less of a speed bump. Use a quarter-inch seam allowance, press it open, and trim the small points.
On curves, guide the tape into place with light tension. Feed a little extra tape toward the outside of the curve and keep the inside relaxed; too much tension pulls the edge inward and leaves ripples that pressing only partly hides.
Ease the tape around the curve gently and let the feed dogs carry the fabric.
If a practice sandwich needs help from another support notion, change only that one variable and sew another short sample. Swap the needle, foot, basting method, or fusible seam tape one at a time, then compare what changed at the edge. The goal is a binding that covers, flexes where the project curves, stays flat where it runs straight, and survives the same washing the finished piece will get.
A baby quilt bound for weekly machine washing and a decorative wall hanging that never gets laundered need different tape, even at the same width. Read the edge first: how it curves, how much bulk it carries, whether the fabric stretches, and how the finished piece will be cleaned.
Washing changes the decision too, because cotton tape can shrink at a different rate than your quilt top or backing. Before you bind a washable project, wash a bonded sample of tape and quilt top together and measure both pieces afterward. A visible size difference means preshrink the tape before it touches the actual edge.
Natural fiber isn't an automatic durability guarantee. Weigh drape, fold retention, tearing resistance, color behavior, and maintenance together. If the tape bleeds on a wash-and-rub test or flattens over a batting sample, set it aside regardless of fiber content.
Samples beat guesses.
One government specification even requires cotton or linen sewing tape at least 1.25 cm wide, with minimum warp and filling thread counts, which shows that weave density can matter more than appearance, as detailed in Canadian government binding tape specifications. You don't need to memorize specifications. You do need to test the tape in conditions that resemble real use.
A wavy edge or a skimpy fold feels like a stitching failure, but most binding problems are material mismatches you can read and retest. Learn the symptoms and you'll fix the setup instead of blaming your hands.
Rippling on a curve usually means you stretched the bias tape too much while stitching. The edge got pulled inward, then relaxed unevenly. Retest with less tension and let the feed dogs move the layers.
A collapsed edge often means the strip is too narrow or too light for the layer stack. Fold a wider sample over the same layers and compare. If the fold springs open, the tape can't hold the edge shape.
If a straight border ripples after binding, resew a sample with straight-grain tape and compare the edge before you blame your stitching. A double-sided basting tape can hold a test fold in place while you check coverage, but it does not replace a correctly sized binding. The goal is to match the tape to what the edge does, whether that edge curves, bulks up, stretches, or gets laundered often.
Use a short checklist before you shop or cut. It keeps the decision tied to your project instead of the prettiest package.
Prewashing, pressing, controlled easing, and a machine test aren't optional extras. They're part of how you choose binding tape for sewing that finishes the project you made. High Country Quilts can serve as a resource for fabrics, notions, tools, classes, and community support while you build that judgment.
Visit High Country Quilts to explore binding tape, quilting fabrics, sewing notions, and tools for your next edge finish. Bring your project measurements and a small sample of your layers if you shop in person, so you can test fold, width, and weight before you commit.
At High Country Quilts we care deeply about community. With our experiences in retail, we know that a store is not only a place to shop but also a place for the community to gather and share. During this busy...

Hi! We’re Adam and Renee Wheaton, the new owners of High Country Quilts! For more than 40 years, we’ve owned and operated vacuum and sewing businesses. Following in Renee’s father’s footsteps after he retired from All Discount Vacuum and Sewing in Colorado...


Leave a comment