

We Love Our Quilting Community
At High Country Quilts we care deeply about community. With our experiences in retail, we know that a store is not only a place to shop but also a place for the community to gather and share. During this busy...


You've laid your sewn paws on the design wall, stepped back, and noticed that something doesn't line up. A claw points the wrong way, a background strip looks crooked, and the paw you pressed so carefully seems smaller than its neighbor. Before you trim everything to match the smallest piece, pause. A successful bear paw quilt pattern depends less on sewing faster and more on checking the right measurements before the next seam.
A Bear Paw block can look complicated because your eye follows every pointed triangle. Look more closely, though, and you'll see a repeatable arrangement: a square paw pad, small triangular claws, background corners, and separating strips. You don't have to solve the whole block at once.
The frustrating design-wall moment usually starts earlier, at the cutting mat or pressing board. A slightly narrow seam changes a unit's width; a stretched triangle changes its shape. When several paws come together, those differences become easier to see.
Practical rule: Aim for repeatable measurements, not a block that merely looks square from across the room.
The Bear's Paw belongs to American patchwork history, not just modern pattern collections. The Ashe County Arts Council teaching guide links its development to the earlier sawtooth pattern, suggests it may date to 1823, and describes its increasing popularity throughout the 1800s.
That guide also records regional names: frontier communities used Bear's Paw, coastal communities used Duck's Foot in the Mud, and Philadelphia Quakers reportedly used Hand of Friendship for the same or a closely related design. Those distinctions matter when you compare templates. A familiar name doesn't guarantee identical construction.
The museum account of Clara Bontrager's Bear's Paw quilt identifies a hand-pieced, hand-quilted example dated 1874, probably made in Holmes County, Ohio, among the earliest known dated Amish quilts. It also documents a 1900 Bear Paw quilt combining machine piecing with hand quilting.
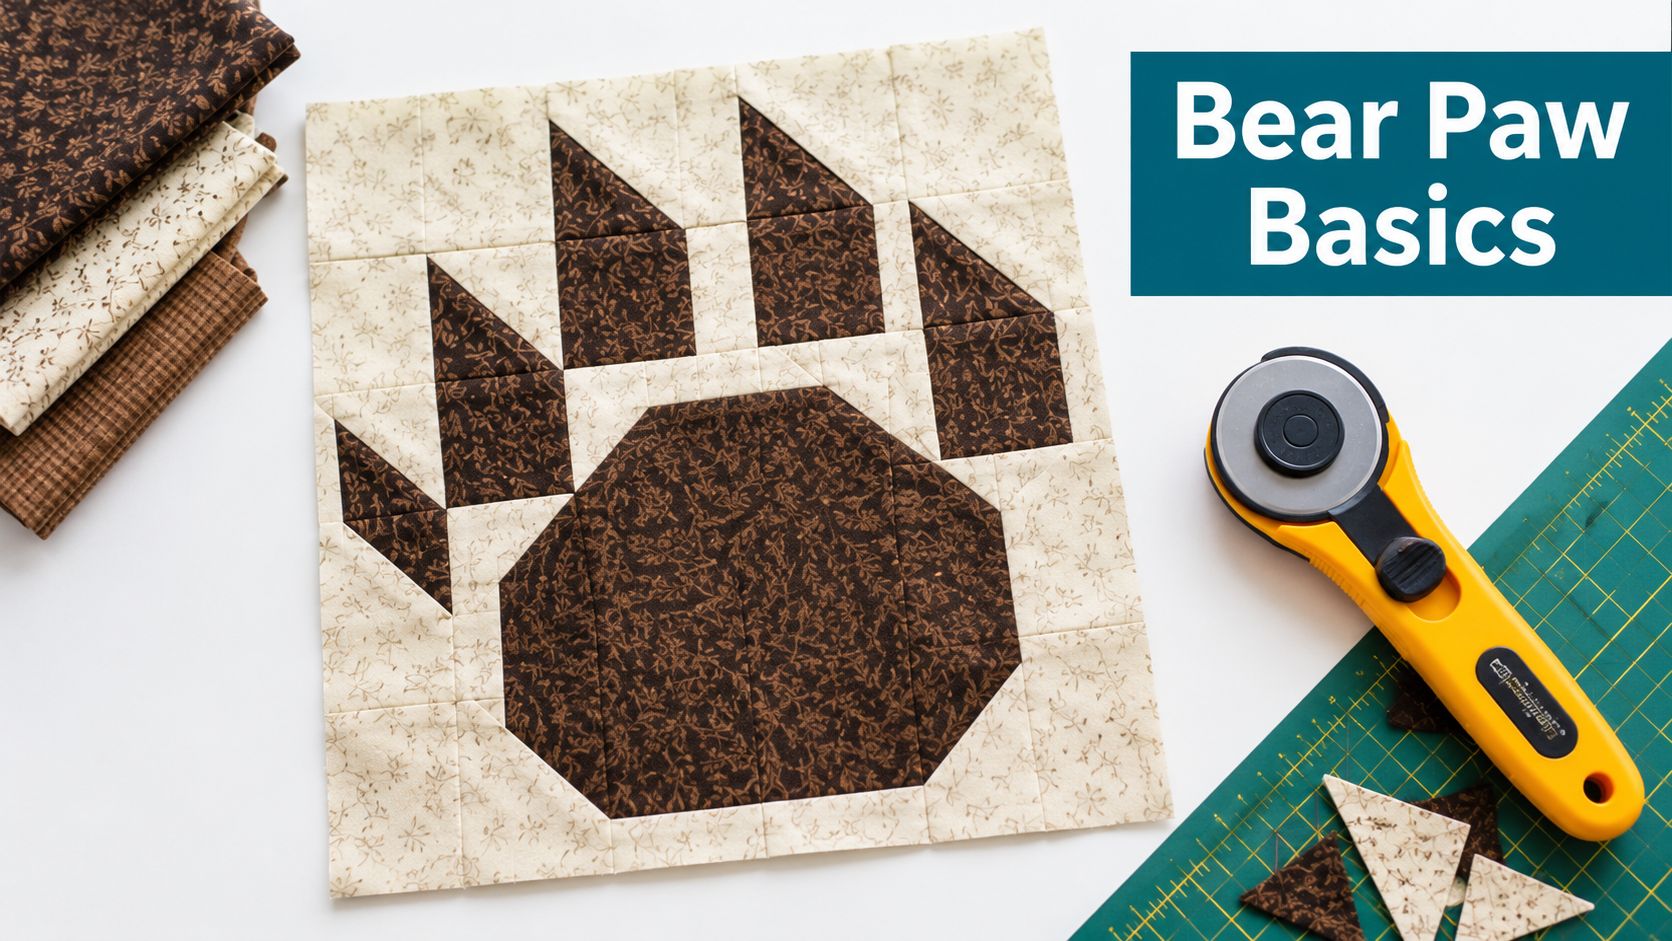
The contrast between paw fabric and background makes the geometry easy to recognize.
Think of the project as connected checkpoints rather than a pile of triangles:
Controlled accuracy makes this traditional design approachable. It doesn't require pretending every seam will be perfect.
A quilter cuts paw squares from one tutorial and sashing rectangles from another, then discovers at assembly that the units refuse to meet. Choose a complete pattern before choosing your cutting dimensions, keep its cutting chart and assembly diagram together, and mark the size you are making.
Sort your materials into four groups: paw fabric, background, sashing, and center, even when some groups share the same fabric. Decide whether directional prints should face consistently or rotate with the paws, because a paw that reads clearly in one orientation can look muddy in another. Lay the fabrics side by side before cutting and step back. If the claws disappear into the background at arm's length, swap one fabric now rather than after the block is sewn.
Follow the selected pattern's fabric-preparation directions and the fabric manufacturer's care guidance. If you prewash, press the fabric flat before measuring. A wrinkle under a ruler adds length you cannot see, and pressing the ruler harder will not correct it.
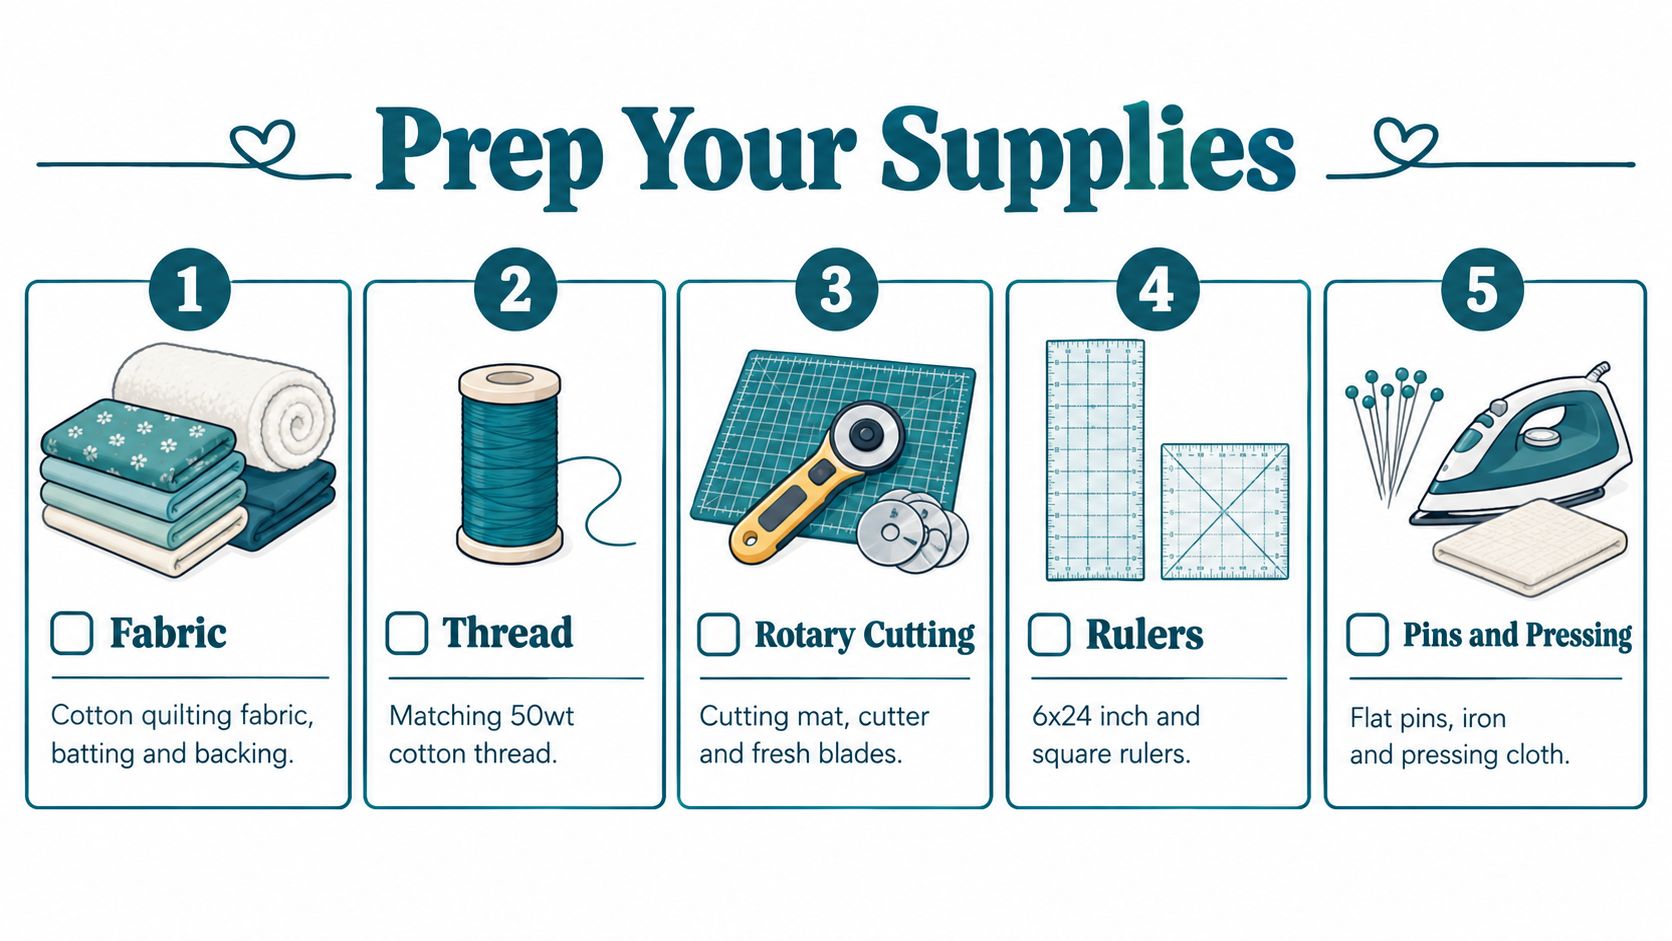
Set out what the project needs:
Use this supply graphic as a visual checklist, while checking its suggested thread and ruler choices against your own pattern and equipment.
BERNINA users should begin with their own machine manual rather than a setting copied from someone else's model. Confirm that the needle, thread, presser foot, and selected stitch are compatible. Thread weight is a compatibility decision, not a universal recipe for this block.
A quarter-inch foot works like a guardrail: it guides the fabric edge, but the driver still controls the line. Owning the foot does not prove the sewn unit will measure correctly. The Fat Quarter Shop Bear Paw instructions specify quarter-inch seams throughout and require the completed paw unit to be checked at 6½ inches square.
Sew a scrap sample, press it, and measure it against your selected pattern's checkpoint. If the unit runs small, a slightly narrower seam path often corrects it; if it runs large, check whether the fabric edge is drifting past the foot's guide. Adjust the setup before cutting and sewing the full batch, and never assume every BERNINA model carries the same controls or compatible accessories.
Keep cut pieces in labeled groups, with the pattern diagram beside them. Write both the piece name and intended size on each label so similarly shaped scraps don't enter the assembly pile.
Before purchasing a foot or tool, explore sewing machines and quilting accessories at High Country Quilts and ask staff for product-detail guidance on your specific model.
Scale the finished geometry, not the cutting dimensions. Seam allowances stay part of the construction even when the visible design changes size. Enlarging every cut piece by the same proportion won't reliably preserve those allowances.
The Quiltler Bear Paw cutting reference describes a seven-by-seven grid, with each claw occupying a grid square, each paw pad occupying a two-by-two area, and sashing occupying a grid-square width; its chart supports 7-, 14-, and 21-inch finished blocks and provides the documented standard-grid cutting dimensions below.
| Finished Size | Unfinished Measurement | Documented Cut Pieces | Template Verification |
|---|---|---|---|
| 7 inches | Confirm in the selected template | Supported size option in the linked grid chart; use its size-specific cutting column | Verify all allowances and HST starting squares rather than halving cut dimensions |
| 14 inches | Checked during final assembly | Four 4½-inch paw squares; eight 2⅞-inch HST starting squares in each fabric; four 2½-inch background corner squares; four 2½-by-6½-inch sashing rectangles; one 2½-inch center square | Confirm fabric assignments and HST trimming instructions before cutting |
| 21 inches | Confirm in the selected template | Supported size option in the linked grid chart; use its size-specific cutting column | Don't enlarge the middle row's cut dimensions proportionally |
| 12 inches | 12½ inches | Use a dedicated pattern rather than borrowing pieces from the standard-grid chart | Confirm that its proportions and assembly method match the template |
The final row's finished-to-unfinished relationship comes from the American Quilter hand-pieced Bear Paw instructions, which identify a 12½-inch unfinished block for a 12-inch finished block, with quarter-inch seams. “Unfinished” means the measurement before the block is sewn into its surrounding patchwork.
The grid explains the relationship between the parts. It doesn't remove the need for a size-specific cutting chart, especially when you're preparing half-square triangles.
Some patterns deliberately start those triangles larger and trim them after sewing. Others use a closer starting cut. Don't invent an oversizing amount, and don't assume instructions from a differently proportioned Bear Paw will transfer unchanged.
A larger starting square is useful only when you also know the exact size to trim the sewn unit.
For a first attempt, choose a documented size whose ruler marks you can read comfortably. There's no advantage in choosing smaller pieces if you spend the entire session struggling to distinguish cutting lines.
Before cutting the batch, check the fabric's grain and straighten the working edge without pulling it out of shape. Keep your ruler fully supported on the mat, and stop if the cutter skips or leaves threads attached. A clean cut is easier to measure than a ragged edge you have to interpret.
Use a short cutting-room check:
Cut a sample group and assemble it before committing all your fabric. That small rehearsal is particularly helpful when you're translating a diagram into physical pieces for the first time.
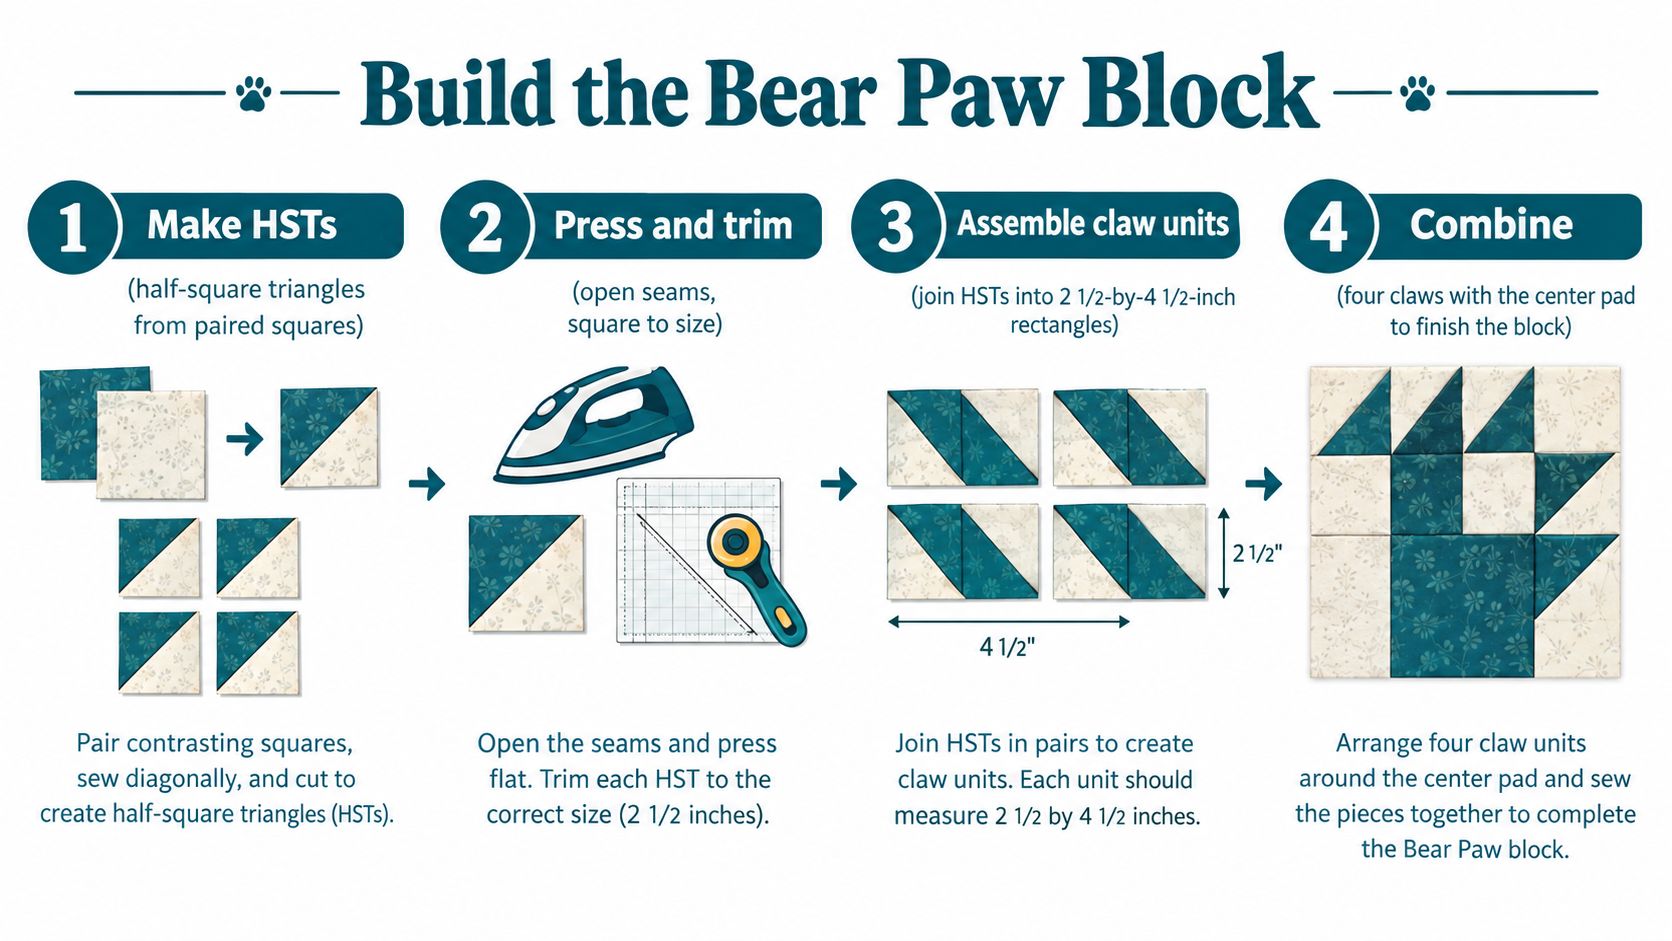
Work from small, checked units toward larger assemblies. The Scissortail Quilting Bear's Paw pattern supplies the construction benchmarks for the 14-inch finished version: 16 HSTs, claw sections measuring 2½ by 4½ inches, completed paws measuring 6½ inches square, and a completed block measuring 14½ inches unfinished.
Keep those measurements beside your machine. The cutting table tells you what to prepare; these checkpoints tell you whether the sewing is producing the intended result.
Place a paw-fabric starting square and a background starting square right sides together. Mark the diagonal on the reverse of the lighter fabric so you can see the line without pressing heavily.
The Generations Quilt Patterns Bear's Paw tutorial supports stitching ¼ inch on each side of the diagonal, cutting along the marked line, and trimming the resulting HSTs to 2½ inches unfinished for the corresponding block specification, using the ruler's 45-degree guide to align the diagonal seam.
Press by lowering and lifting the iron rather than dragging it along the diagonal edge. Let the unit settle flat before trimming. Line up the seam with the ruler's diagonal guide, check that fabric extends beyond the required outline, and remove the excess, including protruding dog ears.
The following graphic summarizes the progression from triangles to larger assemblies. Use the written pattern diagram to distinguish a single paw from the complete block.
If you want to chain piece on your BERNINA, test the sequence on scraps first. Sew matching pairs consecutively, keeping the intended right sides and diagonal directions consistent, then separate the units for pressing and trimming. Chain piecing is an optional work sequence, not a model-specific capability claim or a reason to skip inspection.
Lay out a paw pad with its surrounding HSTs and background corner. Compare the arrangement directly with your pattern before sewing. Join the HST pairs into claw sections, then incorporate the corner where the diagram requires it.
Don't confuse a claw section with a complete paw. Each complete paw includes the pad, its claw groups, and its background corner; the complete block contains the paws separated by sashing.
Measure the claw sections against the benchmark above before attaching them to the larger pad. If a strip is short, inspect its seam allowance and trimming rather than stretching it to fit. Stretching may hide the mismatch at the machine but leave the paw distorted afterward.
Plan pressing directions while the components are still separate. Where adjacent seam allowances will meet, press them in opposite directions when the pattern permits so they nest, meaning the folded seam edges settle against one another. Pin those intersections before joining, and check that the layers remain flat.
Arrange the paw units around the center and sashing. Build the upper and lower rows from paw units separated by a sashing rectangle; assemble the middle row from the remaining sashing and center square. Keep the arrangement on the design wall while you move pieces to the machine.
Before joining the rows, compare their widths and inspect the intersections. A row that needs pulling to reach its neighbor needs diagnosis, not a stronger pin.
When squaring, remove only what the pattern allows. Preserve the outer seam allowance rather than trimming directly to the visible points. If the block is undersized, cutting it smaller won't restore the missing allowance.
Finish with a design-wall review. Check every claw against the diagram, confirm the background corners face outward, and follow the sashing with your eye to make sure its lines remain straight before the block enters the quilt.
A finished block on its own tells you very little about the finished quilt. Lay your sewn blocks out on the design wall or a clean floor before you commit to borders or extra sashing. The spaces between blocks decide whether a viewer notices individual paws, repeated points, or large stretches of background.
| Setting | Visual effect | Construction consideration | A useful choice when |
|---|---|---|---|
| Straight set | Repeats the geometry clearly | Requires careful alignment where blocks meet | You want the patchwork to remain the main feature |
| Sashed setting | Separates and frames individual blocks | Adds fabric, seams, and alignment decisions | You prefer more open space between blocks |
| Restrained fabric palette | Keeps attention on the paw outline | Requires thoughtful contrast between fabric roles | You want a calm, traditional appearance |
| Varied paw fabrics | Gives each paw or block a distinct identity | Requires more layout review | You want to use different fabrics without losing the design |
For a restrained version, repeat a brown paw fabric against a cream background and let the geometry carry the movement. Before committing, place the actual fabrics together under your sewing-room light. Prints that look clearly different on the bolt can blur together once they are cut into small triangles. When in doubt, snap a quick photo and view it in grayscale; value differences show up more clearly than they do to the eye.
For clearer point visibility, choose fabrics with a stronger light-dark difference. That choice also makes inspection easier, since you can confirm claw direction without squinting at two prints of similar value.
Sashing can make a layout feel less crowded, and it adds its own work: yardage, cut lengths, joins, and a relationship to the border. Treat it as a design decision, never as a fix for a block that came out the wrong size. A block that measures small will still measure small inside a frame.
Review the whole quilt from a distance, then move closer. Follow the paw directions across rows, inspect the repeated background corners, and ask whether a border would frame the design or cut it off. As noted earlier, gather your background and paw fabrics with the chosen pattern in hand so the contrast decisions happen before the cutting, not after.
Before any batting enters the picture, lay the completed top flat on a clean floor or table and give it one last honest look. Photograph it, record its actual dimensions in your project notes, and save a close view of the outer edges. Those references help you separate a piecing issue that was already there from a change that appears after quilting.
A finished quilt gives the repeated paws a different presence than an isolated practice block.
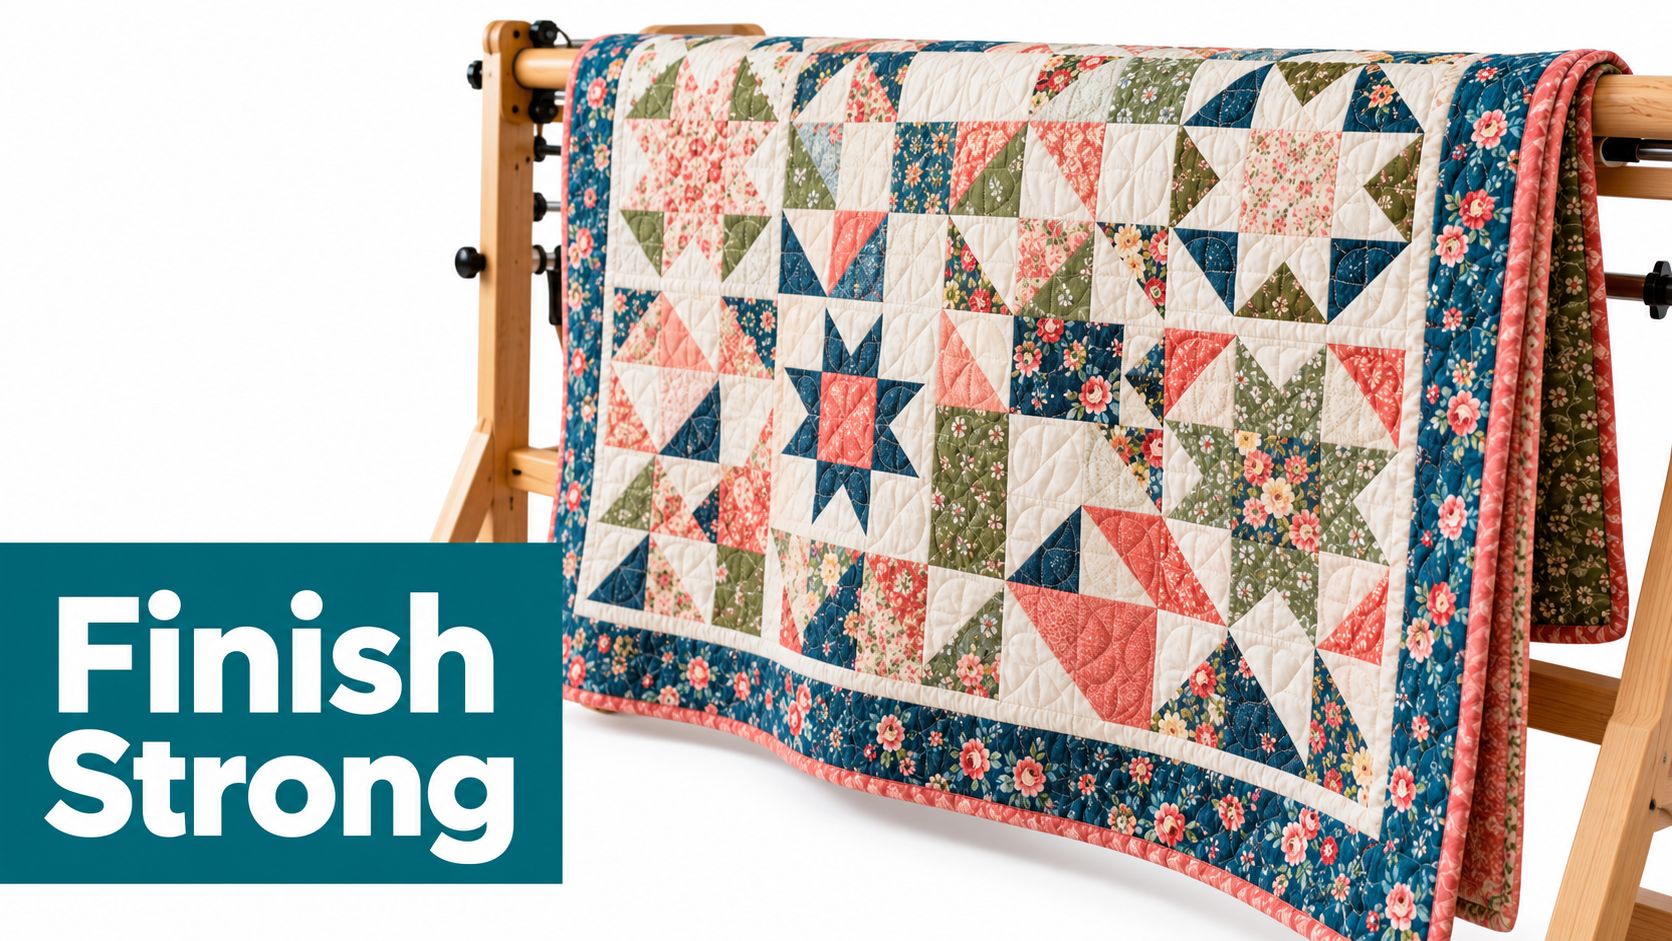
Prepare the backing and batting according to their instructions and your quilting plan. Smooth the layers without tension, then secure them using a basting method suited to the materials. The layered sandwich works like the block itself: accuracy at the layering stage decides how calmly the quilting stage goes.
Machine quilting keeps the work on your own setup, and a walking foot or even-feed system helps the three layers travel through the machine together. On a BERNINA, check your manual for the walking-foot or dual-feed options fitted to your model, since those features differ across the range. Hand quilting suits quilters who enjoy a slower pace, and longarm quilting is a reasonable route if you plan to arrange it with a quilter; confirm preparation requirements before handing over the top. None of these choices needs to be treated as the superior way to finish a Bear Paw.
Keep your first quilting plan manageable enough that you can concentrate on controlling the layers.
For a first Bear Paw, straight lines or a simple grid set a consistent distance from the seams keeps every pass predictable. Dense custom work can wait for a quilt where you are not also learning the pattern.
Use the following video as an additional visual reference, checking its methods against your selected pattern and equipment.
After quilting, inspect the edges before trimming and binding. Prepare and join the binding strips according to your binding method, manage the corners without pulling them tight, and close the final join before securing the remaining edge. Corners behave like little HST points: they reward gentle handling and punish tugging.
Check that the binding catches securely on both sides. Wash, dry, and press according to the selected fabric, batting, and thread care directions rather than assuming every finished quilt needs the same treatment. A final press with the quilt laid flat settles the binding and relaxes the quilting texture.
If you want hands-on guidance for a method you have not tried yet, visit High Country Quilts for quilting classes and BERNINA support.
Diagnose the visible symptom before reaching for the seam ripper. Correcting the earliest inaccurate component is usually more useful than forcing the final join.
| Symptom | Likely cause | Concrete correction |
|---|---|---|
| Points don't match | Unequal HSTs or inconsistent seams | Recheck the component measurements before resewing |
| Block is wavy or undersized | Stretching, seam drift, or measurement confusion | Compare it with the unfinished benchmark, not the finished size |
| Claws face incorrectly | A unit rotated during assembly | Unpick the affected join and reset it against the diagram |
| Intersections feel bulky | Dog ears or poorly arranged allowances | Remove excess protrusions and reassess pressing |
| HSTs bow | Dragging the iron across bias edges | Repress gently; remake a unit that won't lie flat |
| Rows differ or sashing drifts | An unchecked component entered assembly | Locate that component instead of stretching the row |
A dependable Bear Paw comes from these small decisions. You don't need a flawless first attempt; you need to recognize what's ready and what needs another look.
High Country Quilts offers quilting fabrics, sewing notions, classes, and BERNINA training and support in Colorado Springs. Bring your Bear Paw cutting chart or a troublesome sample to High Country Quilts, ask about suitable templates and supplies, and find guidance or a class for your next step.
At High Country Quilts we care deeply about community. With our experiences in retail, we know that a store is not only a place to shop but also a place for the community to gather and share. During this busy...

Hi! We’re Adam and Renee Wheaton, the new owners of High Country Quilts! For more than 40 years, we’ve owned and operated vacuum and sewing businesses. Following in Renee’s father’s footsteps after he retired from All Discount Vacuum and Sewing in Colorado...


Leave a comment